Popular Woodworking 2006-10 № 157, страница 22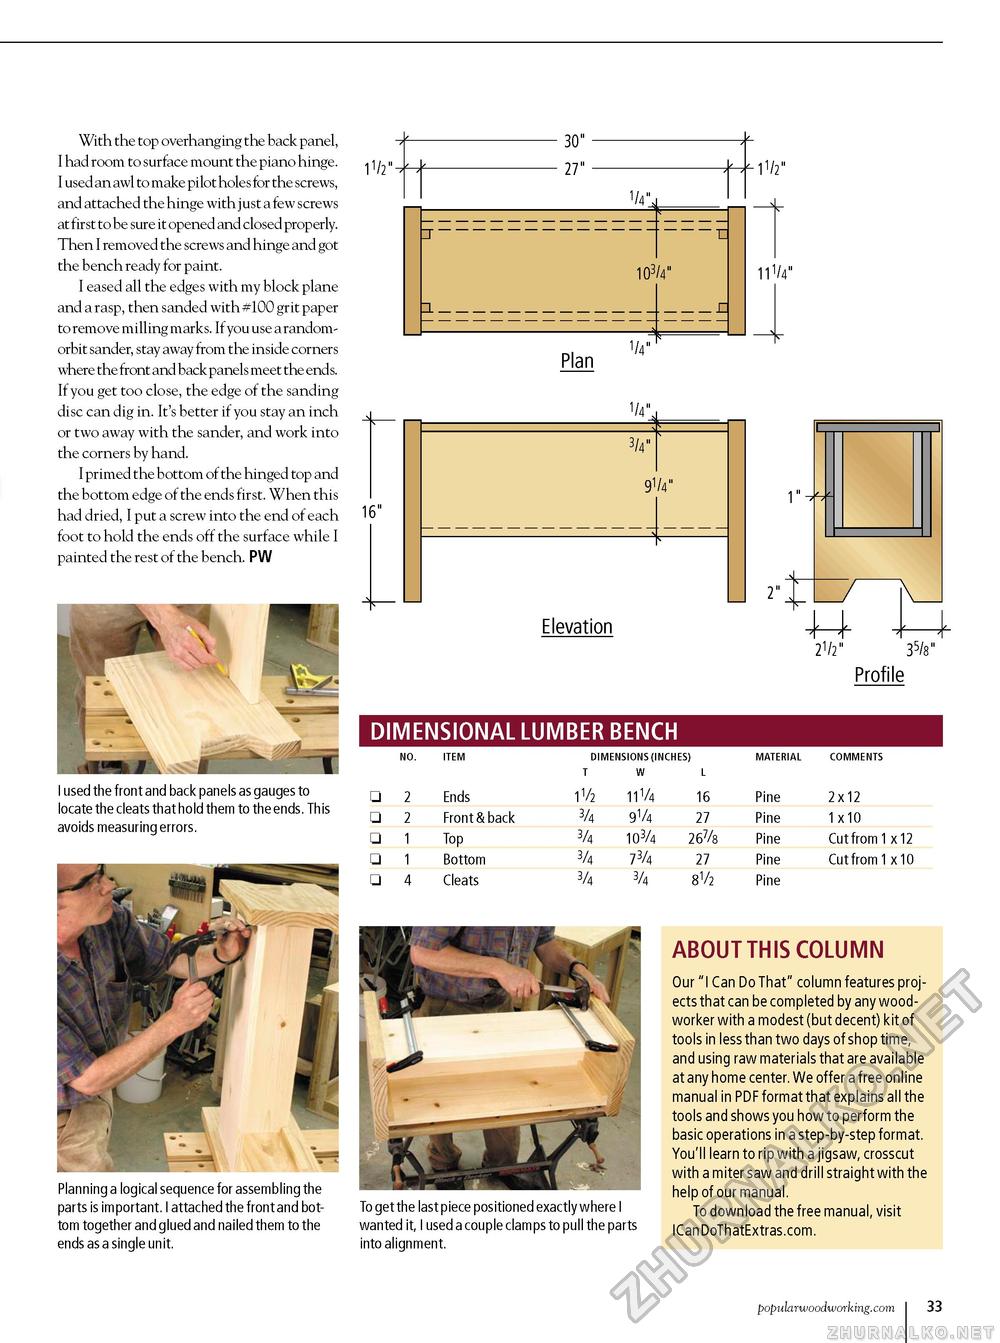
With the top overhanging the back panel, I had room to surface mount the piano hinge. I used an awl to make pilot holes for the screws, and attached the hinge with just a few screws at first to be sure it opened and closed properly. Then I removed the screws and hinge and got the bench ready for paint. I eased all the edges with my block plane and a rasp, then sanded with #100 grit paper to remove milling marks. If you use a random-orbit sander, stay away from the inside corners where the front and back panels meet the ends. If you get too close, the edge of the sanding disc can dig in. It's better if you stay an inch or two away with the sander, and work into the corners by hand. I primed the bottom of the hinged top and the bottom edge of the ends first. When this had dried, I put a screw into the end of each foot to hold the ends off the surface while I painted the rest of the bench. PW 16" = 5= 3/4" 91/4" Elevation DIMENSIONAL LUMBER BENCH Profile I used the front and back panels as gauges to locate the cleats that hold them to the ends. This avoids measuring errors.
Planning a logical sequence for assembling the parts is important. I attached the front and bottom together and glued and nailed them to the ends as a single unit. To get the last piece positioned exactly where I wanted it, I used a couple clamps to pull the parts into alignment. ABOUT THIS COLUMN Our "I Can Do That" column features projects that can be completed by any woodworker with a modest (but decent) kit of tools in less than two days of shop time, and using raw materials that are available at any home center. We offer a free online manual in PDF format that explains all the tools and shows you how to perform the basic operations in a step-by-step format. You'll learn to rip with a jigsaw, crosscut with a miter saw and drill straight with the help of our manual. To download the free manual, visit ICanDoThatExtras.com. popularwoodworking.com i 33 |
||||||||||||||||||||||||||||||||||||||||||||||||


