Popular Woodworking 2006-10 № 157, страница 68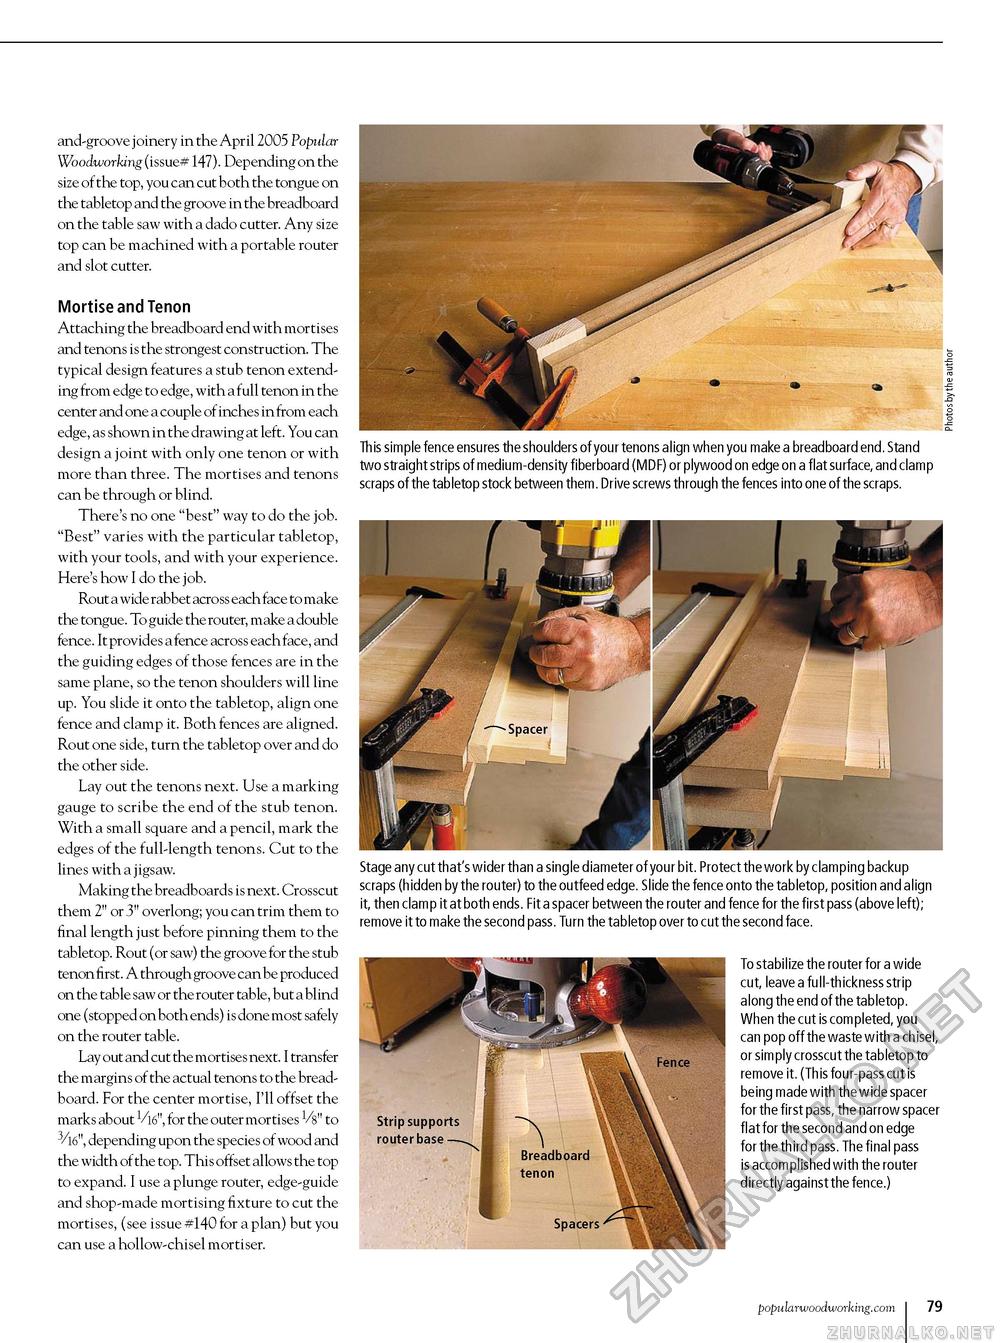
and-groove joinery in the April 2005 Popular Woodworking (issue# 147). Depending on the size of the top, you can cut both the tongue on the tabletop and the groove in the breadboard on the table saw with a dado cutter. Any size top can be machined with a portable router and slot cutter. Mortise and Tenon Attaching the breadboard end with mortises and tenons is the strongest construction. The typical design features a stub tenon extending from edge to edge, with a full tenon in the center and one a couple of inches in from each edge, as shown in the drawing at left. You can design a joint with only one tenon or with more than three. The mortises and tenons can be through or blind. There's no one "best" way to do the job. "Best" varies with the particular tabletop, with your tools, and with your experience. Here's how I do the job. Rout a wide rabbet across each face to make the tongue. To guide the router, make a double fence. It provides a fence across each face, and the guiding edges of those fences are in the same plane, so the tenon shoulders will line up. You slide it onto the tabletop, align one fence and clamp it. Both fences are aligned. Rout one side, turn the tabletop over and do the other side. Lay out the tenons next. Use a marking gauge to scribe the end of the stub tenon. With a small square and a pencil, mark the edges of the full-length tenons. Cut to the lines with a jigsaw. Making the breadboards is next. Crosscut them 2"" or 3"" overlong; you can trim them to final length just before pinning them to the tabletop. Rout (or saw) the groove for the stub tenon first. A through groove can be produced on the table saw or the router table, but a blind one (stopped on both ends) is done most safely on the router table. Lay out and cut the mortises next. I transfer the margins of the actual tenons to the breadboard. For the center mortise, I'll offset the marks about 16"", for the outer mortises Vs" to 3/16", depending upon the species of wood and the width of the top. This offset allows the top to expand. I use a plunge router, edge-guide and shop-made mortising fixture to cut the mortises, (see issue #140 for a plan) but you can use a hollow-chisel mortiser. This simple fence ensures the shoulders of your tenons align when you make a breadboard end. Stand two straight strips of medium-density fiberboard (MDF) or plywood on edge on a flat surface, and clamp scraps of the tabletop stock between them. Drive screws through the fences into one of the scraps. Stage any cut that's wider than a single diameter of your bit. Protect the work by clamping backup scraps (hidden by the router) to the outfeed edge. Slide the fence onto the tabletop, position and align it, then clamp it at both ends. Fit a spacer between the router and fence for the first pass (above left); remove it to make the second pass. Turn the tabletop over to cut the second face. To stabilize the router for a wide cut, leave a full-thickness strip along the end of the tabletop. When the cut is completed, you can pop off the waste with a ch isel, or simply crosscut the tabletop to remove it. (This four-pass cut is being made with the wide spacer for the first pass, the narrow spacer flat for the second and on edge for the third pass. The final pass is accomplished with the router directly against the fence.) popularwoodworking.com i 79 |


