Popular Woodworking 2006-11 № 158, страница 44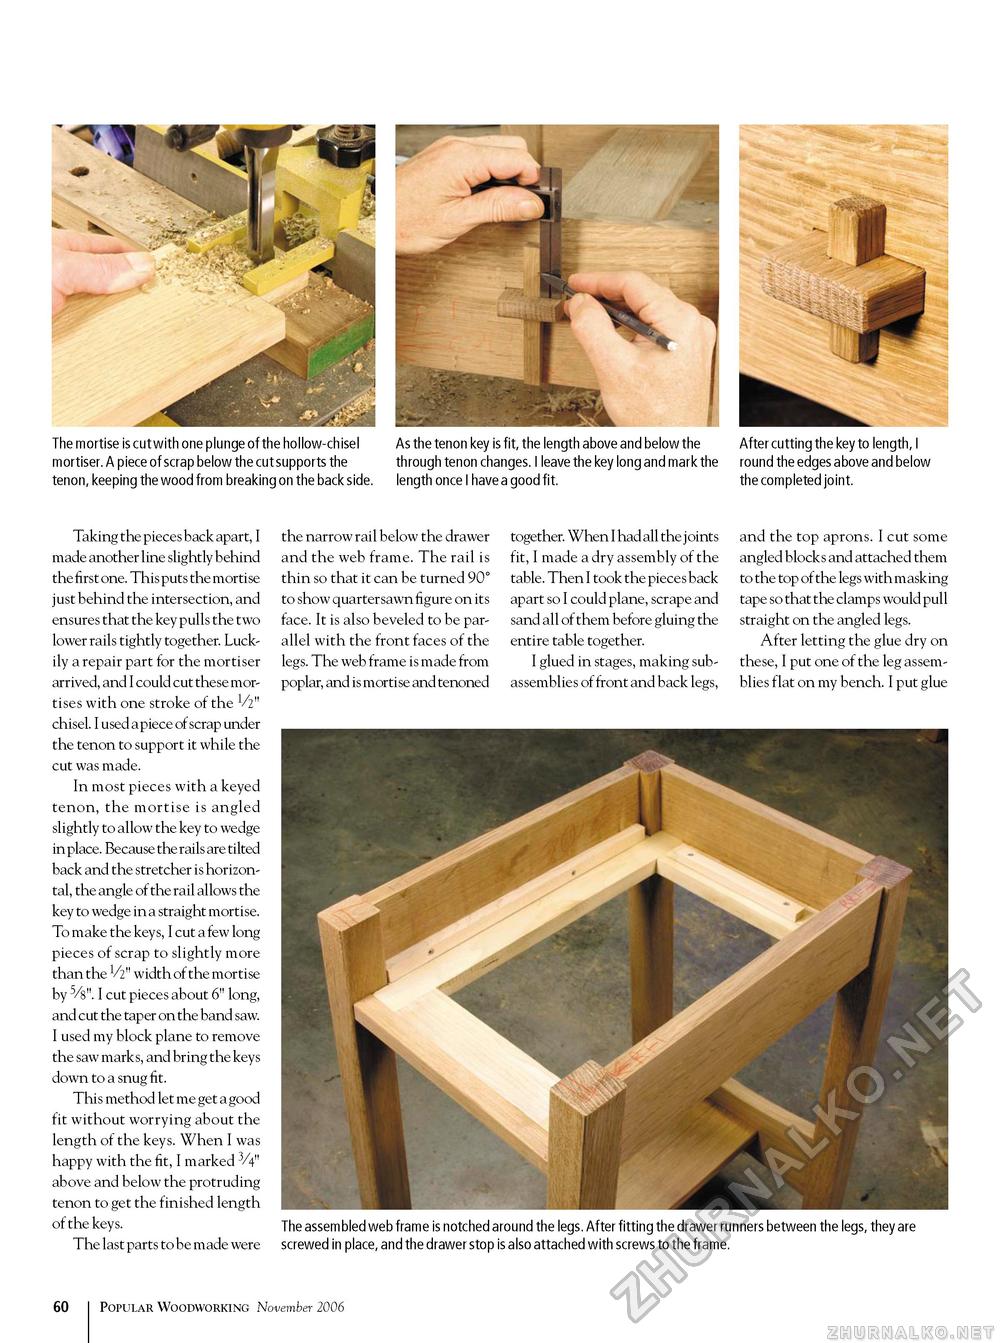
The mortise is cut with one plunge of the hollow-chisel As the tenon key is fit, the length above and below the After cutting the key to length, I mortiser. A piece of scrap below the cut supports the through tenon changes. I leave the key long and mark the round the edges above and below tenon, keeping the wood from breaking on the back side. length once I have a good fit. the completed joint. Taking the pieces back apart, I made another line slightly behind the first one. This puts the mortise just behind the intersection, and ensures that the key pulls the two lower rails tightly together. Luckily a repair part for the mortiser arrived, and I could cut these mortises with one stroke of the V2" chisel. I used a piece of scrap under the tenon to support it while the cut was made. In most pieces with a keyed tenon, the mortise is angled slightly to allow the key to wedge in place. Because the rails are tilted back and the stretcher is horizontal, the angle of the rail allows the key to wedge in a straight mortise. To make the keys, I cut a few long pieces of scrap to slightly more than the V2" width of the mortise by 5/8". I cut pieces about 6" long, and cut the taper on the band saw. I used my block plane to remove the saw marks, and bring the keys down to a snug fit. This method let me get a good fit without worrying about the length of the keys. When I was happy with the fit, I marked V4" above and below the protruding tenon to get the finished length of the keys. The last parts to be made were the narrow rail below the drawer and the web frame. The rail is thin so that it can be turned 90° to show quartersawn figure on its face. It is also beveled to be parallel with the front faces of the legs. The web frame is made from poplar, and is mortise and tenoned together. When I had all the j oints fit, I made a dry assembly of the table. Then I took the pieces back apart so I could plane, scrape and sand all of them before gluing the entire table together. I glued in stages, making subassemblies of front and back legs, and the top aprons. I cut some angled blocks and attached them to the top of the legs with masking tape so that the clamps would pull straight on the angled legs. After letting the glue dry on these, I put one of the leg assemblies flat on my bench. I put glue The assembled web frame is notched around the legs. After fitting the drawer runners between the legs, they are screwed in place, and the drawer stop is also attached with screws to the frame. 60 Popular Woodworking November 2006 |


