Popular Woodworking 2006-11 № 158, страница 57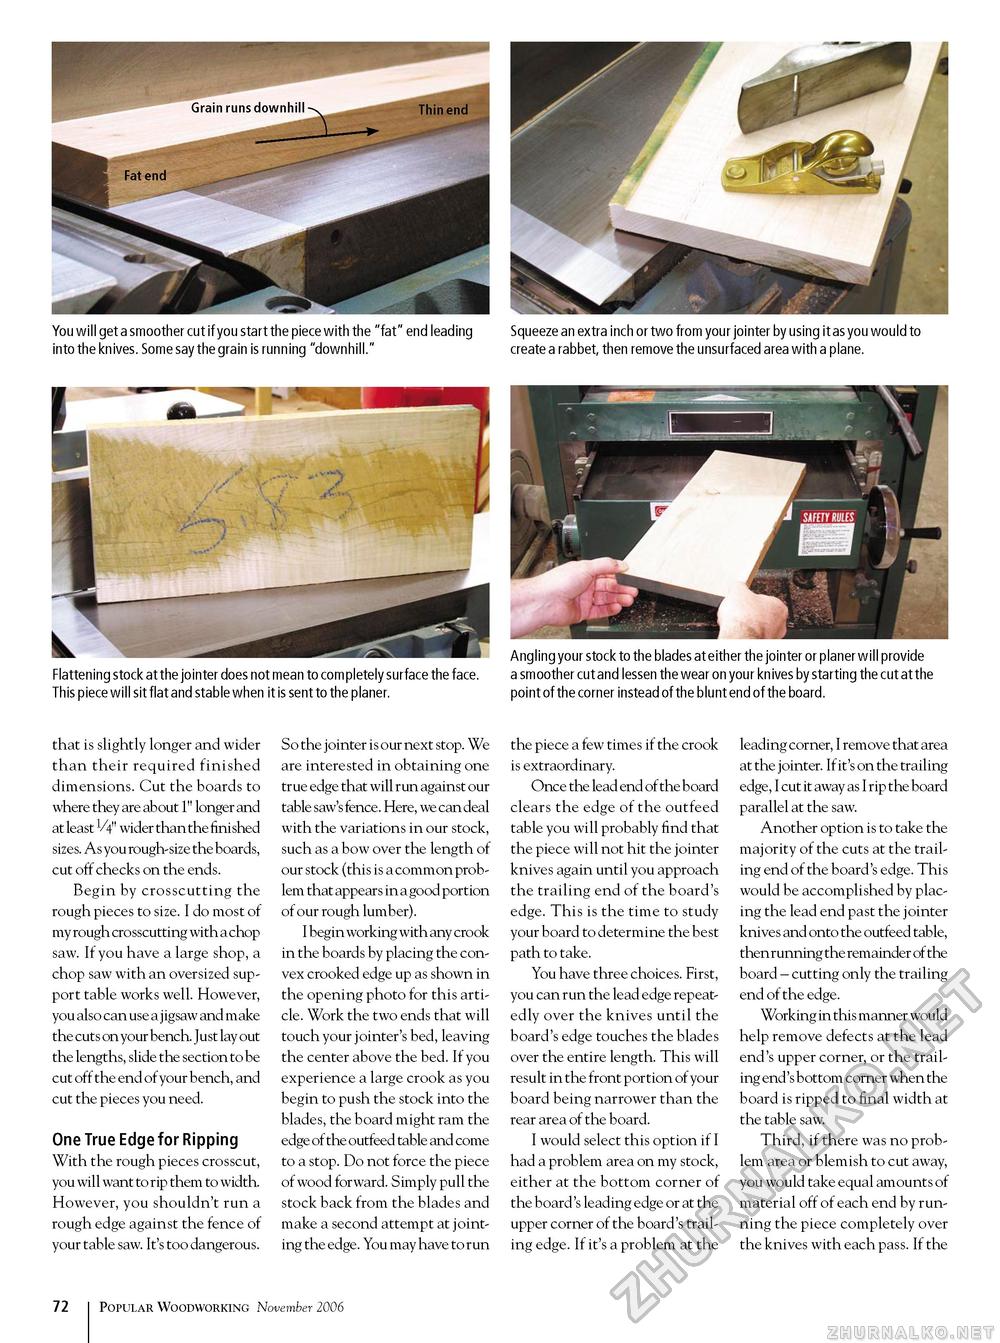
You will get a smoother cut if you start the piece with the "fat" end leading Squeeze an extra inch or two from your jointer by using it as you would to into the knives. Some say the grain is running "downhill." create a rabbet, then remove the unsurfaced area with a plane. Angling your stock to the blades at either the jointer or planer will provide Flattening stock at the jointer does not mean to completely surface the face. a smoother cut and lessen the wear on your knives by starting the cut at the This piece will sit flat and stable when it is sent to the planer. point of the corner instead of the blunt end of the board. that is slightly longer and wider than their required finished dimensions. Cut the boards to where they are about 1" longer and at least V4" wider than the finished sizes. As you rough-size the boards, cut off checks on the ends. Begin by crosscutting the rough pieces to size. I do most of my rough crosscutting with a chop saw. If you have a large shop, a chop saw with an oversized support table works well. However, you also can use a j igsaw and make the cuts on your bench. Just lay out the lengths, slide the section to be cut off the end of your bench, and cut the pieces you need. One True Edge for Ripping With the rough pieces crosscut, you will want to rip them to width. However, you shouldn't run a rough edge against the fence of your table saw. It's too dangerous. So the jointer is our next stop. We are interested in obtaining one true edge that will run against our table saw's fence. Here, we can deal with the variations in our stock, such as a bow over the length of our stock (this is a common problem that appears in a good portion of our rough lumber). I begin working with any crook in the boards by placing the convex crooked edge up as shown in the opening photo for this article. Work the two ends that will touch your jointer's bed, leaving the center above the bed. If you experience a large crook as you begin to push the stock into the blades, the board might ram the edge of the outfeed table and come to a stop. Do not force the piece of wood forward. Simply pull the stock back from the blades and make a second attempt at jointing the edge. You may have to run the piece a few times if the crook is extraordinary. Once the lead end of the board clears the edge of the outfeed table you will probably find that the piece will not hit the jointer knives again until you approach the trailing end of the board's edge. This is the time to study your board to determine the best path to take. You have three choices. First, you can run the lead edge repeatedly over the knives until the board's edge touches the blades over the entire length. This will result in the front portion of your board being narrower than the rear area of the board. I would select this option if I had a problem area on my stock, either at the bottom corner of the board's leading edge or at the upper corner of the board's trailing edge. If it's a problem at the leading corner, I remove that area at the jointer. If it's on the trailing edge, I cut it away as I rip the board parallel at the saw. Another option is to take the majority of the cuts at the trailing end of the board's edge. This would be accomplished by placing the lead end past the jointer knives and onto the outfeed table, then running the remainder of the board - cutting only the trailing end of the edge. Working in this manner would help remove defects at the lead end's upper corner, or the trailing end's bottom corner when the board is ripped to final width at the table saw. Third, if there was no problem area or blemish to cut away, you would take equal amounts of material off of each end by running the piece completely over the knives with each pass. If the 57 Popular Woodworking November 2006 |


