Popular Woodworking 2006-11 № 158, страница 58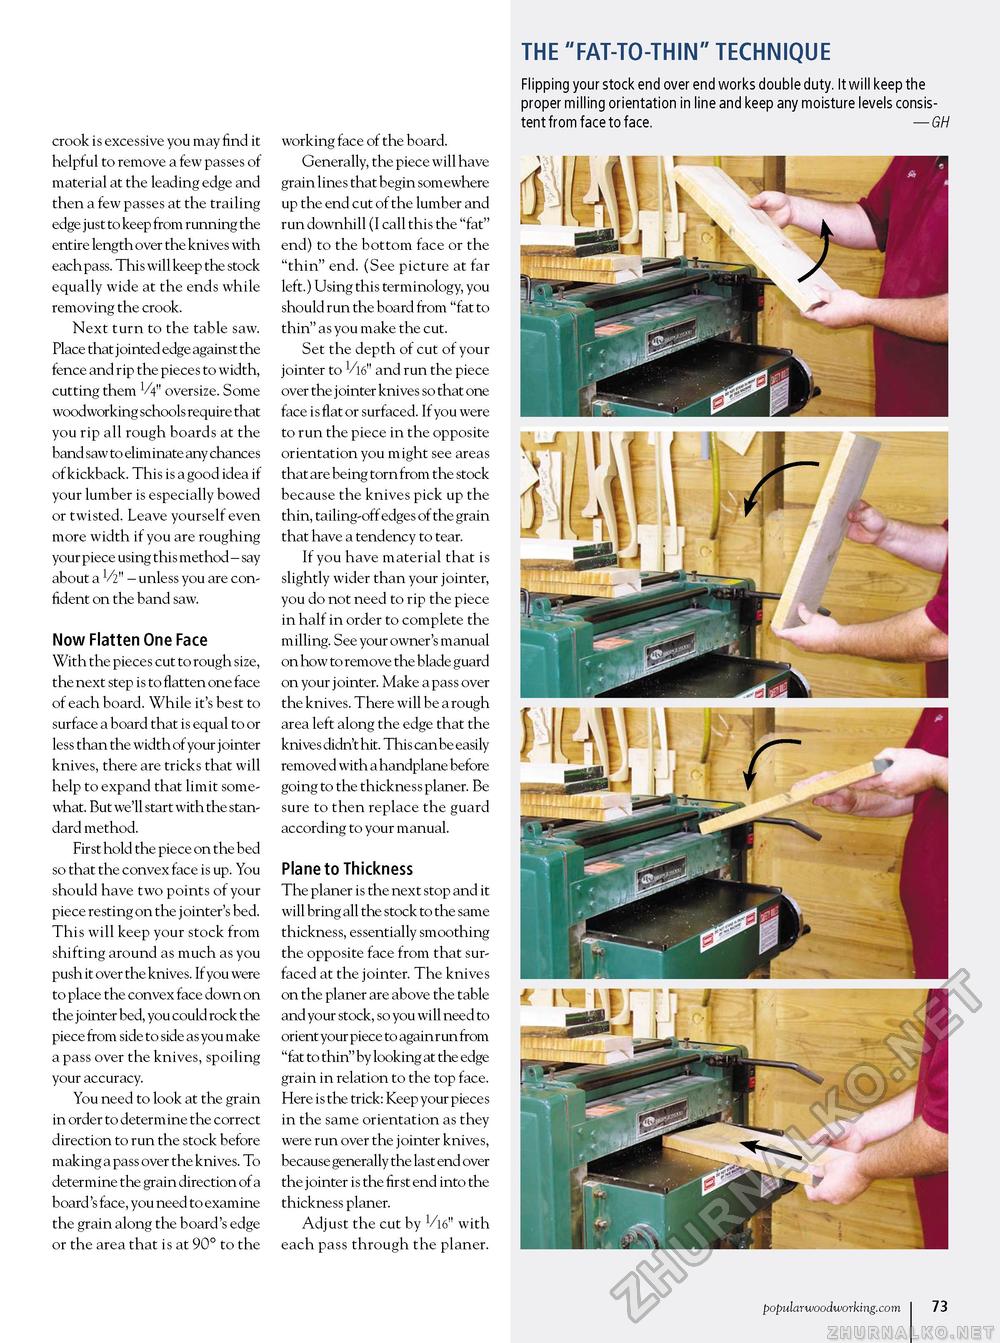
crook is excessive you may find it helpful to remove a few passes of material at the leading edge and then a few passes at the trailing edge just to keep from running the entire length over the knives with each pass. This will keep the stock equally wide at the ends while removing the crook. Next turn to the table saw. Place that j ointed edge against the fence and rip the pieces to width, cutting them VV" oversize. Some woodworking schools require that you rip all rough boards at the band saw to eliminate any chances of kickback. This is a good idea if your lumber is especially bowed or twisted. Leave yourself even more width if you are roughing your piece using this method - say about a V2" - unless you are confident on the band saw. Now Flatten One Face With the pieces cut to rough size, the next step is to flatten one face of each board. While it's best to surface a board that is equal to or less than the width of your jointer knives, there are tricks that will help to expand that limit somewhat. But we'll start with the standard method. First hold the piece on the bed so that the convex face is up. You should have two points of your piece resting on the j ointer's bed. This will keep your stock from shifting around as much as you push it over the knives. If you were to place the convex face down on the jointer bed, you could rock the piece from side to side as you make a pass over the knives, spoiling your accuracy. You need to look at the grain in order to determine the correct direction to run the stock before making a pass over the knives. To determine the grain direction of a board's face, you need to examine the grain along the board's edge or the area that is at 90° to the working face of the board. Generally, the piece will have grain lines that begin somewhere up the end cut of the lumber and run downhill (I call this the ""fat" end) to the bottom face or the "thin" end. (See picture at far left.) Using this terminology, you should run the board from ""fat to thin" as you make the cut. Set the depth of cut of your jointer to V16" and run the piece over the jointer knives so that one face is flat or surfaced. If you were to run the piece in the opposite orientation you might see areas that are being torn from the stock because the knives pick up the thin, tailing-off edges of the grain that have a tendency to tear. If you have material that is slightly wider than your jointer, you do not need to rip the piece in half in order to complete the milling. See your owner's manual on how to remove the blade guard on your jointer. Make a pass over the knives. There will be a rough area left along the edge that the knives didn't hit. This can be easily removed with a handplane before going to the thickness planer. Be sure to then replace the guard according to your manual. Plane to Thickness The planer is the next stop and it will bring all the stock to the same thickness, essentially smoothing the opposite face from that surfaced at the jointer. The knives on the planer are above the table and your stock, so you will need to orient your piece to again run from "fat to thin" by looking at the edge grain in relation to the top face. Here is the trick: Keep your pieces in the same orientation as they were run over the jointer knives, because generally the last end over the jointer is the first end into the thickness planer. Adjust the cut by V16" with each pass through the planer. THE "FAT-TO-THIN" TECHNIQUE Flipping your stock end over end works double duty. It will keep the proper milling orientation in line and keep any moisture levels consistent from face to face. — GH popularwoodworking.com i 58 |


