Popular Woodworking 2007-02 № 160, страница 59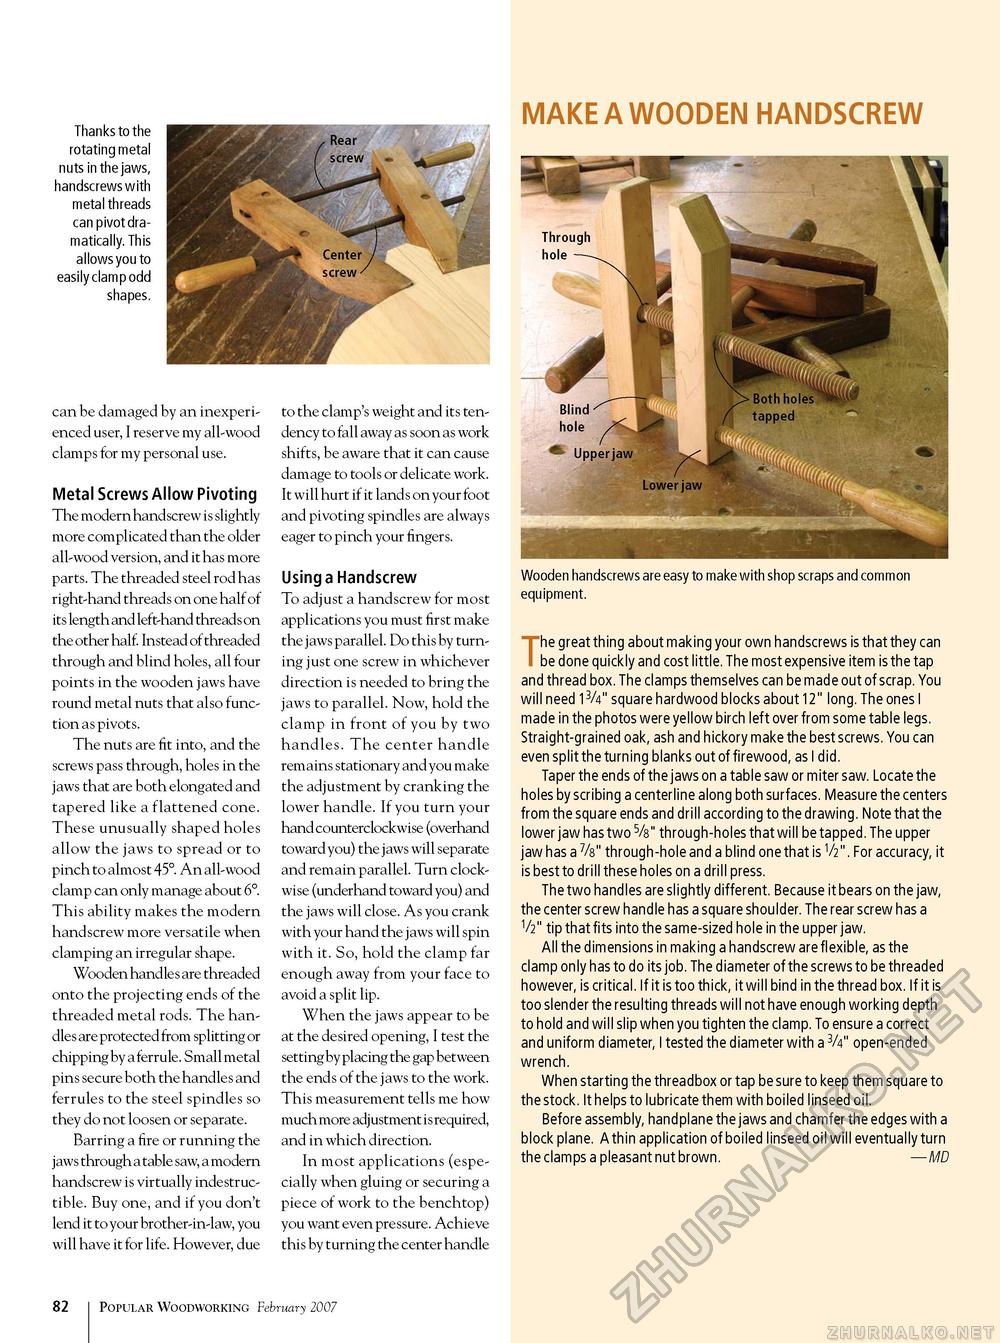
Thanks to the rotating metal nuts in the jaws, handscrews with metal threads can pivot dramatically. This allows you to easily clamp odd shapes. MAKE A WOODEN HANDSCREW can be damaged by an inexperienced user, I reserve my all-wood clamps for my personal use. Metal Screws Allow Pivoting The modern handscrew is slightly more complicated than the older all-wood version, and it has more parts. The threaded steel rod has right-hand threads on one half of its length and left-hand threads on the other half. Instead of threaded through and blind holes, all four points in the wooden jaws have round metal nuts that also function as pivots. The nuts are fit into, and the screws pass through, holes in the jaws that are both elongated and tapered like a flattened cone. These unusually shaped holes allow the jaws to spread or to pinch to almost 45°. An all-wood clamp can only manage about 6°. This ability makes the modern handscrew more versatile when clamping an irregular shape. Wooden handle s are threaded onto the projecting ends of the threaded metal rods. The handles are protected from splitting or chipping by a ferrule. Small metal pins secure both the handles and ferrules to the steel spindles so they do not loosen or separate. Barring a fire or running the jaws through a table saw, a modern handscrew is virtually indestructible. Buy one, and if you don't lend it to your brother-in-law, you will have it for life. However, due to the clamp's weight and its tendency to fall away as soon as work shifts, be aware that it can cause damage to tools or delicate work. It will hurt if it land s on your foot and pivoting spindles are always eager to pinch your fingers. Using a Handscrew To adjust a handscrew for most applications you must first make the jaws parallel. Do this by turning just one screw in whichever direction is needed to bring the jaws to parallel. Now, hold the clamp in front of you by two handles. The center handle remains stationary and you make the adjustment by cranking the lower handle. If you turn your hand counterclockwise (overhand toward you) the j aws will separate and remain parallel. Turn clockwise (underhand toward you) and the jaws will close. As you crank with your hand the jaws will spin with it. So, hold the clamp far enough away from your face to avoid a split lip. When the jaws appear to be at the desired opening, I test the setting by placing the gap between the ends of the jaws to the work. This measurement tells me how much more adjustment is required, and in which direction. In most applications (especially when gluing or securing a piece of work to the benchtop) you want even pressure. Achieve this by turning the center handle Wooden handscrews are easy to make with shop scraps and common equipment. The great thing about making your own handscrews is that they can be done quickly and cost little. The most expensive item is the tap and thread box. The clamps themselves can be made out of scrap. You will need 1W square hardwood blocks about 12" long. The ones I made in the photos were yellow birch left over from some table legs. Straight-grained oak, ash and hickory make the best screws. You can even split the turning blanks out of firewood, as I did. Taper the ends of the jaws on a table saw or miter saw. Locate the holes by scribing a centerline along both surfaces. Measure the centers from the square ends and drill according to the drawing. Note that the lower jaw has two 5/s" through-holes that will be tapped. The upper jaw has a 7/s" through-hole and a blind one that is V2". For accuracy, it is best to drill these holes on a drill press. The two handles are slightly different. Because it bears on the jaw, the center screw handle has a square shoulder. The rear screw has a V2" tip that fits into the same-sized hole in the upper jaw. All the dimensions in making a handscrew are flexible, as the clamp only has to do its job. The diameter of the screws to be threaded however, is critical. If it is too thick, it will bind in the thread box. If it is too slender the resulting threads will not have enough working depth to hold and will slip when you tighten the clamp. To ensure a correct and uniform diameter, I tested the diameter with a 3/4" open-ended wrench. When starting the threadbox or tap be sure to keep them square to the stock. It helps to lubricate them with boiled linseed oil. Before assembly, handplane the jaws and chamfer the edges with a block plane. A thin application of boiled linseed oil will eventually turn the clamps a pleasant nut brown. — MD 10 Popular Woodworking February 2007 |


