Popular Woodworking 2007-04 № 161, страница 13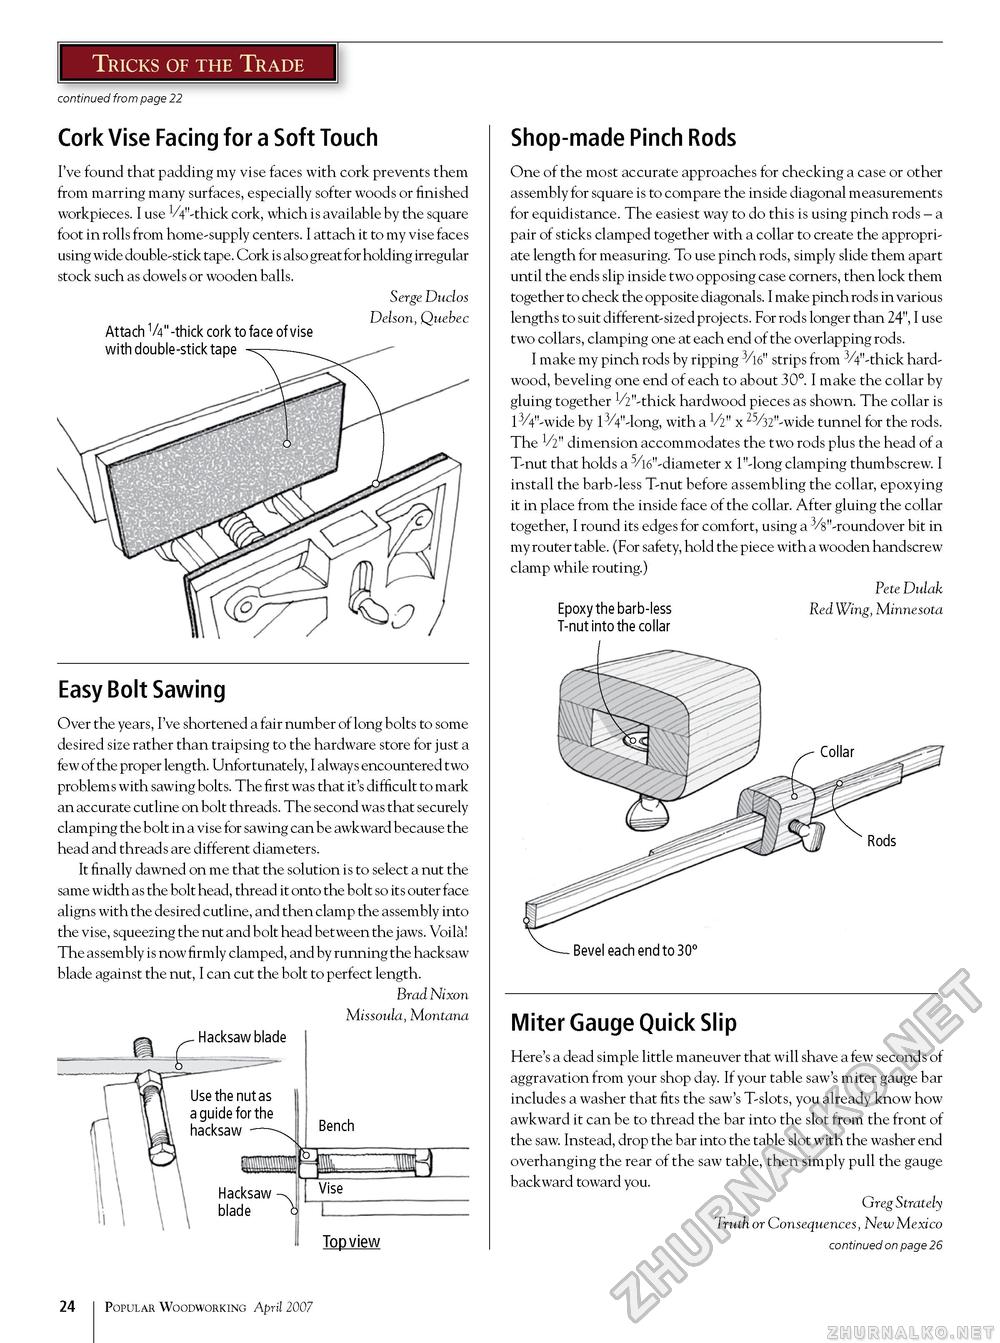
Tricks of the Trade continued from page 22 Cork Vise Facing for a Soft Touch I've found that padding my vise faces with cork prevents them from marring many surfaces, especially softer woods or finished workpieces. I use 1/4"-thick cork, which is available by the square foot in rolls from home-supply centers. I attach it to my vise faces using wide double-stick tape. Cork is also great for holding irregular stock such as dowels or wooden balls. Serge Duclos Delson, Quebec Attach V4" -thick cork to face of vise Easy Bolt Sawing Over the years, I've shortened a fair number of long bolts to some desired size rather than traipsing to the hardware store for just a few of the proper length. Unfortunately, I always encountered two problems with sawing bolts. The first was that it's difficult to mark an accurate cutline on bolt threads. The second was that securely clamping the bolt in a vise for sawing can be awkward because the head and threads are different diameters. It finally dawned on me that the solution is to select a nut the same width as the bolt head, thread it onto the bolt so its outer face aligns with the desired cutline, and then clamp the assembly into the vise, squeezing the nut and bolt head between the jaws. Voila! The assembly is now firmly clamped, and by running the hacksaw blade against the nut, I can cut the bolt to perfect length. Brad Nixon Missoula, Montana Shop-made Pinch Rods One of the most accurate approaches for checking a case or other assembly for square is to compare the inside diagonal measurements for equidistance. The easiest way to do this is using pinch rods - a pair of sticks clamped together with a collar to create the appropriate length for measuring. To use pinch rods, simply slide them apart until the ends slip inside two opposing case corners, then lock them together to check the opposite diagonals. I make pinch rods in various lengths to suit different-sized projects. For rods longer than 24", I use two collars, clamping one at each end of the overlapping rods. I make my pinch rods by ripping 3/16" strips from 3/4"-thick hardwood, beveling one end of each to about 30°. I make the collar by gluing together V2"-thick hardwood pieces as shown. The collar is 13/4"-wide by 13/4"-long, with a V2" x 25/32" -wide tunnel for the rods. The V2" dimension accommodates the two rods plus the head of a T-nut that holds a 5/16" -diameter x 1"-long clamping thumbscrew. I install the barb-less T-nut before assembling the collar, epoxying it in place from the inside face of the collar. After gluing the collar together, I round its edges for comfort, using a 3/8"-roundover bit in my router table. (For safety, hold the piece with a wooden handscrew clamp while routing.) Pete Dulak Epoxy the barb-less Red Wing, Minnesota T-nut into the collar Miter Gauge Quick Slip Here's a dead simple little maneuver that will shave a few seconds of aggravation from your shop day. If your table saw's miter gauge bar includes a washer that fits the saw's T-slots, you already know how awkward it can be to thread the bar into the slot from the front of the saw. Instead, drop the bar into the table slot with the washer end overhanging the rear of the saw table, then simply pull the gauge backward toward you. Greg Strately Truth or Consequences, New Mexico continued on page 26 24 Popular Woodworking April 2007 |


