Popular Woodworking 2007-06 № 162, страница 54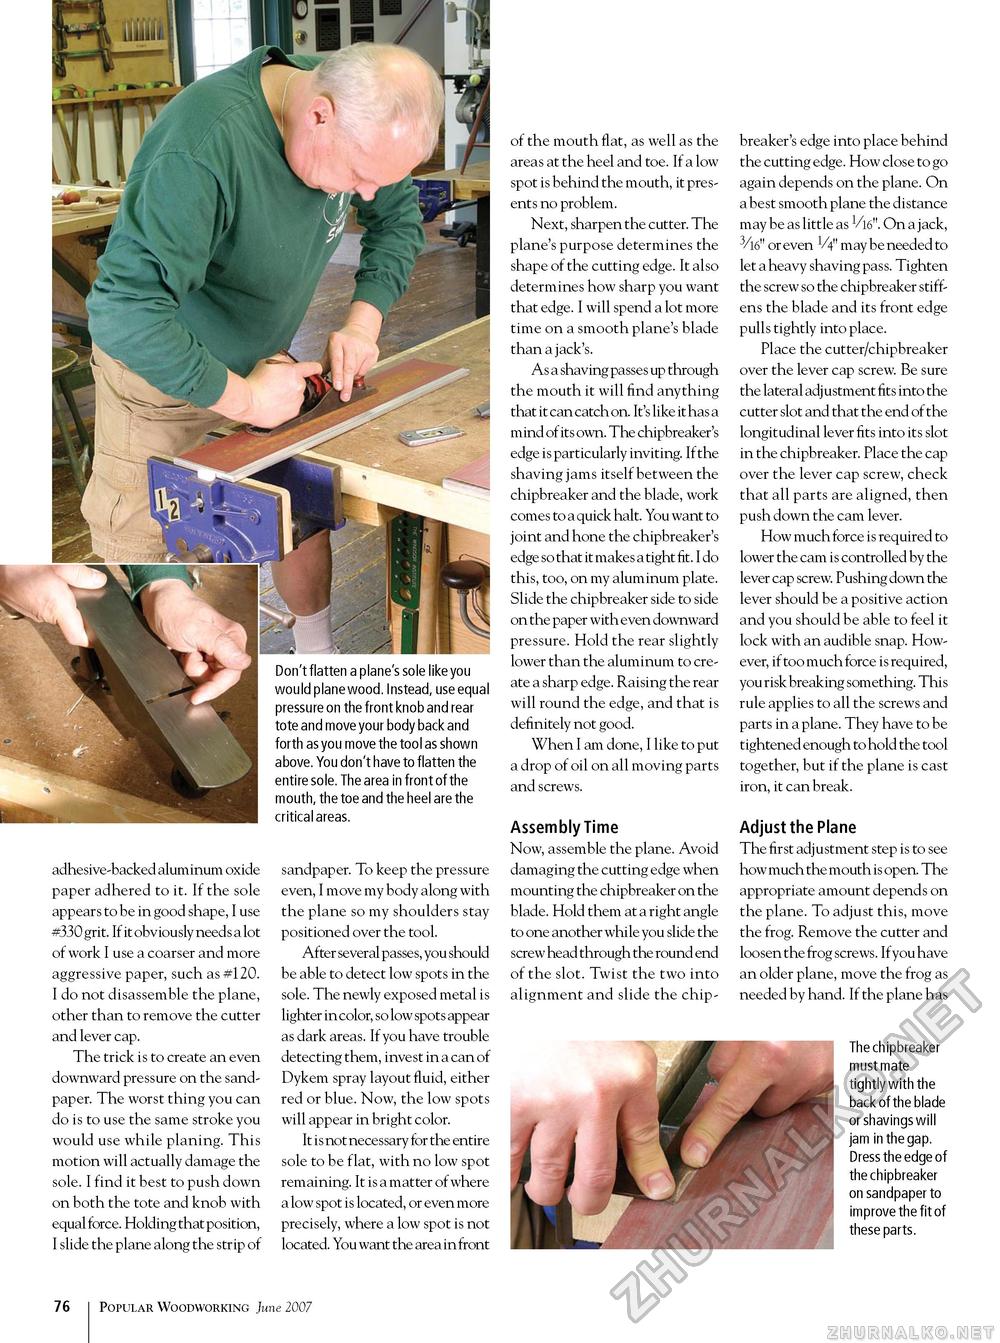
adhesive-backed aluminum oxide paper adhered to it. If the sole appears to be in good shape, I use #330 grit. If it obviously needs a lot of work I use a coarser and more aggressive paper, such as #120. I do not disassemble the plane, other than to remove the cutter and lever cap. The trick is to create an even downward pressure on the sandpaper. The worst thing you can do is to use the same stroke you would use while planing. This motion will actually damage the sole. I find it best to push down on both the tote and knob with equal force. Holding that position, I slide the plane along the strip of Don't flatten a plane's sole like you would plane wood. Instead, use equal pressure on the front knob and rear tote and move your body back and forth as you move the tool as shown above. You don't have to flatten the entire sole. The area in front of the mouth, the toe and the heel are the critical areas. sandpaper. To keep the pressure even, I move my body along with the plane so my shoulders stay positioned over the tool. After several passes, you should be able to detect low spots in the sole. The newly exposed metal is lighter in color, so low spots appear as dark areas. If you have trouble detecting them, invest in a can of Dykem spray layout fluid, either red or blue. Now, the low spots will appear in bright color. It is not necessary for the entire sole to be flat, with no low spot remaining. It is a matter of where a low spot is located, or even more precisely, where a low spot is not located. You want the area in front of the mouth flat, as well as the areas at the heel and toe. If a low spot is behind the mouth, it presents no problem. Next, sharpen the cutter. The plane's purpose determines the shape of the cutting edge. It also determines how sharp you want that edge. I will spend a lot more time on a smooth plane's blade than a jack's. As a shaving passes up through the mouth it will find anything that it can catch on. It's like it has a mind of its own. The chipbreaker's edge is particularly inviting. If the shaving jams itself between the chipbreaker and the blade, work comes to a quick halt. You want to joint and hone the chipbreaker's edge so that it makes a tight fit. I do this, too, on my aluminum plate. Slide the chipbreaker side to side on the paper with even downward pressure. Hold the rear slightly lower than the aluminum to create a sharp edge. Raising the rear will round the edge, and that is definitely not good. When I am done, I like to put a drop of oil on all moving parts and screws. Assembly Time Now, assemble the plane. Avoid damaging the cutting edge when mounting the chipbreaker on the blade. Hold them at a right angle to one another while you slide the screw head through the round end of the slot. Twist the two into alignment and slide the chip- breaker's edge into place behind the cutting edge. How close to go again depends on the plane. On a best smooth plane the distance may be as little as 1//16". On a jack, 3V or even V4" may be needed to let a heavy shaving pass. Tighten the screw so the chipbreaker stiffens the blade and its front edge pulls tightly into place. Place the cutter/chipbreaker over the lever cap screw. Be sure the lateral adjustment fits into the cutter slot and that the end of the longitudinal lever fits into its slot in the chipbreaker. Place the cap over the lever cap screw, check that all parts are aligned, then push down the cam lever. How much force is required to lower the cam is controlled by the lever cap screw. Pushing down the lever should be a positive action and you should be able to feel it lock with an audible snap. However, if too much force is required, you risk breaking something. This rule applies to all the screws and parts in a plane. They have to be tightened enough to hold the tool together, but if the plane is cast iron, it can break. Adjust the Plane The first adjustment step is to see how much the mouth is open. The appropriate amount depends on the plane. To adjust this, move the frog. Remove the cutter and loosen the frog screws. Ifyou have an older plane, move the frog as needed by hand. If the plane has The chipbreaker must mate tightly with the back of the blade or shavings will jam in the gap. Dress the edge of the chipbreaker on sandpaper to improve the fit of these parts. 10 Popular Woodworking June 2007 |


