Popular Woodworking 2007-06 № 162, страница 57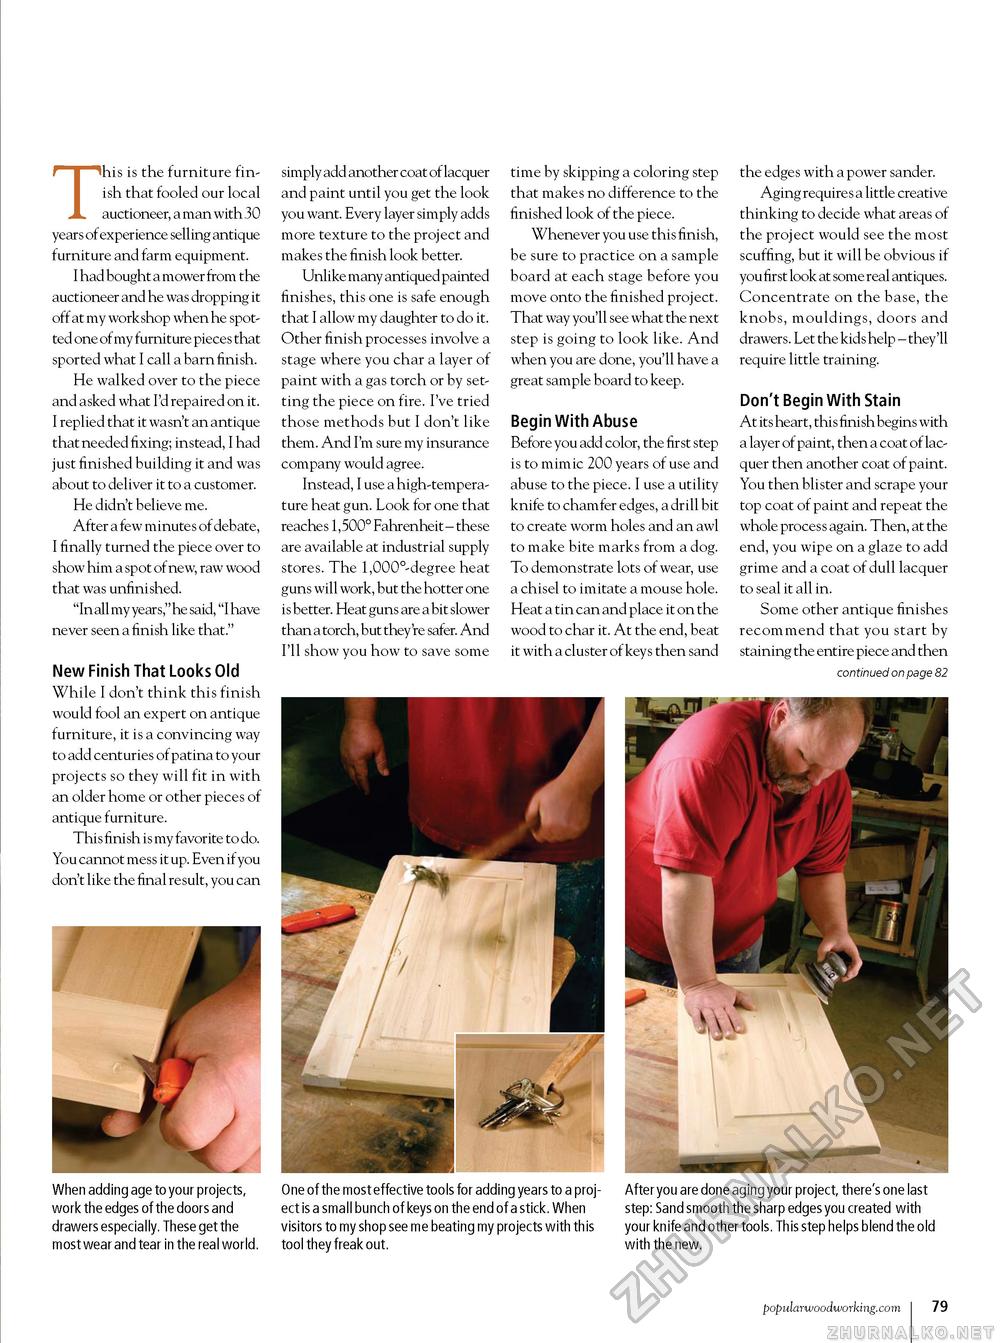
This is the furniture finish that fooled our local auctioneer, a man with 30 years of experience selling antique furniture and farm equipment. I had bought a mower from the auctioneer and he was dropping it off at my work shop when he spotted one of my furniture pieces that sported what I call a barn finish. He walked over to the piece and asked what I'd repaired on it. I replied that it wasn't an antique that needed fixing; instead, I had just finished building it and was about to deliver it to a customer. He didn't believe me. After a few minutes of debate, I finally turned the piece over to show him a spot of new, raw wood that was unfinished. "In all my years," he said, ""I have never seen a finish like that." New Finish That Looks Old While I don't think this finish would fool an expert on antique furniture, it is a convincing way to add centuries of patina to your projects so they will fit in with an older home or other pieces of antique furniture. This finish is my favorite to do. You cannot mess it up. Even if you don't like the final result, you can simply add another coat of lacquer and paint until you get the look you want. Every layer simply adds more texture to the project and makes the finish look better. Unlike many antiqued painted finishes, this one is safe enough that I allow my daughter to do it. Other finish processes involve a stage where you char a layer of paint with a gas torch or by setting the piece on fire. I've tried those methods but I don't like them. And I'm sure my insurance company would agree. Instead, I use a high-temperature heat gun. Look for one that reaches 1,500° Fahrenheit - these are available at industrial supply stores. The 1,000°-degree heat guns will work, but the hotter one is better. Heat guns are a bit slower than a torch, but they're safer. And I'll show you how to save some time by skipping a coloring step that makes no difference to the finished look of the piece. Whenever you use this finish, be sure to practice on a sample board at each stage before you move onto the finished project. That way you'll see what the next step is going to look like. And when you are done, you'll have a great sample board to keep. Begin With Abuse Before you add color, the first step is to mimic 200 years of use and abuse to the piece. I use a utility knife to chamfer edges, a drill bit to create worm holes and an awl to make bite marks from a dog. To demonstrate lots of wear, use a chisel to imitate a mouse hole. Heat a tin can and place it on the wood to char it. At the end, beat it with a cluster of keys then sand the edges with a power sander. Aging require s a little creative thinking to decide what areas of the project would see the most scuffing, but it will be obvious if you first look at some real antiques. Concentrate on the base, the knobs, mouldings, doors and drawers. Let the kids help - they'll require little training. Don't Begin With Stain At its heart, this finish begins with a layer of paint, then a coat of lacquer then another coat of paint. You then blister and scrape your top coat of paint and repeat the whole process again. Then, at the end, you wipe on a glaze to add grime and a coat of dull lacquer to seal it all in. Some other antique finishes recommend that you start by staining the entire piece and then continued on page 82 When adding age to your projects, work the edges of the doors and drawers especially. These get the most wear and tear in the real world. One of the most effective tools for adding years to a project is a small bunch of keys on the end of a stick. When visitors to my shop see me beating my projects with this tool they freak out. After you are done aging your project, there's one last step: Sand smooth the sharp edges you created with your knife and other tools. This step helps blend the old with the new. popularwoodworking.com 23 |


