Popular Woodworking 2007-06 № 162, страница 65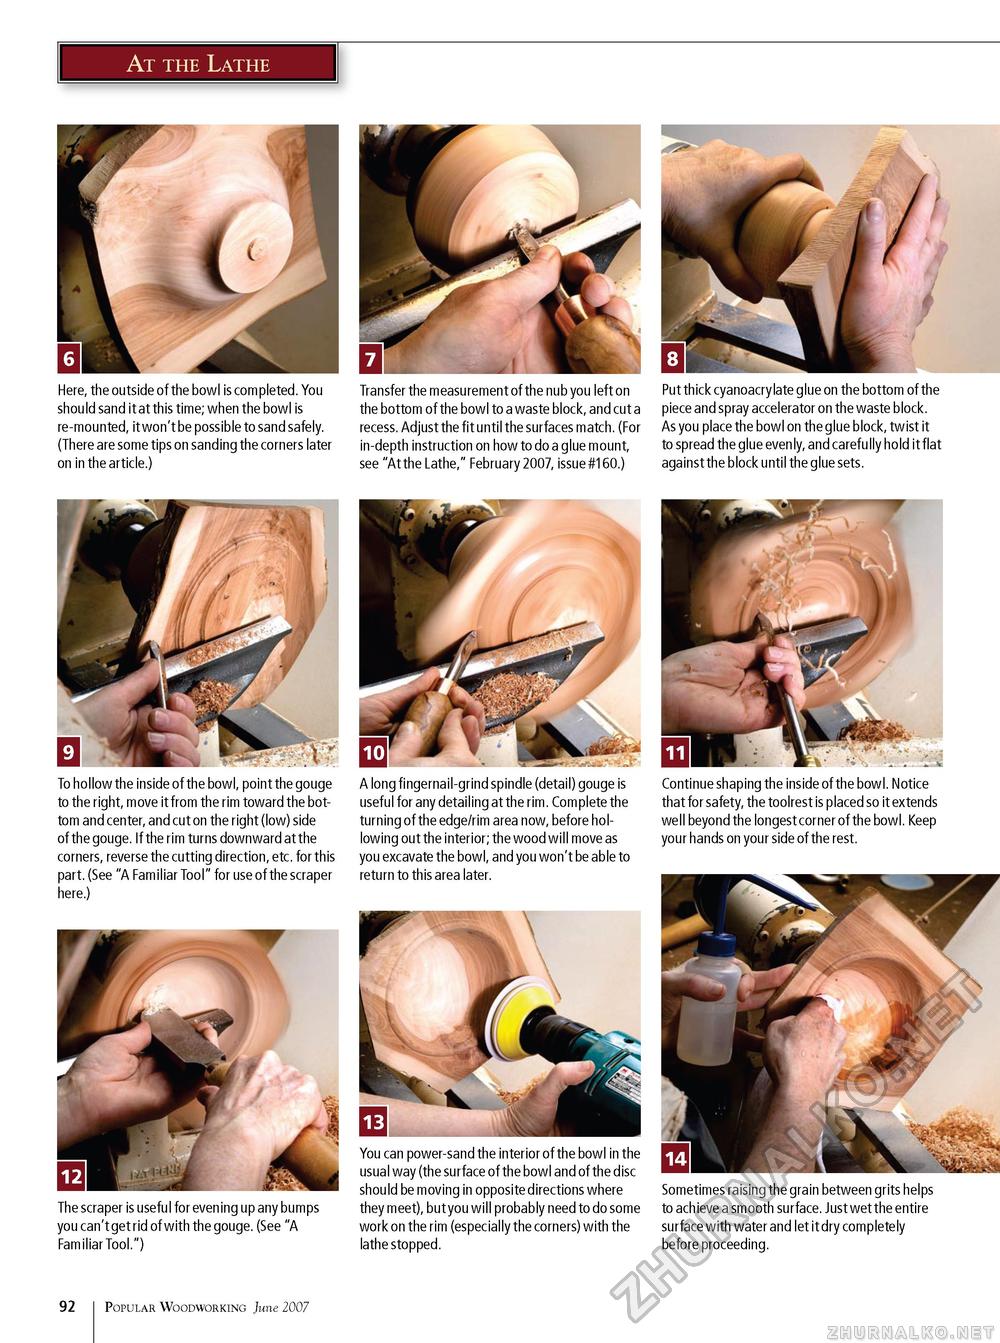
At the Lathe Here, the outside of the bowl is completed. You should sand it at this time; when the bowl is re-mounted, it won't be possible to sand safely. (There are some tips on sanding the corners later on in the article.) To hollow the inside of the bowl, point the gouge to the right, move it from the rim toward the bottom and center, and cut on the right (low) side of the gouge. If the rim turns downward at the corners, reverse the cutting direction, etc. for this part. (See "A Familiar Tool" for use of the scraper here.) The scraper is useful for evening up any bumps you can't get rid of with the gouge. (See "A Familiar Tool.") Transfer the measurement of the nub you left on the bottom of the bowl to a waste block, and cut a recess. Adjust the fit until the surfaces match. (For in-depth instruction on how to do a glue mount, see "At the Lathe," February 2007, issue #160.) Put thick cyanoacrylate glue on the bottom of the piece and spray accelerator on the waste block. As you place the bowl on the glue block, twist it to spread the glue even ly, and carefully hold it flat against the block until the glue sets. A long fingernail-grind spindle (detail) gouge is useful for any detailing at the rim. Complete the turning of the edge/rim area now, before hollowing out the interior; the wood will move as you excavate the bowl, and you won't be able to return to this area later Continue shaping the inside of the bowl. Notice that for safety, the toolrest is placed so it extends well beyond the longest corner of the bowl. Keep your hands on your side of the rest. You can power-sand the interior of the bowl in the usual way (the surface of the bowl and of the disc should be moving in opposite directions where they meet), but you will probably need to do some work on the rim (especially the corners) with the lathe stopped. Sometimes raising the grain between grits helps to achieve a smooth surface. Just wet the entire surface with water and let it dry completely before proceeding. 10 Popular Woodworking June 2007 |


