Popular Woodworking 2007-10 № 164, страница 32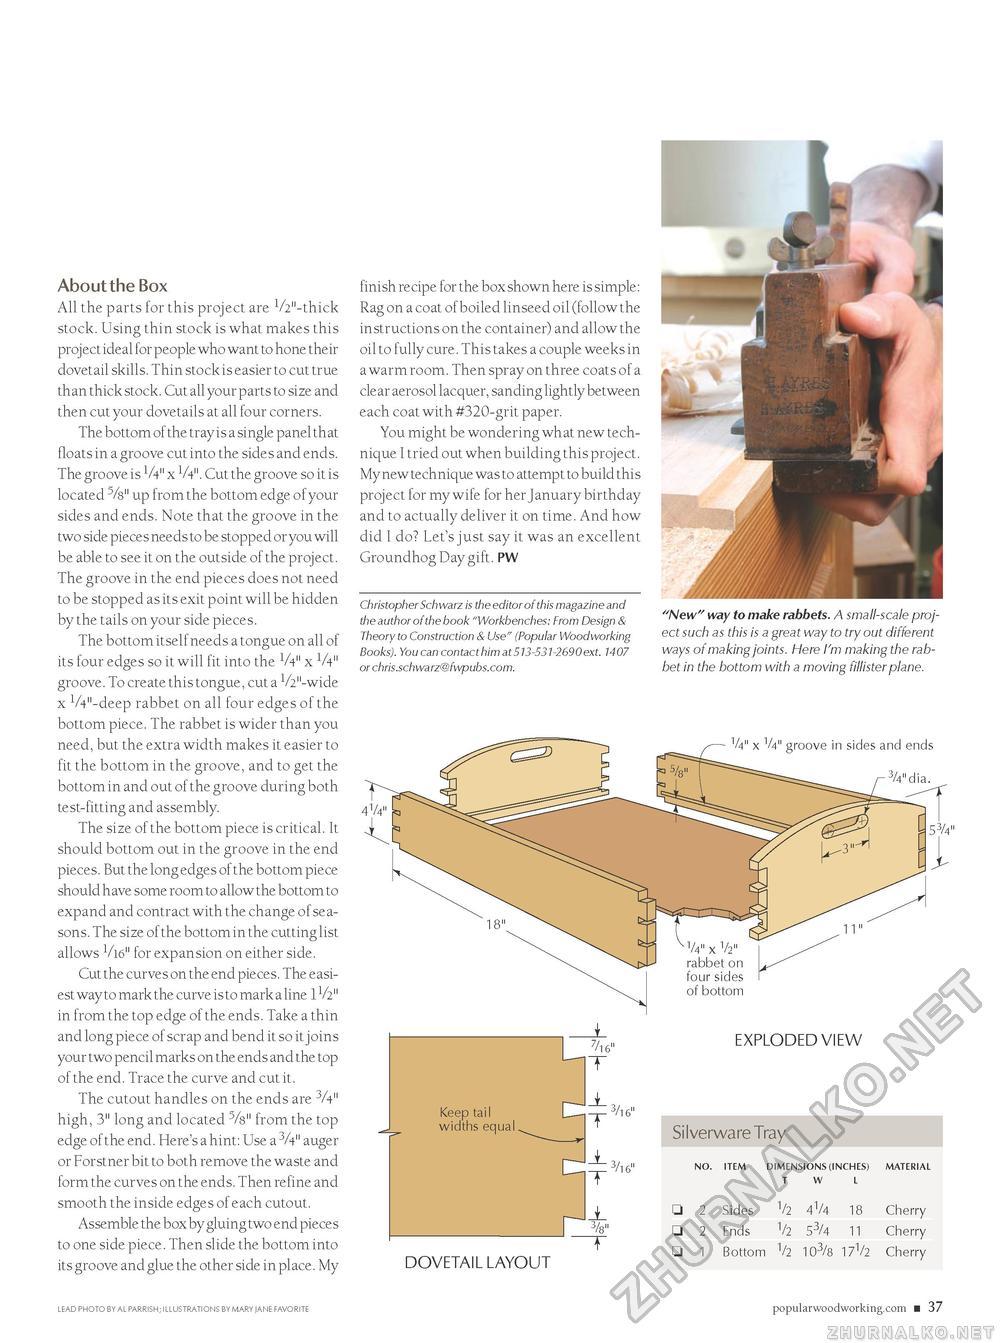
About the Box All the parts for this project are 1/2"-thick stock. Using thin stock is what makes this project ideal for people who want to hone their dovetail skills. Thin stock is easier to cut true than thick stock. Cut all your parts to size and then cut your dovetails at all four corners. The bottom of the tray is a single panel that floats in a groove cut into the sides and ends. The groove is V4" x V4". Cut the groove so it is located 5/s" up from the bottom edge of your sides and ends. Note that the groove in the two side pieces needs to be stopped or you will be able to see it on the outside of the project. The groove in the end pieces does not need to be stopped as its exit point will be hidden by the tails on your side pieces. The bottom itself needs a tongue on all of its four edges so it will fit into the V411 x 1A" groove. To create this tongue, cut a 1/2"-wide x 1A"-deep rabbet on all four edges of the bottom piece. The rabbet is wider than you need, but the extra width makes it easier to fit the bottom in the groove, and to get the bottom in and out of the groove during both test-fitting and assembly. The size of the bottom piece is critical. It should bottom out in the groove in the end pieces. But the long edges of the bottom piece should have some room to allow the bottom to expand and contract with the change of seasons. The size of the bottom in the cutting list allows V16" for expansion on either side. Cut the curves on the end pieces. The easiest way to mark the curve is to mark a line 1V2" in from the top edge of the ends. Take a thin and long piece of scrap and bend it so it joins your two pencil marks on the ends and the top of the end. Trace the curve and cut it. The cutout handles on the ends are 3A" high, 3" long and located 5/s" from the top edge of the end. Here's a hint: Use a 3A" auger or Forstner bit to both remove the waste and form the curves on the ends. Then refine and smooth the inside edges of each cutout. Assemble the box by gluing two end pieces to one side piece. Then slide the bottom into its groove and glue the other side in place. My finish recipe for the box shown here is simple: Rag on a coat of boiled linseed oil (follow the instructions on the container) and allow the oil to fully cure. This takes a couple weeks in a warm room. Then spray on three coats of a clear aerosol lacquer, sanding lightly between each coat with #320-grit paper. You might be wondering what new technique I tried out when building this project. My new technique was to attempt to build this project for my wife for her January birthday and to actually deliver it on time. And how did I do? Let's just say it was an excellent Groundhog Day gift. PW Christopher Schwarz is the editor of this magazine and the author of the book "Workbenches: From Design & Theory to Construction & Use" (Popular Woodworking Books). You can contact him at 513-531-2690 ext. 1407 or chris.schwarz@fwpubs.com. "New" way to make rabbets. A small-scale project such as this is a great way to try out different ways of making joints. Here I'm making the rabbet in the bottom with a moving fillister plane. LEAD PHOTO BY AL RARRISH; ILLUSTRATIONS BY MARY JANE FAVORITE popularwoodworking.com ■ 37 |


