Popular Woodworking 2007-10 № 164, страница 35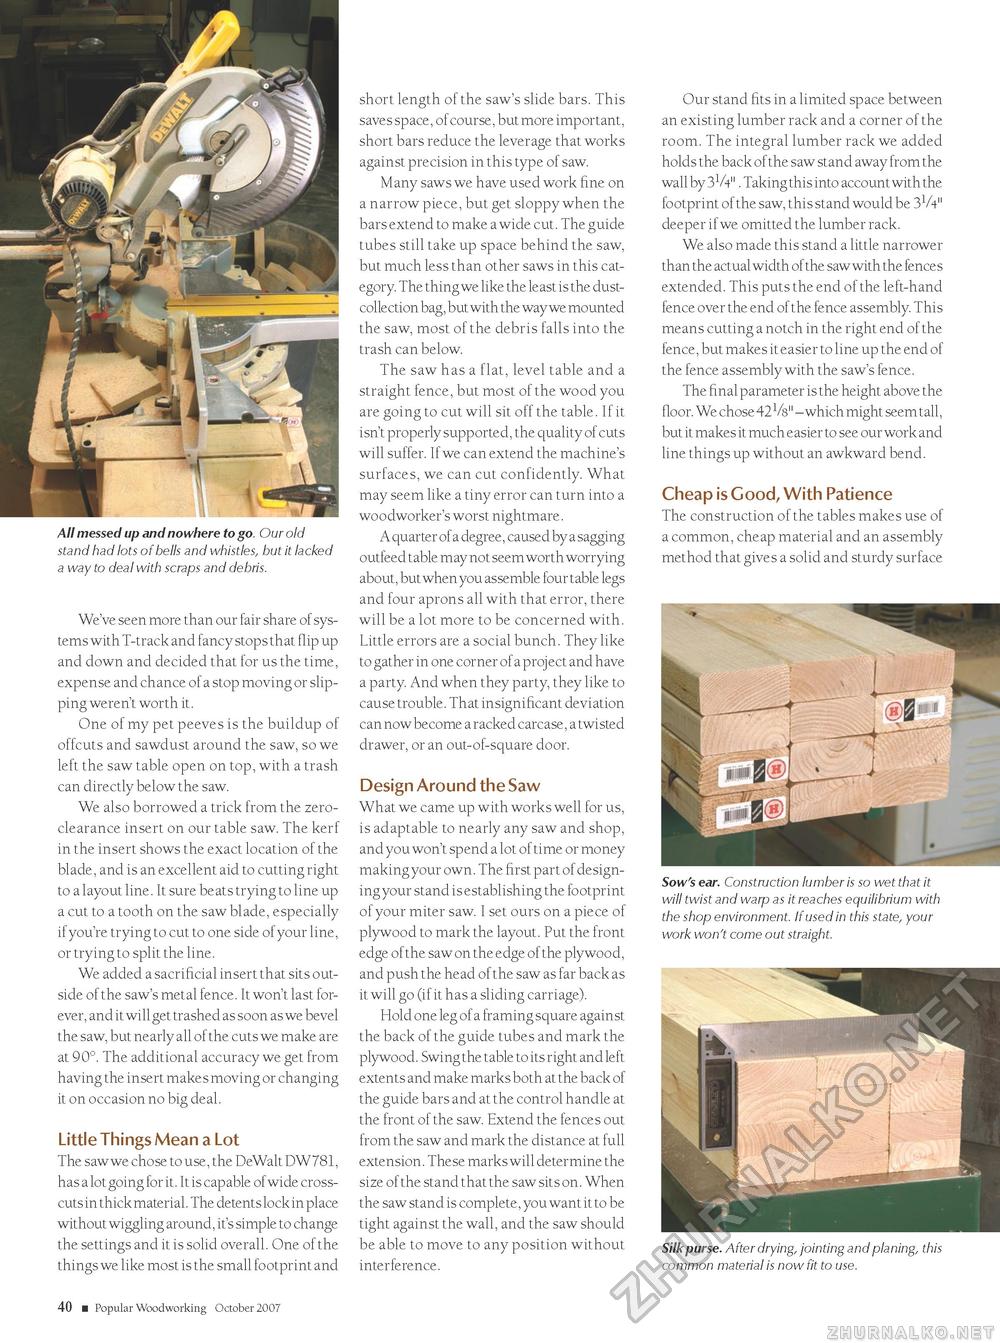
All messed up and nowhere to go. Our old stand had lots of bells and whistles, but it lacked a way to deal with scraps and debris. We've seen more than our fair share of systems with T-track and fancy stops that flip up and down and decided that for us the time, expense and chance of a stop moving or slipping weren't worth it. One of my pet peeves is the buildup of offcuts and sawdust around the saw, so we left the saw table open on top, with a trash can directly below the saw. We also borrowed a trick from the zero-clearance insert on our table saw. The kerf in the insert shows the exact location of the blade, and is an excellent aid to cutting right to a layout line. It sure beats trying to line up a cut to a tooth on the saw blade, especially if you're trying to cut to one side of your line, or trying to split the line. We added a sacrificial insert that sits outside of the saw's metal fence. It won't last forever, and it will get trashed as soon as we bevel the saw, but nearly all of the cuts we make are at 90°. The additional accuracy we get from having the insert makes moving or changing it on occasion no big deal. Little Things Mean a Lot The saw we chose to use, the DeWalt DW781, has a lot going for it. It is capable of wide crosscuts in thick material. The detents lock in place without wiggling around, it's simple to change the settings and it is solid overall. One of the things we like most is the small footprint and short length of the saw's slide bars. This saves space, of course, but more important, short bars reduce the leverage that works against precision in this type of saw. Many saws we have used work fine on a narrow piece, but get sloppy when the bars extend to make a wide cut. The guide tubes still take up space behind the saw, but much less than other saws in this category. The thing we like the least is the dust-collection bag, but with the way we mounted the saw, most of the debris falls into the trash can below. The saw has a flat, level table and a straight fence, but most of the wood you are going to cut will sit off the table. If it isn't properly supported, the quality of cuts will suffer. If we can extend the machine's surfaces, we can cut confidently. What may seem like a tiny error can turn into a woodworker's worst nightmare. A quarter of a degree, caused by a sagging outfeed table may not seem worth worrying about, but when you assemble four table legs and four aprons all with that error, there will be a lot more to be concerned with. Little errors are a social bunch. They like to gather in one corner of a project and have a party. And when they party, they like to cause trouble. That insignificant deviation can now become a racked carcase, a twisted drawer, or an out-of-square door. Design Around the Saw What we came up with works well for us, is adaptable to nearly any saw and shop, and you won't spend a lot of time or money making your own. The first part of designing your stand is establishing the footprint of your miter saw. I set ours on a piece of plywood to mark the layout. Put the front edge of the saw on the edge of the plywood, and push the head of the saw as far back as it will go (if it has a sliding carriage). Hold one leg of a framing square against the back of the guide tubes and mark the plywood. Swing the table to its right and left extents and make marks both at the back of the guide bars and at the control handle at the front of the saw. Extend the fences out from the saw and mark the distance at full extension. These marks will determine the size of the stand that the saw sits on. When the saw stand is complete, you want it to be tight against the wall, and the saw should be able to move to any position without interference. Our stand fits in a limited space between an existing lumber rack and a corner of the room. The integral lumber rack we added holds the back of the saw stand away from the wall by 3V4" . Taking this into account with the footprint of the saw, this stand would be 3V4" deeper if we omitted the lumber rack. We also made this stand a little narrower than the actual width of the saw with the fences extended. This puts the end of the left-hand fence over the end of the fence assembly. This means cutting a notch in the right end of the fence, but makes it easier to line up the end of the fence assembly with the saw's fence. The final parameter is the height above the floor. We chose 42Vs" - which might seem tall, but it makes it much easier to see our work and line things up without an awkward bend. Cheap is Good, With Patience The construction of the tables makes use of a common, cheap material and an assembly method that gives a solid and sturdy surface Sow's ear. Construction lumber is so wet that it will twist and warp as it reaches equilibrium with the shop environment. If used in this state, your work won't come out straight. Silk purse. After drying, jointing and planing, this common material is now fit to use. 40 ■ Popular Woodworking October 2007 |


