Popular Woodworking 2007-12 № 166, страница 11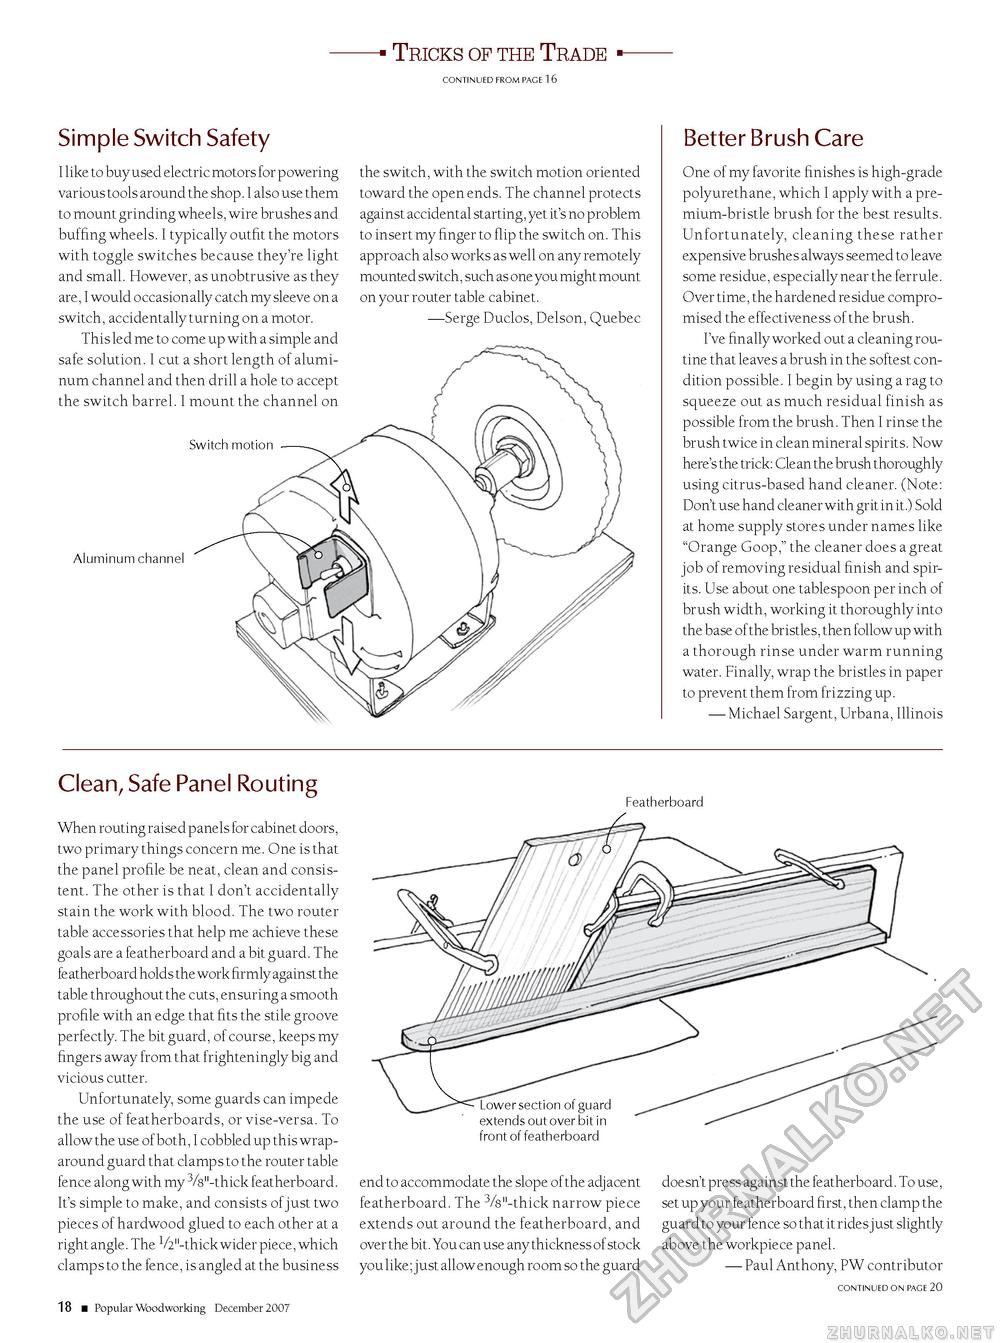
Tricks of the Trade CONTiNUED FROM PAGE 1 6 Simple Switch Safety I like to buy used electric motors for powering various tools around the shop. I also use them to mount grinding wheels, wire brushes and buffing wheels. I typically outfit the motors with toggle switches because they're light and small. However, as unobtrusive as they are, I would occasionally catch my sleeve on a switch, accidentally turning on a motor. This led me to come up with a simple and safe solution. I cut a short length of aluminum channel and then drill a hole to accept the switch barrel. I mount the channel on the switch, with the switch motion oriented toward the open ends. The channel protects against accidental starting, yet it's no problem to insert my finger to flip the switch on. This approach also works as well on any remotely mounted switch, such as one you might mount on your router table cabinet. —Serge Duclos, Delson, Quebec Switch motion Aluminum channel Better Brush Care One of my favorite finishes is high-grade polyurethane, which I apply with a premium-bristle brush for the best results. Unfortunately, cleaning these rather expensive brushes always seemed to leave some residue, especially near the ferrule. Over time, the hardened residue compromised the effectiveness of the brush. I've finally worked out a cleaning routine that leaves a brush in the softest condition possible. I begin by using a rag to squeeze out as much residual finish as possible from the brush. Then I rinse the brush twice in clean mineral spirits. Now here's the trick: Clean the brush thoroughly using citrus-based hand cleaner. (Note: Don't use hand cleaner with grit in it.) Sold at home supply stores under names like "Orange Goop," the cleaner does a great job of removing residual finish and spirits. Use about one tablespoon per inch of brush width, working it thoroughly into the base of the bristles, then follow up with a thorough rinse under warm running water. Finally, wrap the bristles in paper to prevent them from frizzing up. — Michael Sargent, Urbana, Illinois Featherboard front of featherboard Clean, Safe Panel Routing When routing raised panels for cabinet doors, two primary things concern me. One is that the panel profile be neat, clean and consistent. The other is that I don't accidentally stain the work with blood. The two router table accessories that help me achieve these goals are a featherboard and a bit guard. The featherboard holds the work firmly against the table throughout the cuts, ensuring a smooth profile with an edge that fits the stile groove perfectly. The bit guard, of course, keeps my fingers away from that frighteningly big and vicious cutter. Unfortunately, some guards can impede the use of featherboards, or vise-versa. To allow the use of both, I cobbled up this wraparound guard that clamps to the router table fence along with my 3/s"-thick featherboard. It's simple to make, and consists of just two pieces of hardwood glued to each other at a right angle. The V2"-thick wider piece, which clamps to the fence, is angled at the business 18 ■ Popular Woodworking December 2007 end to accommodate the slope of the adjacent featherboard. The 3/s"-thick narrow piece extends out around the featherboard, and over the bit. You can use any thickness of stock you like; just allow enough room so the guard doesn't press against the featherboard. To use, set up your featherboard first, then clamp the guard to your fence so that it rides just slightly above the workpiece panel. — Paul Anthony, PW contributor CONTiNUED ON PAGE 20 |


