Popular Woodworking 2007-12 № 166, страница 28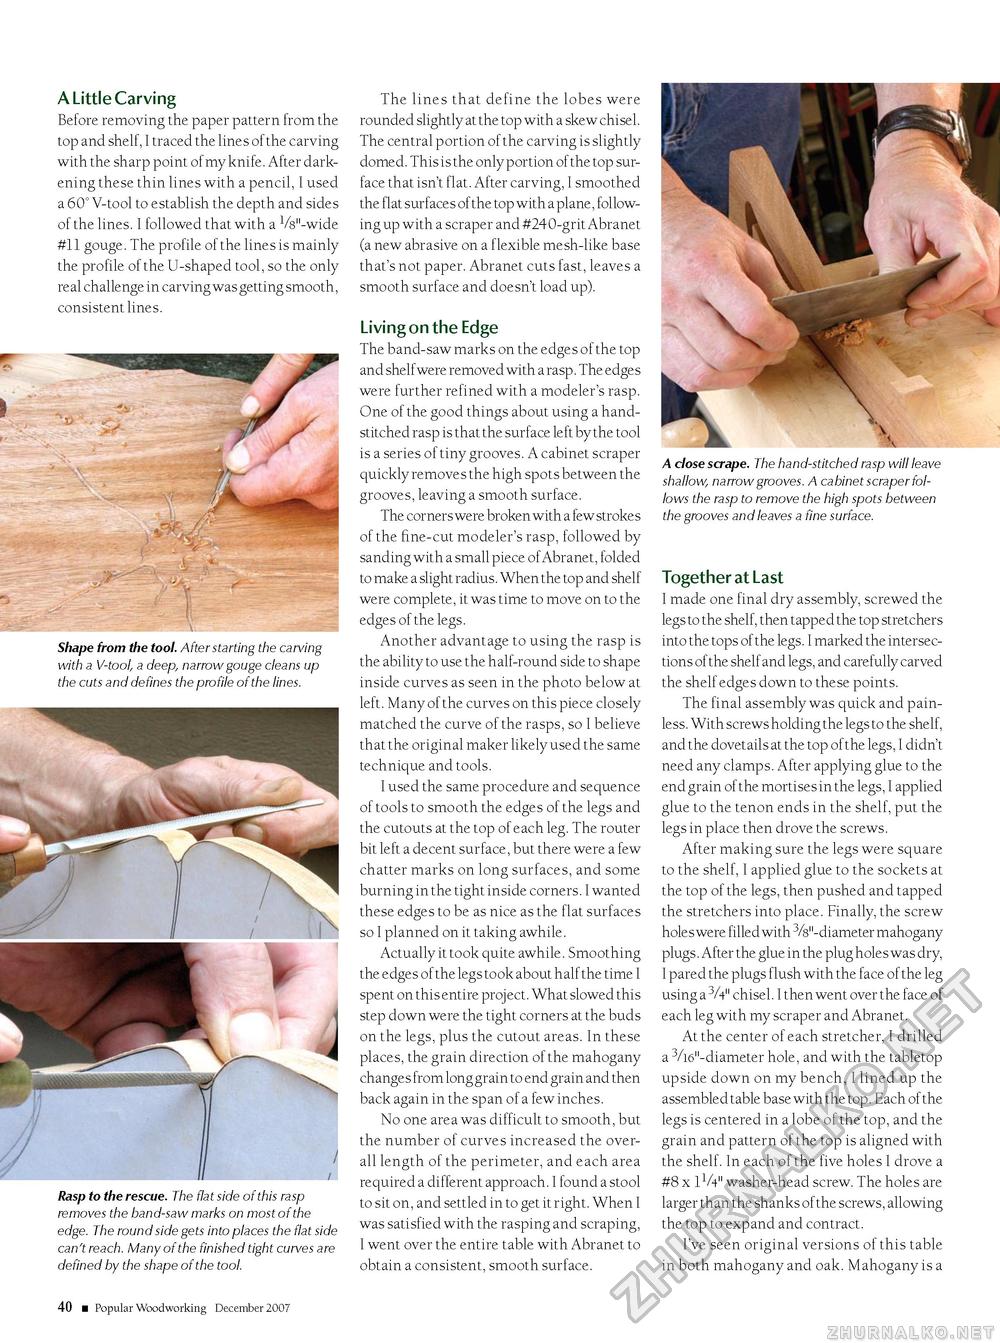
A Little Carving Before removing the paper pattern from the top and shelf, I traced the lines of the carving with the sharp point of my knife. After darkening these thin lines with a pencil, I used a 60° V-tool to establish the depth and sides of the lines. I followed that with a 1/8"-wide #11 gouge. The profile of the lines is mainly the profile of the U-shaped tool, so the only real challenge in carving was getting smooth, consistent lines. ■1 < (H 'I ,, ---- - - - \ .. Shape from the tool. After starting the carving with a V-tool, a deep, narrow gouge cleans up the cuts and defines the profile of the lines. Rasp to the rescue. The flat side of this rasp removes the band-saw marks on most of the edge. The round side gets into places the flat side can't reach. Many of the finished tight curves are defined by the shape of the tool. The lines that define the lobes were rounded slightly at the top with a skew chisel. The central portion of the carving is slightly domed. This is the only portion of the top surface that isn't flat. After carving, I smoothed the flat surfaces of the top with a plane, following up with a scraper and #240-grit Abranet (a new abrasive on a flexible mesh-like base that's not paper. Abranet cuts fast, leaves a smooth surface and doesn't load up). Living on the Edge The band-saw marks on the edges of the top and shelf were removed with a rasp. The edges were further refined with a modeler's rasp. One of the good things about using a hand-stitched rasp is that the surface left by the tool is a series of tiny grooves. A cabinet scraper quickly removes the high spots between the grooves, leaving a smooth surface. The corners were broken with a few strokes of the fine-cut modeler's rasp, followed by sanding with a small piece of Abranet, folded to make a slight radius. When the top and shelf were complete, it was time to move on to the edges of the legs. Another advantage to using the rasp is the ability to use the half-round side to shape inside curves as seen in the photo below at left. Many of the curves on this piece closely matched the curve of the rasps, so I believe that the original maker likely used the same technique and tools. I used the same procedure and sequence of tools to smooth the edges of the legs and the cutouts at the top of each leg. The router bit left a decent surface, but there were a few chatter marks on long surfaces, and some burning in the tight inside corners. I wanted these edges to be as nice as the flat surfaces so I planned on it taking awhile. Actually it took quite awhile. Smoothing the edges of the legs took about half the time I spent on this entire proj ect. What slowed this step down were the tight corners at the buds on the legs, plus the cutout areas. In these places, the grain direction of the mahogany changes from long grain to end grain and then back again in the span of a few inches. No one area was difficult to smooth, but the number of curves increased the overall length of the perimeter, and each area required a different approach. I found a stool to sit on, and settled in to get it right. When I was satisfied with the rasping and scraping, I went over the entire table with Abranet to obtain a consistent, smooth surface. A close scrape. The hand-stitched rasp will leave shallow, narrow grooves. A cabinet scraper follows the rasp to remove the high spots between the grooves and leaves a fine surface. Together at Last I made one final dry assembly, screwed the legs to the shelf, then tapped the top stretchers into the tops of the legs. I marked the intersections of the shelf and legs, and carefully carved the shelf edges down to these points. The final assembly was quick and painless. With screws holding the legs to the shelf, and the dovetails at the top of the legs, I didn't need any clamps. After applying glue to the end grain of the mortises in the legs, I applied glue to the tenon ends in the shelf, put the legs in place then drove the screws. After making sure the legs were square to the shelf, I applied glue to the sockets at the top of the legs, then pushed and tapped the stretchers into place. Finally, the screw holes were filled with 3/8"-diameter mahogany plugs. After the glue in the plug holes was dry, I pared the plugs flush with the face of the leg using a 3/4" chisel. I then went over the face of each leg with my scraper and Abranet. At the center of each stretcher, I drilled a 3/16"-diameter hole, and with the tabletop upside down on my bench, I lined up the assembled table base with the top. Each of the legs is centered in a lobe of the top, and the grain and pattern of the top is aligned with the shelf. In each of the five holes I drove a #8 x 11/4" washer-head screw. The holes are larger than the shanks of the screws, allowing the top to expand and contract. I've seen original versions of this table in both mahogany and oak. Mahogany is a 40 ■ Popular Woodworking December 2007 |


