Popular Woodworking 2008-04 № 168, страница 33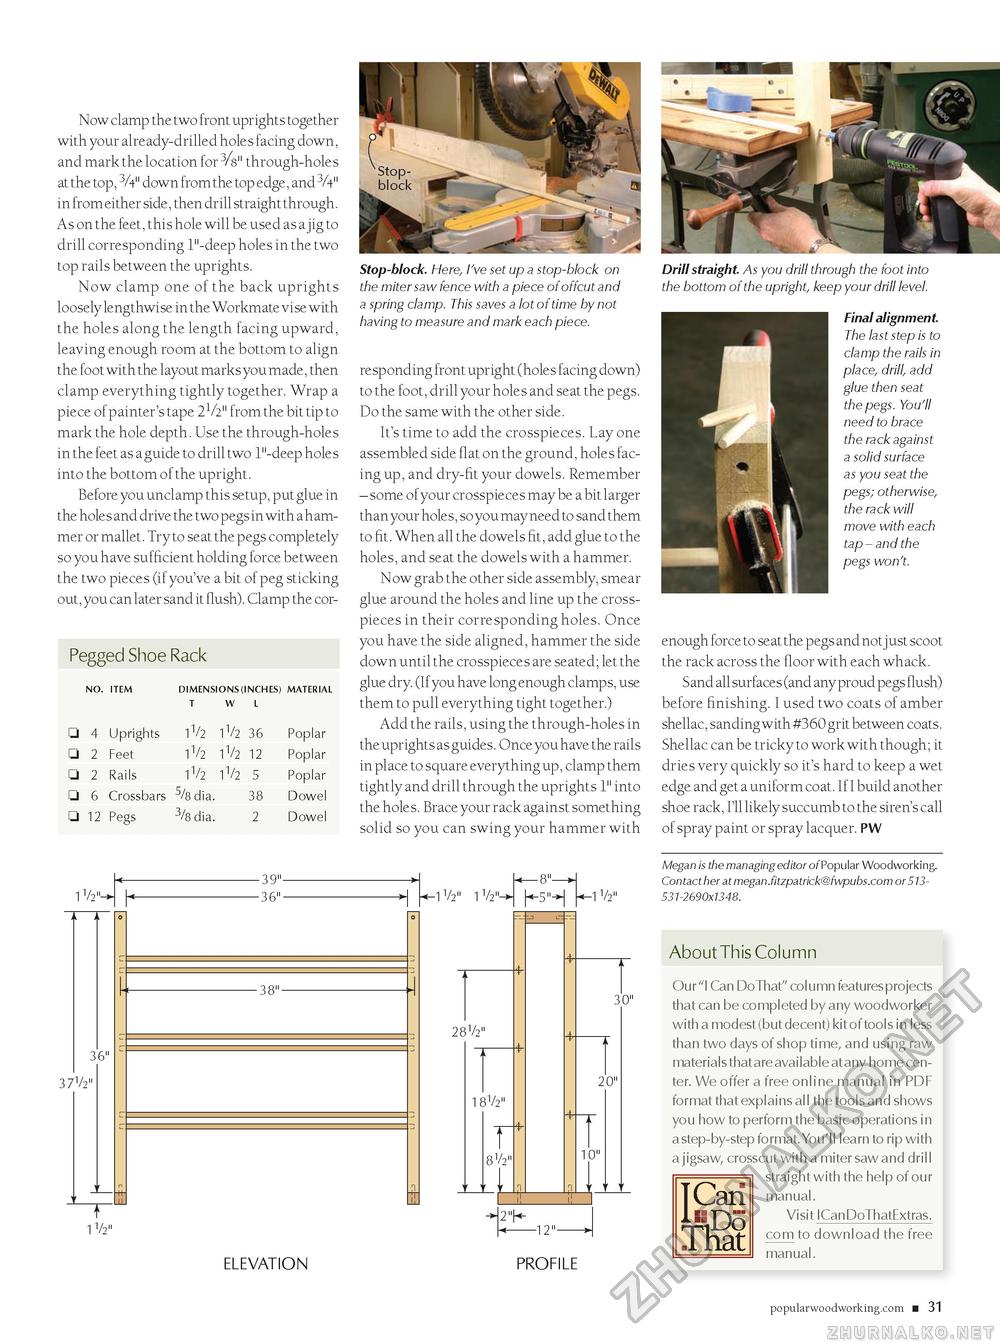
Now clamp the two front uprights together with your already-drilled holes facing down, and mark the location for 3/8" through-holes at the top, 3A" down from the top edge, and 3A" in from either side, then drill straight through. As on the feet, this hole will be used as a jig to drill corresponding 1"-deep holes in the two top rails between the uprights. Now clamp one of the back uprights loosely lengthwise in the Workmate vise with the holes along the length facing upward, leaving enough room at the bottom to align the foot with the layout marks you made, then clamp everything tightly together. Wrap a piece of painter's tape 21/2" from the bit tip to mark the hole depth. Use the through-holes in the feet as a guide to drill two 1"-deep holes into the bottom of the upright. Before you unclamp this setup, put glue in the holes and drive the two pegs in with a hammer or mallet. Try to seat the pegs completely so you have sufficient holding force between the two pieces (if you've a bit of peg sticking out, you can later sand it flush). Clamp the cor- Regged Shoe Rack DiMENSiONS (iNCHES) MATERIAL DiMENSiONS (iNCHES) MATERIAL NO. ITEM
1 1/2"- 36" 3 7V2" ~r 1V21 -39" -36" -38"- Stop-block. Here, I've set up a stop-block on the miter saw fence with a piece of offcut and a spring clamp. This saves a lot of time by not having to measure and mark each piece. responding front upright (holes facing down) to the foot, drill your holes and seat the pegs. Do the same with the other side. It's time to add the crosspieces. Lay one assembled side flat on the ground, holes facing up, and dry-fit your dowels. Remember - some of your crosspieces may be a bit larger than your holes, so you may need to sand them to fit. When all the dowels fit, add glue to the holes, and seat the dowels with a hammer. Now grab the other side assembly, smear glue around the holes and line up the cross-pieces in their corresponding holes. Once you have the side aligned, hammer the side down until the crosspieces are seated; let the glue dry. (If you have long enough clamps, use them to pull everything tight together.) Add the rails, using the through-holes in the uprights as guides. Once you have the rails in place to square everything up, clamp them tightly and drill through the uprights 1" into the holes. Brace your rack against something solid so you can swing your hammer with -IV2" 1V2" 28V2" 181 2" 81 2" _L -5"-i -1 V2" 30" 20" 10" 2"K 12" ELEVATiON RROFiLE Drill straight. As you drill through the foot into the bottom of the upright, keep your drill level. Final alignment. The last step is to clamp the rails in place, drill, add glue then seat the pegs. You'll need to brace the rack against a solid surface as you seat the pegs; otherwise, the rack will move with each tap - and the pegs won't. enough force to seat the pegs and notjust scoot the rack across the floor with each whack. Sand all surfaces (and any proud pegs flush) before finishing. I used two coats of amber shellac, sanding with #360 grit between coats. Shellac can be tricky to work with though; it dries very quickly so it's hard to keep a wet edge and get a uniform coat. If I build another shoe rack, I'll likely succumb to the siren's call of spray paint or spray lacquer. PW Megan is the managing editor of Popular Woodworking. Contact her at megan.fitzpatrick@fwpubs.com or 513-531-2690x1348. About This Column Our "I Can DoThat" column features projects that can be completed by any woodworker with a modest (but decent) kit of tools in less than two days of shop time, and using raw materials that are available at any home center. We offer a free online manual in PDF format that explains all the tools and shows you how to perform the basic operations in a step-by-step format.You'll learn to rip with a jigsaw, crosscut with a miter saw and drill straight with the help of our manual. Visit ICanDoThatExtras. com to download the free manual. popularwoodworking.com ■ 31 CIRCLE #100 ON FREE INFORMATION CARD. NO. ITEM |


