Popular Woodworking 2008-04 № 168, страница 32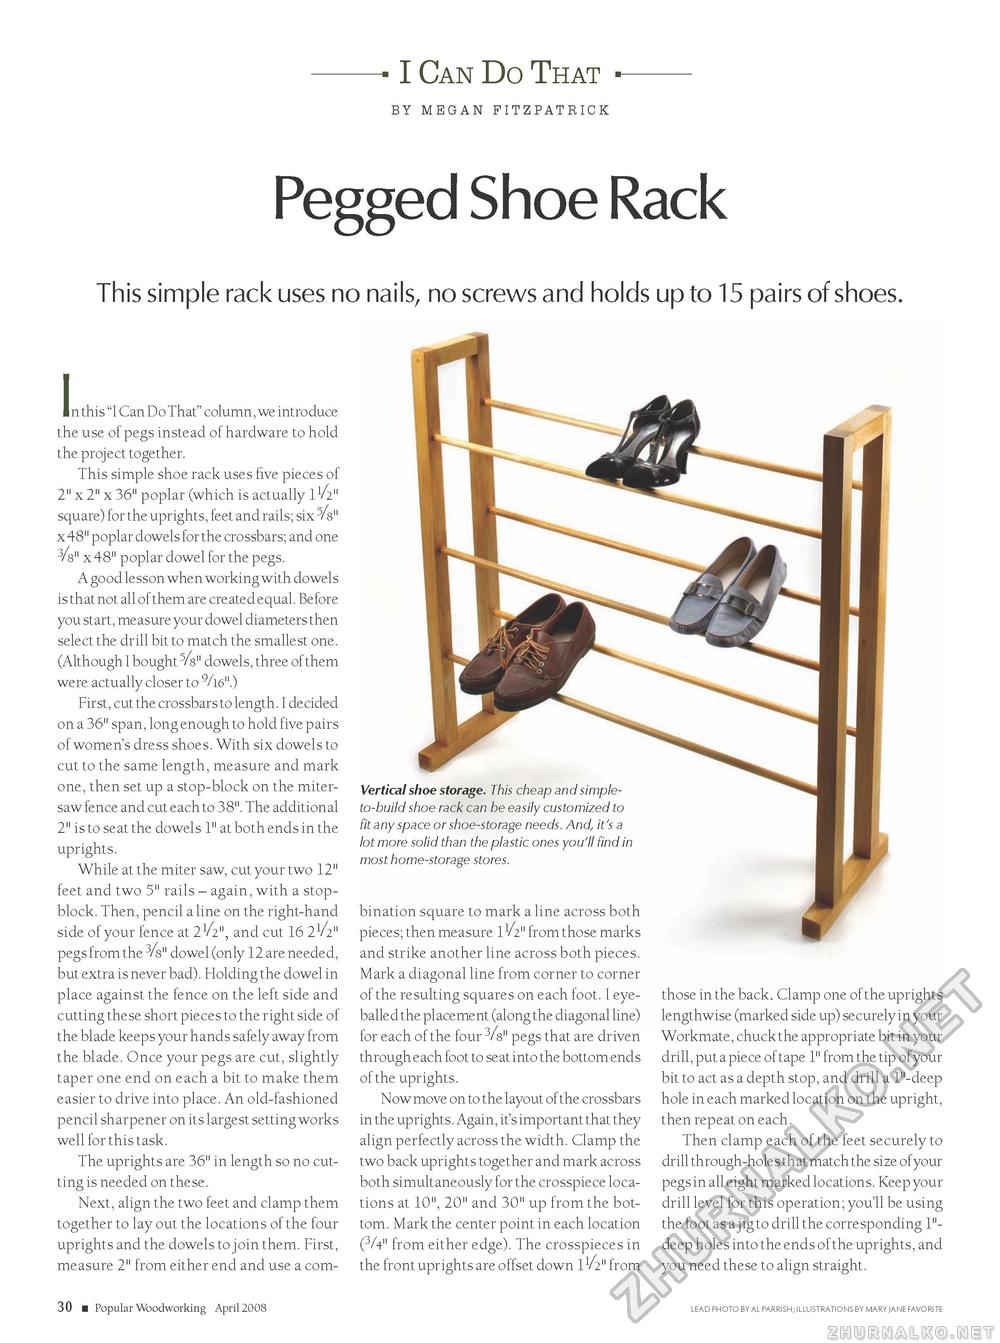
I Can Do That BY MEGAN FITZPATRICK Pegged Shoe Rack This simple rack uses no nails, no screws and holds up to 15 pairs of shoes. I n this "I Can Do That" column, we introduce the use of pegs instead of hardware to hold the project together. This simple shoe rack uses five pieces of 2" x 2" x 36" poplar (which is actually I1/!" square) for the uprights, feet and rails; six 5/8" x 48" poplar dowels for the crossbars; and one 3/8" x 48" poplar dowel for the pegs. A good lesson when working with dowels is that not all of them are created equal. Before you start, measure your dowel diameters then select the drill bit to match the smallest one. (Although I bought 5/8" dowels, three of them were actually closer to 9/16".) First, cut the crossbars to length. I decided on a 36" span, long enough to hold five pairs of women's dress shoes. With six dowels to cut to the same length, measure and mark one, then set up a stop-block on the miter-saw fence and cut each to 38". The additional 2" is to seat the dowels 1" at both ends in the uprights. While at the miter saw, cut your two 12" feet and two 5" rails - again, with a stop-block. Then, pencil a line on the right-hand side of your fence at 2V2", and cut 16 21/2" pegs from the 3/3" dowel (only 12 are needed, but extra is never bad). Holding the dowel in place against the fence on the left side and cutting these short pieces to the right side of the blade keeps your hands safely away from the blade. Once your pegs are cut, slightly taper one end on each a bit to make them easier to drive into place. An old-fashioned pencil sharpener on its largest setting works well for this task. The uprights are 36" in length so no cutting is needed on these. Next, align the two feet and clamp them together to lay out the locations of the four uprights and the dowels to join them. First, measure 2" from either end and use a com Vertical shoe storage. This cheap and simple-to-build shoe rack can be easily customized to fit any space or shoe-storage needs. And, it's a lot more solid than the plastic ones you'll find in most home-storage stores. bination square to mark a line across both pieces; then measure 11/2" from those marks and strike another line across both pieces. Mark a diagonal line from corner to corner of the resulting squares on each foot. I eye-balled the placement (along the diagonal line) for each of the four 3/8" pegs that are driven through each foot to seat into the bottom ends of the uprights. Now move on to the layout of the crossbars in the uprights. Again, it's important that they align perfectly across the width. Clamp the two back uprights together and mark across both simultaneously for the crosspiece locations at 10", 20" and 30" up from the bottom. Mark the center point in each location (3A" from either edge). The crosspieces in the front uprights are offset down 1V2" from those in the back. Clamp one of the uprights lengthwise (marked side up) securely in your Workmate, chuck the appropriate bit in your drill, put a piece of tape 1" from the tip of your bit to act as a depth stop, and drill a 1"-deep hole in each marked location on the upright, then repeat on each. Then clamp each of the feet securely to drill through-holes that match the size ofyour pegs in all eight marked locations. Keep your drill level for this operation; you'll be using the foot as a jig to drill the corresponding 1"-deep holes into the ends of the uprights, and you need these to align straight. 30 ■ Popular Woodworking April 2008 LEAD RHoto BY AL RARRisH; ILLusTRATIons BY MARY JANE FAYoRITE |


