Popular Woodworking 2008-04 № 168, страница 70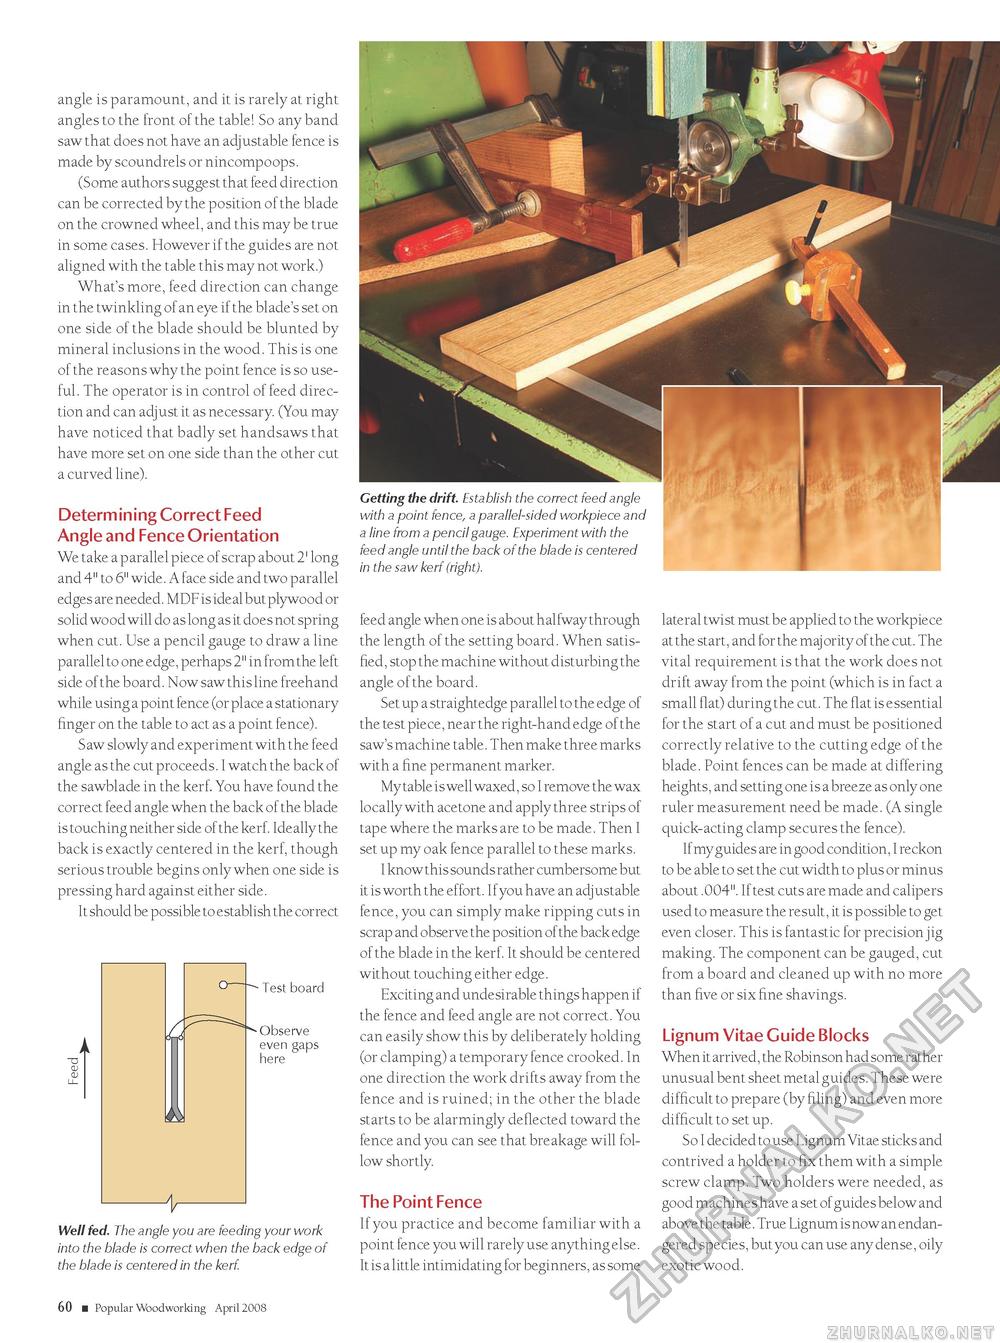
angle is paramount, and it is rarely at right angles to the front of the table! So any band saw that does not have an adjustable fence is made by scoundrels or nincompoops. (Some authors suggest that feed direction can be corrected by the position of the blade on the crowned wheel, and this may be true in some cases. However if the guides are not aligned with the table this may not work.) What's more, feed direction can change in the twinkling of an eye if the blade's set on one side of the blade should be blunted by mineral inclusions in the wood. This is one of the reasons why the point fence is so useful. The operator is in control of feed direction and can adjust it as necessary. (You may have noticed that badly set handsaws that have more set on one side than the other cut a curved line). Determining Correct Feed Angle and Fence Orientation We take a parallel piece of scrap about 2' long and 4" to 6" wide. A face side and two parallel edges are needed. MDF is ideal but plywood or solid wood will do as long as it does not spring when cut. Use a pencil gauge to draw a line parallel to one edge, perhaps 2" in from the left side of the board. Now saw this line freehand while using a point fence (or place a stationary finger on the table to act as a point fence). Saw slowly and experiment with the feed angle as the cut proceeds. I watch the back of the sawblade in the kerf. You have found the correct feed angle when the back of the blade is touching neither side of the kerf. Ideally the back is exactly centered in the kerf, though serious trouble begins only when one side is pressing hard against either side. It should be possible to establish the correct Test board Observe even gaps here Well fed. The angle you are feeding your work into the blade is correct when the back edge of the blade is centered in the kerf. Getting the drift. Establish the correct feed angle with a point fence, a parallel-sided workpiece and a line from a pencil gauge. Experiment with the feed angle until the back of the blade is centered in the saw kerf (right). feed angle when one is about halfway through the length of the setting board. When satisfied, stop the machine without disturbing the angle of the board. Set up a straightedge parallel to the edge of the test piece, near the right-hand edge of the saw's machine table. Then make three marks with a fine permanent marker. My table is well waxed, so I remove the wax locally with acetone and apply three strips of tape where the marks are to be made. Then I set up my oak fence parallel to these marks. I know this sounds rather cumbersome but it is worth the effort. If you have an adjustable fence, you can simply make ripping cuts in scrap and observe the position of the back edge of the blade in the kerf. It should be centered without touching either edge. Exciting and undesirable things happen if the fence and feed angle are not correct. You can easily show this by deliberately holding (or clamping) a temporary fence crooked. In one direction the work drifts away from the fence and is ruined; in the other the blade starts to be alarmingly deflected toward the fence and you can see that breakage will follow shortly. The Point Fence If you practice and become familiar with a point fence you will rarely use anything else. It is a little intimidating for beginners, as some lateral twist must be applied to the workpiece at the start, and for the maj ority of the cut. The vital requirement is that the work does not drift away from the point (which is in fact a small flat) during the cut. The flat is essential for the start of a cut and must be positioned correctly relative to the cutting edge of the blade. Point fences can be made at differing heights, and setting one is a breeze as only one ruler measurement need be made. (A single quick-acting clamp secures the fence). If my guides are in good condition, I reckon to be able to set the cut width to plus or minus about .004". If test cuts are made and calipers used to measure the result, it is possible to get even closer. This is fantastic for precision jig making. The component can be gauged, cut from a board and cleaned up with no more than five or six fine shavings. Lignum Vitae Guide Blocks When it arrived, the Robinson had some rather unusual bent sheet metal guides. These were difficult to prepare (by filing) and even more difficult to set up. So I decided to use Lignum Vitae sticks and contrived a holder to fix them with a simple screw clamp. Two holders were needed, as good machines have a set of guides below and above the table. True Lignum is now an endangered species, but you can use any dense, oily exotic wood. 60 ■ Popular Woodworking April 2008 MX |


