Popular Woodworking 2008-06 № 169, страница 10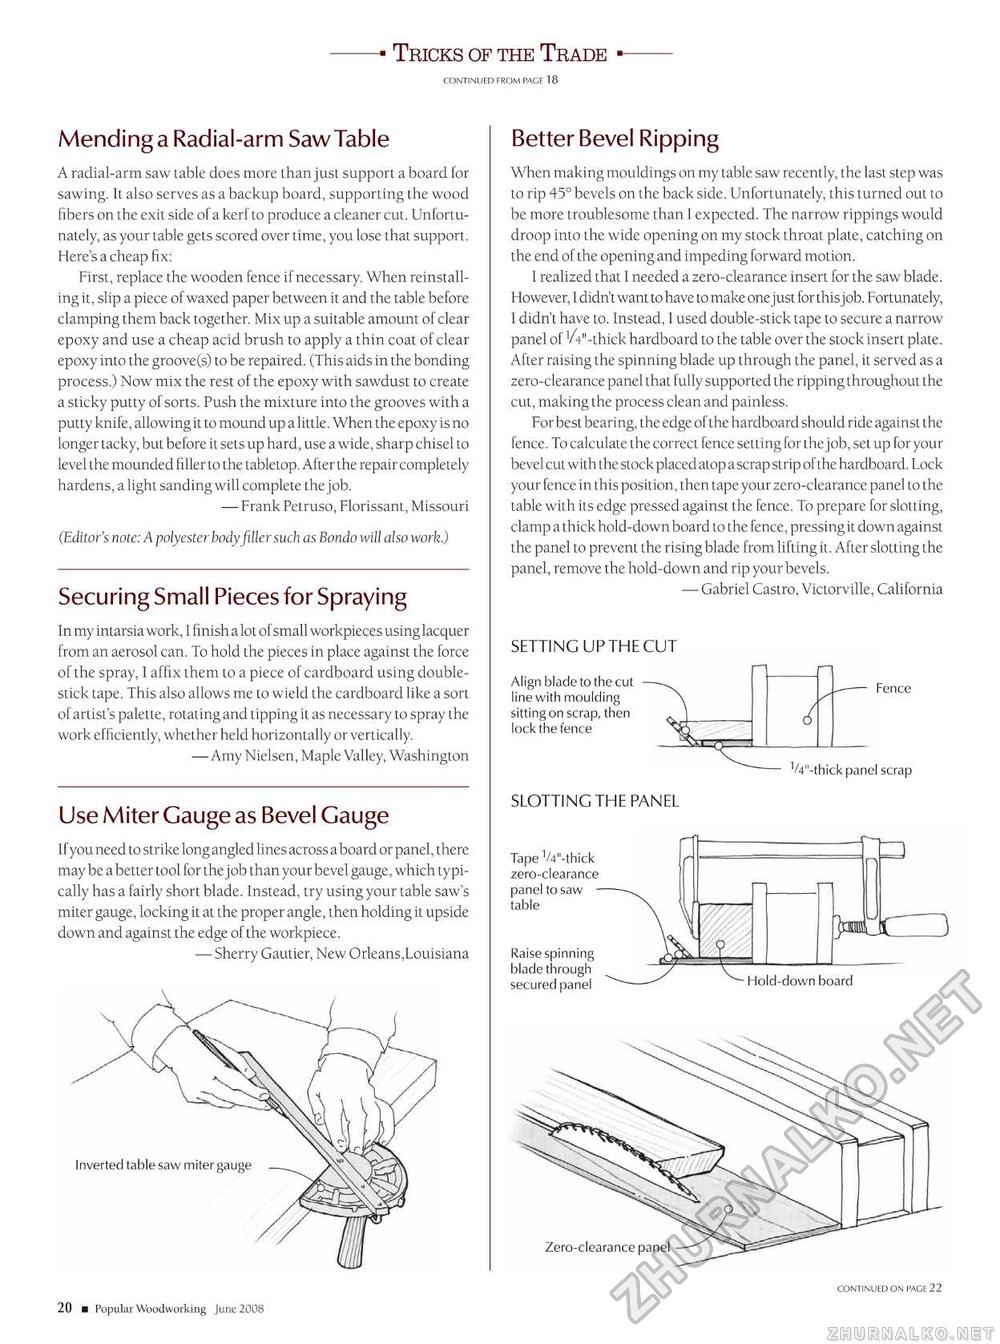
—" Tricks of the Trade ■— Mending a Radial-arm Saw Table A radial-arm saw table does more than just support a board for sawing. It also serves as a backup board, supporting the wood fibers on the exit side of a kerf to produce acleanercut.Un fortunately, as your table gets scored over time, you lose that support. Here's a cheap fix: First, replace the wooden fence if necessary. When reinstalling it, slip a piece of waxed paper between it and the table before clamping them back together. Mix up a suitable amount of clear epoxy and use a cheap acid brush to apply a thin coat of clear epoxy into the groove(s) to be repaired. (This aids in the bonding process.) Now mix the rest of the epoxy with sawdust to create a sticky putty of sorts. Push the mixture into the grooves with a putty knife, allowing it to mound up a little. When the epoxy is no longer tacky, but before it sets up hard, use a wide, sharp chisel to level the mounded filler to the tabletop. After the repair completely hardens, a light sanding will complete the job. — Frank Petruso, Florissant, Missouri (Editor's note: A polyester body filler such as Bondo will also work.) Securing Small Pieces for Spraying In my intarsia work, I finish a lot of small workpieces using lacquer from an aerosol can. To hold the pieces in place against the force of the spray, I affix them to a piece of cardboard using double-stick tape. This also allows me to wield the cardboard like a sort of artist's palette, rotating and lipping it as necessary to spray the work efficiently, whether held horizontally or vertically. —Amy Nielsen, Maple Valley, Washington Use Miter Gauge as Bevel Gauge If you need to strike long angled lines across a board or panel, there may be a better tool for the job than your bevel gauge, which typically has a fairly short blade. Instead, try using your table saw's miter gauge, locking it at the proper angle, then holding it upside down and against the edge of the workpiece. —Sherry Gautier, New Orleans,Louisiana Better Bevel Ripping When making mouldings on my table saw recently, the last step was to rip 45° bevels on the back side. Unfortunately, this turned out to be more troublesome than I expected. The narrow rippings would droop into the wide opening on my stock throat plate, catching on the end of the opening and impeding forward motion. 1 realized that I needed a zero-clearance insert for the saw blade. However, I didn't want to have to make onejust for thisjob. Fortunately, 1 didn't have to. Instead, 1 used double-stick tape to secure a narrow panel of V4" -thick hardboard to the table over the stock insert plate. After raising the spinning blade up through the panel, it served as a zero-clearance panel that fully supported the ripping throughout the cut, making the process clean and painless. For best bearing, the edge of the hardboard should ride against the fence. To calculate the correct fence setting for the job, set up for your bevel cut with the stock placed atop a scrap strip of the hardboard. Lock your fence in this position, then tape your zero-clearance panel to the table with its edge pressed against the fence. To prepare for slotting, clamp a thick hold-down board to the fence, pressing it down against the panel to prevent the rising blade from lifting it. After slotting the panel, remove the hold-down and rip your bevels. — Gabriel Castro, Victorville, California setting up the cut Tape V4"-thick zero-clearance table Raise spinning blade through ^ » secured panel "*---Hold-down board Inverted table Se Zero-clearance panel |


