Popular Woodworking 2008-10 № 171, страница 15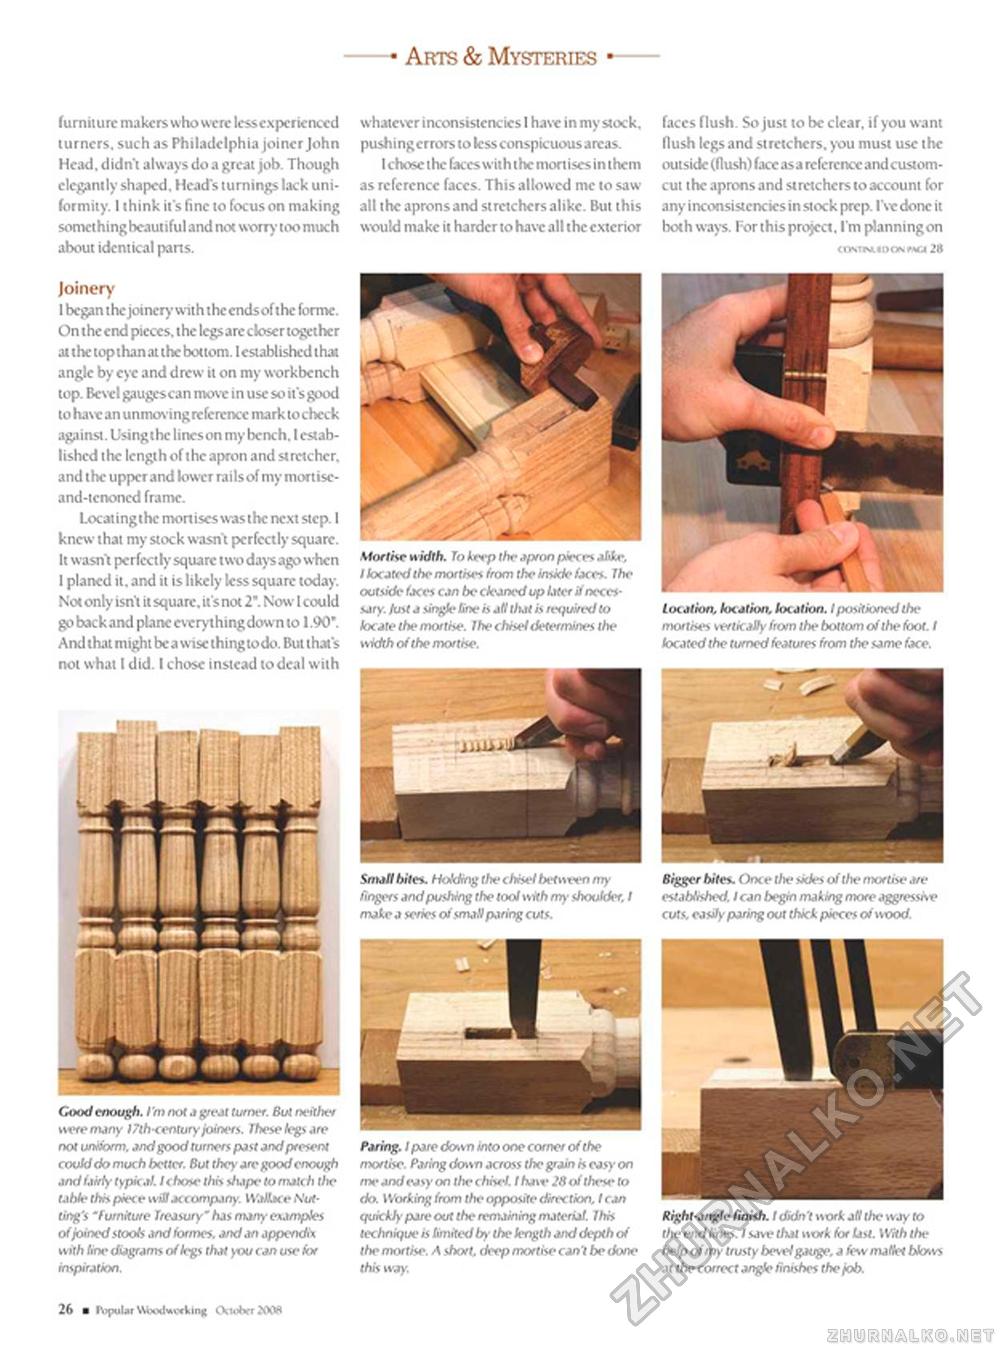
■ Arts & Mysteries ■ furniture makers who were Icsscxpcrienoed turners, such as Philadelphia joiner John Head, didn't always do a great job. Though elegantly shaped. Head's turnings lack uniformity. I think it's fine to focus on making something beautiful and not worry too much about identical parts. Joinery I began the joiner)1 with theendsof the forme. On theerid pieces, the legsare closer together at the top than at the bottom. I established that angle by eye and drew it on my workbench lop. Bevel gaugescan move in use so it's good to have an unmovingreference mark to check against. Usingthe lines on my bench. I established the length of the apron and stretcher, and ihc upper and lower railsof my mortisc-and-tcnoncd frame. Locatingthc mortises was the next step. I knew that my stock wasn't perfectly square. It wasn't perfectly square two days ago when I planed it. and it is likely less square today. Not only isn't it square, it's not 2". Now I could go back and plane everything down to 1.90*. And thai might be a wise thing to do. But that's nol what I did. I chose instead to deal with whatever inconsistencies I have in my stock, pushingcrrors to less conspicuous areas. 1 chose the faces with the mortises in them as reference faces. This allowed me to saw all the aprons and stretchers alike. But this would make it harder to have all t he exterior faces flush. So just to be clear, if you want flush legs and stretchers, you must use the outside (flush) face as a reference and custom-cut the aprons and stretchers to account for any inconsistencicsin stock prep. I've done it both ways. For this project, I'm planningon Marine width. To kti-p the apron piece* ahke. I located the mortises from the inside facet. The outside faces can be cleaned up later if necessary. hist a single line isatl that is required to locate the mortise. Ihe chisel determines the width of the mortise. location, location, location. I positioned the mortises vertically from the bottom of the foot. I located the turned features from the same face. Small bite*. Holding the chisel between my ringers and pushing the tool with my shoulder. I make a series of small paring cuts. Bigger bites. Once the sides of the mortise are established. I can begin making more aggressise cuts, easily paring out thick pieces of wood. Good enough. I'm not a peat turner. But neither were many 17th<entury joiners, these legs are not uniform, and good turners past and present could do much better. But they are good enough and fairly typical. IchoM'this shape tomalch the table this piece will accompany. Mfebce Nutting's "f urniture Treasury' has ntany examples of joined stools and formes, and an appendix with line diagrams of legs that you can use for inspiration. Paring. I pare down tnto one corner of the mortise. Paring down across the grain is easy on me and easy on the (Mwl I haw 28 of these to do. Working from the opposite direction, I can quickly pore out the remaining material. This technique is limited by the length and depth of the mortise. A short, deep mortise can't be done this way. Right-angle finish. I didn't work all the way to r/»e end One*. / save that work for last. With the help of my trusty bevel gauge, a few mallet blows at the correct angle finishes the job. 26 ■ ttftlm Woodworking OiohrrJOOH |


