Popular Woodworking 2008-11 № 172, страница 52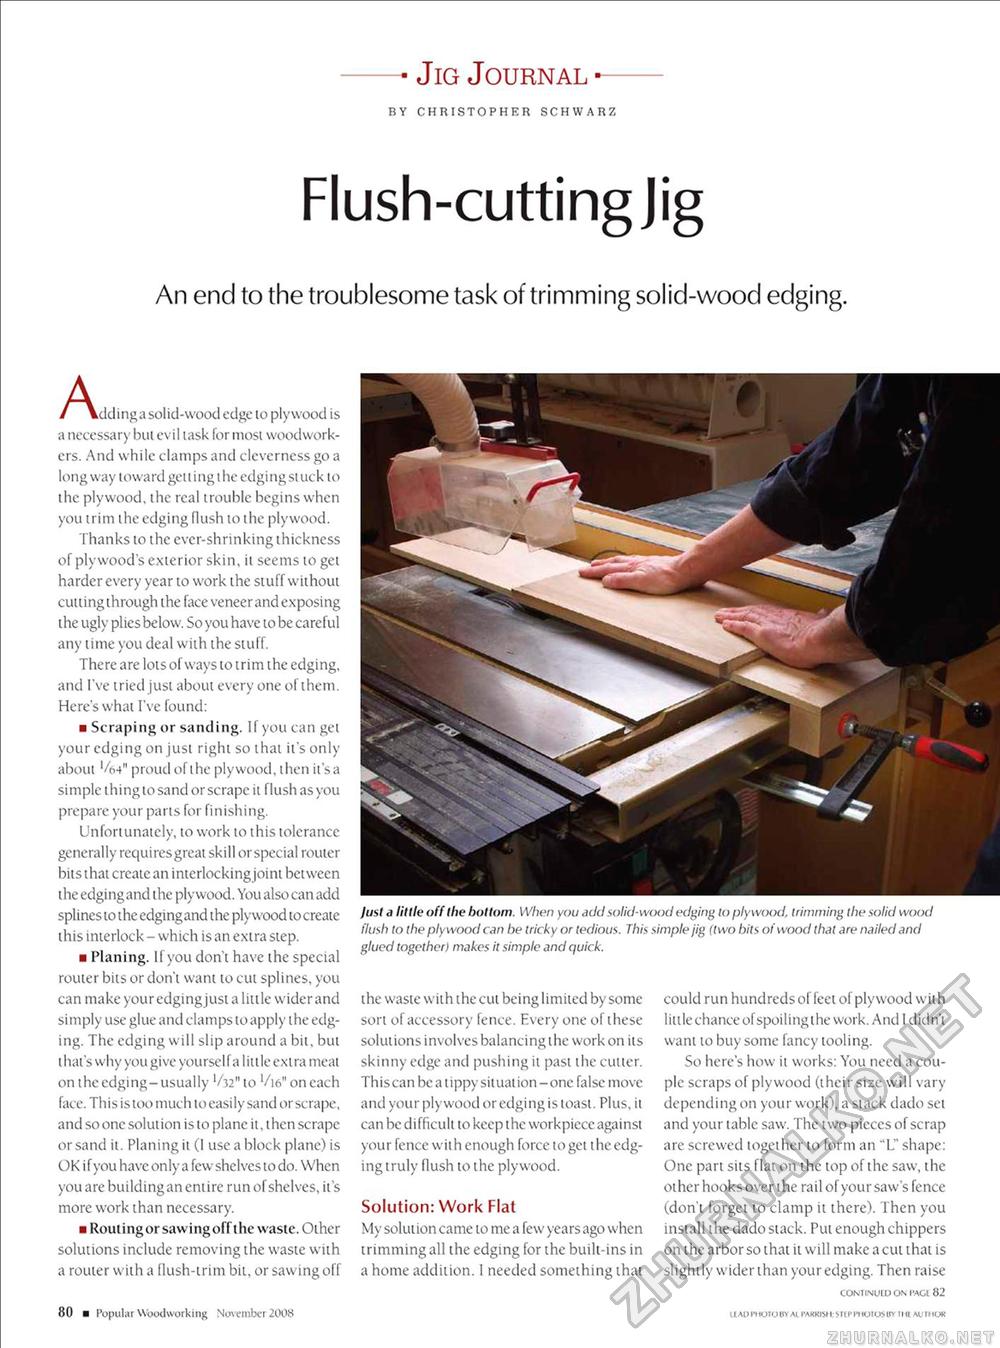
— Jig Journal — BY CHRISTOPHER SCHWARZ Flush-cutting Jig An end to the troublesome task of trimming solid-wood edging. A / \tlcl i ng a solid-wood edge lo plywood is a necessary bul evil task for most woodworkers. And while clamps and cleverness go a long way toward getting the edgingstuck to the plywood, the real trouble begins when you trim the edging flush to the plywood. Thanks to the ever-shrinking thickness of plywood's exterior skin, it seems to get harder every year to work the stuff without cutting through the face veneer and exposing the ugly plies below. So you have to be careful any time you deal with the siuTf. There are lots of ways to trim the edging, and I've tried just about every one of them. Here's what I've found: ■ Scraping or sanding. Ifyou can gel your edging on just right so that it's only about '/f)4" proud of lhe plywood, then it's a simple thing to sand orscrape it flush as you prepare your parts for finishing. Unfortunately, to work to this tolerance / 1 generally requires great skill or special rouier bits ihat creaie an interlocking joint between the edgingand the plywood. You also can add splines to the edgingand the plywood to create this interlock - which is an extra step. ■ Planing, ll you don't have the special router bits or don't want to cut splines, you can make your edging just a little wider and simply use glue and clamps to apply the edg-ing. The edging will slip around a bit, but that's why you give yourself a little extra meal on the edging-usually V32" to '/ie>" on each face. This is too much to easily sand orscrape, and so one solution is to plane it, then scrape or sand it. Planing it (I use a block plane) is OK if you have only a few shelves to do. When you are buildingan entire run of shelves, it's more work than necessary. ■ Routing or sawing off the waste. Other solutions include removing the waste with a rouier with a flush-trim bit, or sawing off just a little off the bottom. When you add solid-wood edging to plywood, trimming the solid wood flush to the plywood can be tricky or tedious. This simple jig (two bits of wood that are nailed and glued together) makes it simple and quick. the waste with the cut being limited by some sort of accessory fence. Every one of these solutions involves balancing the work on its skinny edge and pushing it past the cutler. This can bea tippy situation-one false move and your plywood or edging is toast. Plus, it can be difficult to keep the workpiece against your fence with enough force to get the edging iruly flush to the plywood. Solution: Work Flat My solution came to me a few years ago when trimming all the edging for the buili-ins in a home addition. 1 needed something that could run hundreds of feet of plywood with little chance ofspoilingihe work. And I didn't want to buy some fancy tooling. So here's how it works: You need a couple scraps of plywood (their size will vary depending on your work), a slack dado set and your table saw. The two pieces of scrap are screwed together to form an "L" shape: One part sits flat on ihe top of the saw, the other hooks over ihe rail of your saw's fence (don't forget to clamp it there). Then you install the dado stack. Put enough chippers on the arbor so thai it will make a cut that is slightly wider than your edging. Then raise CONTINULl) OS I'AGl 82 80 a Popular Woodworking November 2008 HAD CI I'JIU BY AI PARKBtt5UPPtlOtOSBVTHI AllIMOK |


