Popular Woodworking 2008-12 № 173, страница 63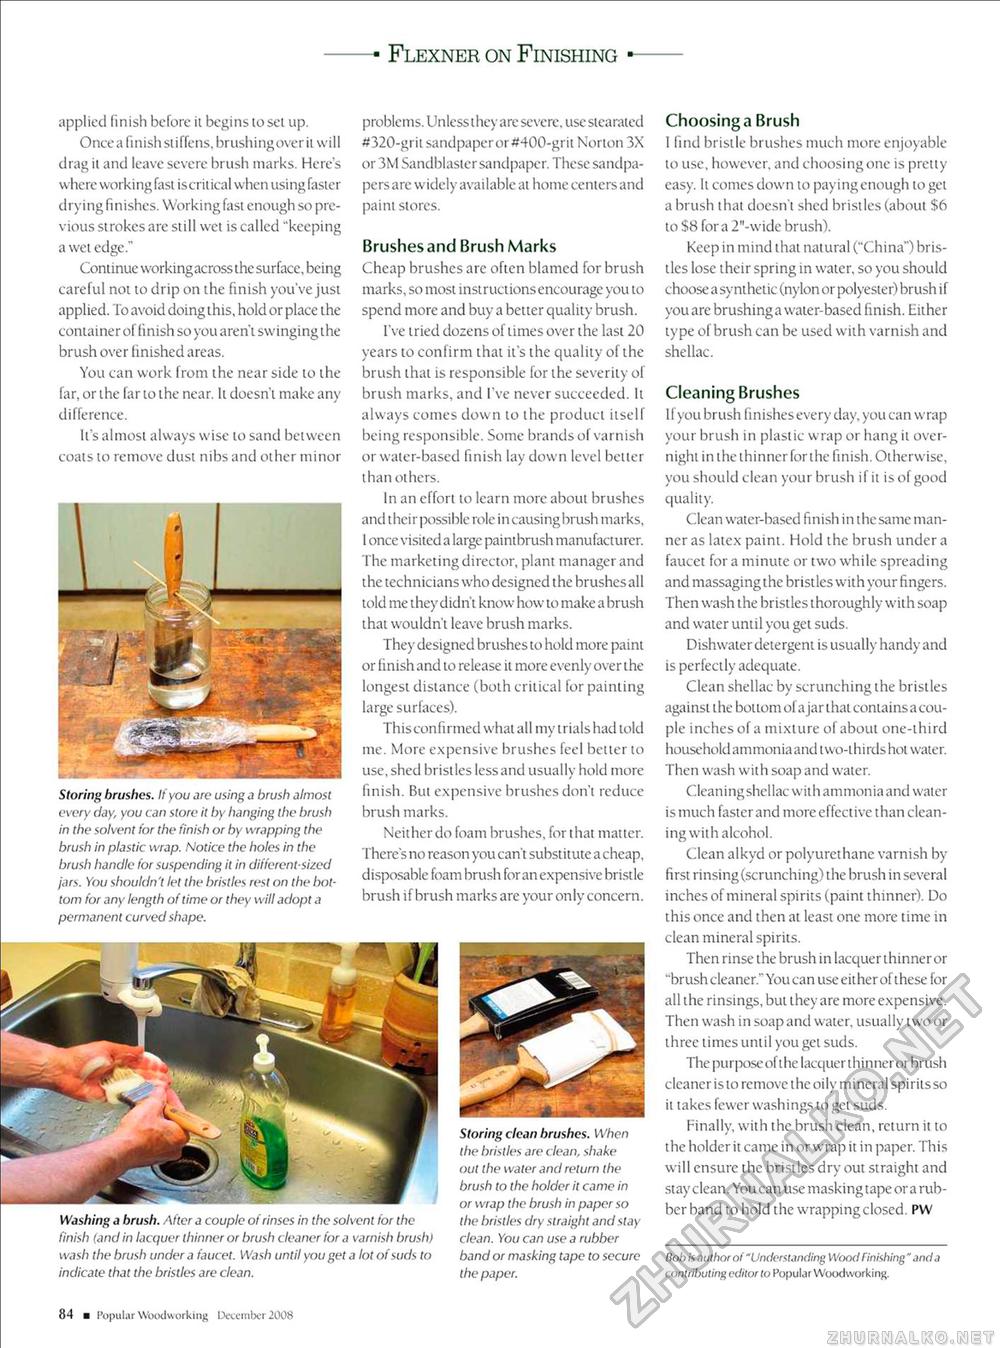
Flexner on Finishing problems. Unlessihcy are severe, use siearaied #320-grit sandpaper or #400-grit Norton 3X or 3M Sandblaster sandpaper. These sandpapers are widely available at home centers and paint stores. Brushes and Brush Marks Cheap brushes arc often blamed for brush marks, so most instructions encourage you to spend more and buy a better quality brush. I've tried dozens of limes over ihe lasi 20 years to confirm thai it's the quality of the brush lhai is responsible for ihe severity of brush marks, and I've never succeeded. Ii always comes down lo the product itself being responsible. Some brands of varnish or water-based finish lay down level better than others. In an effort to learn more about brushes and their possible role in causing brush marks, I once visited a large paintbrush manufacturer. The marketing director, plant manager and the technicians who designed the brushesall told me they didn't know how to make a brush that wouldn't leave brush marks. They designed brushes to hold more paint or finish and to release it more evenly over ihe longest distance (both critical for painting large surfaces). This confirmed what all my trials had told me. More expensive brushes feel better to use, shed bristles less and usually hold more finish. But expensive brushes don't reduce brush marks. Neither do foam brushes, for that matter. There's no reason you can't substitute a cheap, disposable foam brush for an expensive bristle brush if brush marks are vour only concern. J J Washing a brush. After a couple of rinses in the solvent for the finish (and in lacquer thinner or brush cleaner for a varnish brush) wash the brush under a faucet. Wash until you get a lot of suds to indicate that the bristles are clean. Storing clean brushes. When the bristles are clean, shake out the water and return the brush to the holder it came in or wrap the brush in paper so the bristles dry straight and stay clean. You can use a rubber band or masking tape to secure the paper. applied finish before it begins loset up. Once a 11 n ish st i ffens, brush i rig over it will drag ii and leave severe brush marks. Here's where working fast is critical when using faster drying finishes. Working fast enough so previous strokes are still wet is called "keeping a wet edge." Continue working across the surface, being careful noi to drip on the finish you've just applied. To avoid doing this, hold or place the container of finish so you aren't swinging the brush over finished areas. You can work from ihe near side to ihe far, or ihe far to the near. Ii doesn't make any difference. ll's almost always wise to sand between coats to remove dust nibs and other minor Storing brushes. If you are using a brush almost every day, you can store it by hanging the brush in the solvent for the finish or by wrapping the brush in plastic wrap. Notice the holes in the brush handle for suspending it in different-sized jars. You shouldn't let the bristles rest on the bottom for any length of time or they will adopt a permanent curved shape. 84 ■ Popul ar Woodworking December 2008 Choosing a Brush I find bristle brushes much more en joyable to use, however, and choosing one is pretty easy. It comes down to paying enough to get a brush that doesn't shed bristles (about $6 to $8 for a 2"-wide brush). Keep in mind that natural ("China") bristles lose iheir spring in water, so you should choose a synthetic (nylon or polyester) brush if you are brushing a water-based finish. Hither type of brush can be used with varnish and shellac. Cleaning Brushes If you brush finishes every day, you can wrap your brush in plastic wrap or hang it overnight in the thinner forthe finish. Otherwise, you should clean your brush il it is of good quality. Clean water-based finish in the same manner as latex paint. Hold the brush under a faucet for a minute or two while spreading and massaging the bristles with your fingers. Then wash the bristles thoroughly with soap and water until you get suds. Dishwater detergent is usually handy and is perfectly adequate. Clean shellac by scrunching ihe bristles againsi the bottom ofajar that contains a couple inches of a mixture of about one-third household ammonia and two-thirds hoi water. Then wash with soap and water. Cleaning shellac with ammonia and water is much faster and more effective t han cleaning with alcohol. Clean alkyd or polyurcthane varnish by first rinsing (scrunching) the brush in several inches of mineral spirits (paint thinner). Do this once and then at least one more time in clean mineral spirits. Then rinse the brush in lacquer thinner or "brush cleaner." You can use eit her of these for all the rinsings, but they are more expensive. Then wash in soap and water, usually two or three times until you get suds. The purpose of the lacquer thinner or brush cleaner is to remove the oily mineral spirits so it takes fewer washings to gel suds. Finally, with the brush clean, return it to the holder it came in or wrap it in paper. This will ensure the bristles dry out straight and stay clean. You can use masking tape or a rub-ber band to hold the wrapping closed. PW Hob is author of "Understanding Wood finishing " and a contributing editor to Popular Woodworking. |


