Popular Woodworking 2009-02 № 174, страница 41
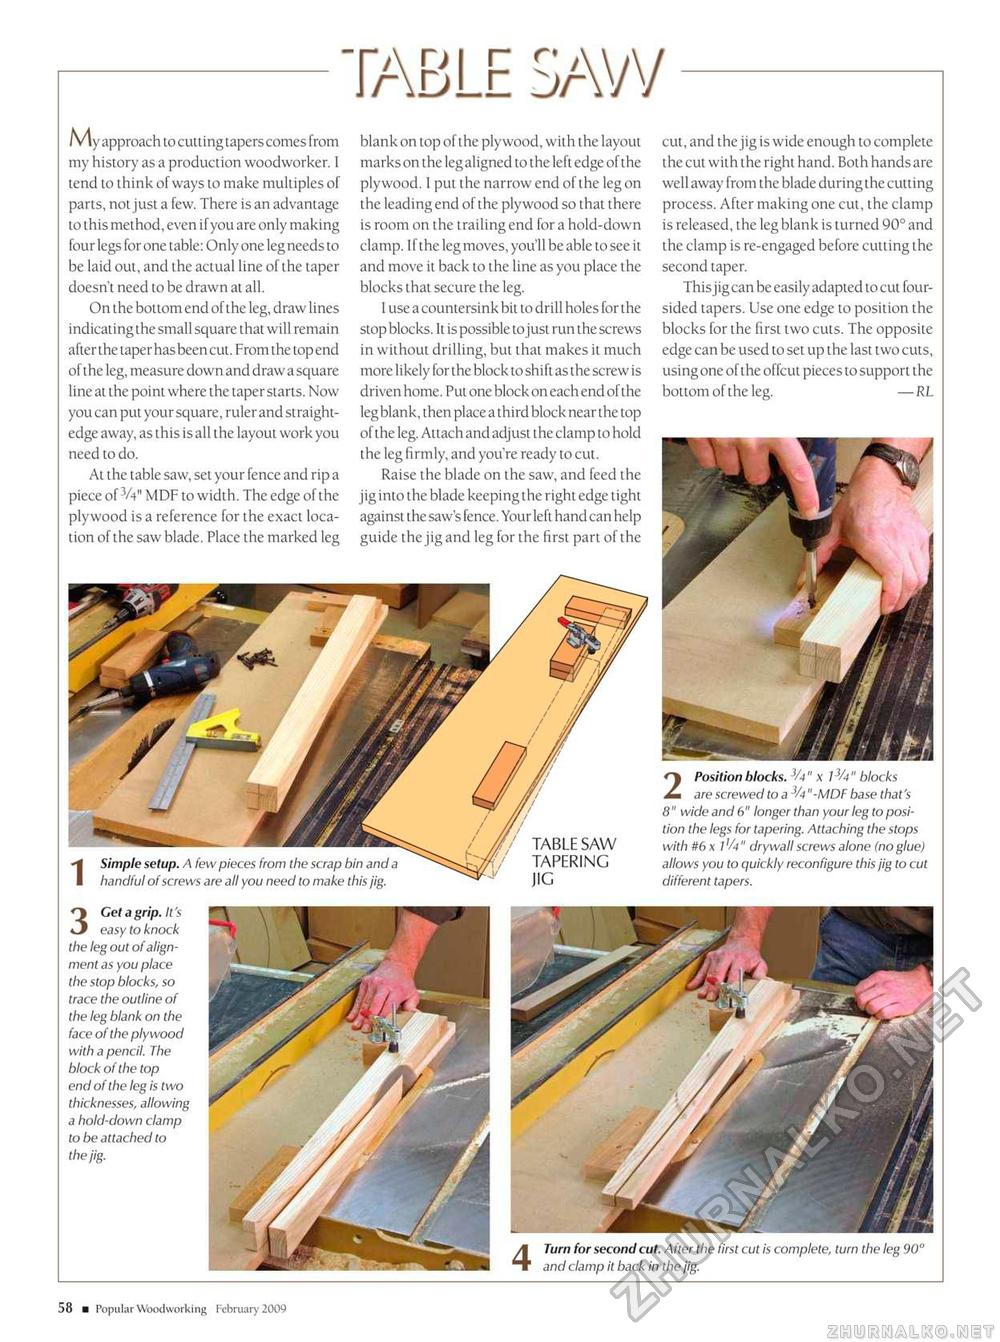
TABLE SAW 2 Position blocks. 3A" x l3A" blocks are screwed to a 3A"-MDF base that's 8" wide and 6" longer than your leg to position the legs for tapering. Attaching the stops with #6 x I 'A " drywall screws alone (no glue) allows you to quickly reconfigure this jig to cut different tapers. My approach to culling tapers comes from my history as a production woodworker. I tend to think of ways to make multiples of parts, not just a few. There is an advantage to this method, even ifyou are only making four legs for one table: Only one leg needs to be laid out, and the actual line of the taper doesn't need to be drawn at all. On the bottom end of the leg, draw lines indicating the small square that will remain after the taper has been cut. From the top end of the leg, measure down and draw a square line at the point where the taper starts. Now you can put your square, ruler and straightedge away, as this is all the layout work you need to do. At the table saw, set your fence and rip a piece of V4" MDF to width. The edge of the plywood is a reference for the exact location of the saw blade. Place the marked leg blank on top of the plywood, with the layout marks on the leg aligned to the left edge of the plywood. 1 put the narrow end of the leg on the leading end of the plywood so that there is room on the trailing end for a hold-down clamp. If the leg moves, you'll be able to see it and move it back to the line as you place the blocks that secure the leg. I use a countersink bit to drill holes for the stop blocks. It is possible to just run the screws in without drilling, but that makes it much more likely for the block to shift as the screw is driven home. Put one block on each end of the leg blank, then place a third block near the top of the leg. Attach and adjust the clamp to hold the leg firmly, and you're ready to cut. Raise the blade on the saw, and feed the jig into the blade keeping the right edge tight against the saw's fence. Your left hand can help guide the jig and leg for the first part of the cut, and the jig is wide enough to complete the cut with the right hand. Both hands are well away from the blade during the cutting process. After making one cut, the clamp is released, the leg blank is turned 90° and the clamp is re-engaged before cutting the second taper. Thisjigcan be easily adapted to cut four-sided tapers. Use one edge to position the blocks for the first two cuts. The opposite edge can be used to set up the last two cuts, using one of the offcut pieces to support the bottom of the leg. — RL 1 Simple setup. A few pieces from the scrap bin and a handful of screws are all you need to make this jig. TABLE SAW TAPERING JIG 3 Get a grip. It's easy to knock the leg out of alignment as you place the stop blocks, so trace the outline of the leg blank on the face of the plywood with a pencil. The block of the top end of the leg is two thicknesses, allowing a hold-down clamp to be attached to thejig. 58 ■ Popular Woodworking February 2009 |


