Popular Woodworking 2009-06 № 176, страница 11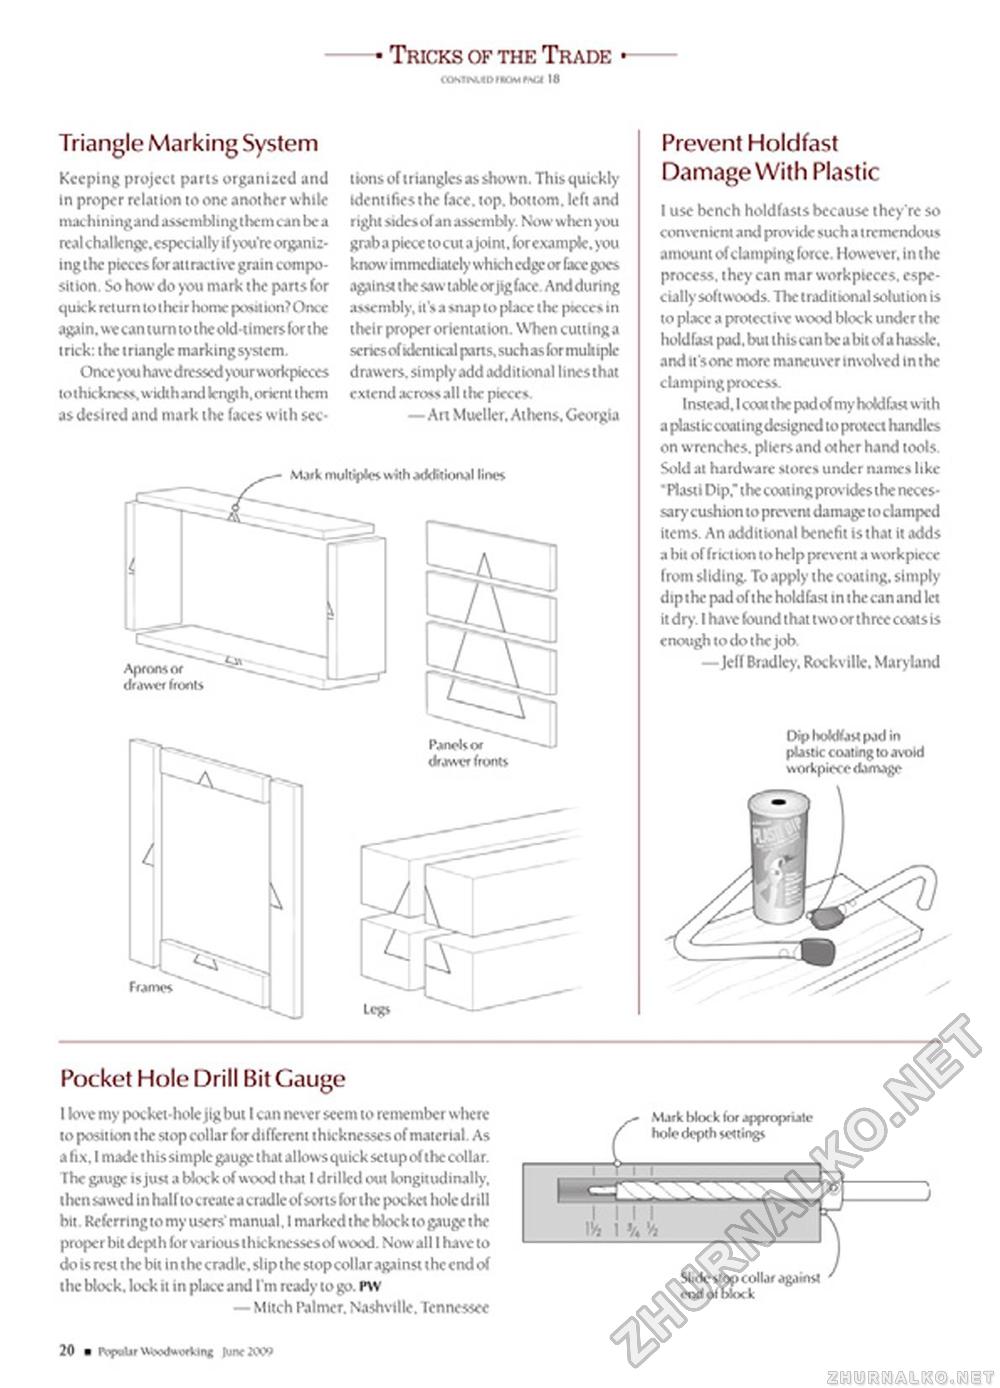
• Tricks of the Trade • Triangle Marking System Keeping project parts organised and in proper relation to one another while machimngand asscmblingthcm can be a real c hal kngc. especially if you're orga n i ingthe pieces for attract iw grain composition. So how do you mark the parts for quick return to their home position? Once aftiln, w« can turn to the old-timers for the trick: the triangle marking system. Once you have dressed yvxir wwkpieces to thickness, widt h and kngt h, orient t hem as desited and mark the faces with sec tions of triangles as shown. This quickly identlfiesthe face. top. bottom, left and right sidesof an assembly. Now when you graba piece tocut a joint, for example, you know immediately which edge or face goes against the saw table or jig face Andduring assembly, it's a snap to place the pieces in their proper orientation. When cuuinga sencs of identical pans, such as lor multiple drawers, simply add additional lines that extend acrossall the pieces. —An Mueller, Athens. Georgia Prevent Holdfast Damage With Plastic I use bench holdfasts because they're so convenient and provide such a I rrmendous amount of clamping force. However, in the process, they can mar workpieces, especially softwoods. The traditional solution is to place a protective wood block under the holdfast pod. but this can be a bit o(a hassle, and tt'sone more maneuver involved in the clamping process. Instead. I com the pod of my holdfast with a plasticcualingdcsigncd to prutcct handles on wrenches, pliersand other hand tools. Sold at hardware stores under names like "Plasti Dip." the coating presides the necessary cushion to prevent damage to clamped items. An additional benefit is that it adds a bit of friction to help present a workpiccc from sliding. To apply the coating, simply dipthe pad of the holdfast in the can and let it dry. I haw found that two or three coats is enough to do the job. —Jell Bradley. Rockville. Maryland Dip huWfjH pad in plastic coating to avoid woripieee damage Pocket Hole Drill Bit Gauge I love my pockei-holc jig but I can new seem to remember where to position the stop collar for different thicknesses of material. As a fix. I made this simple gauge that allowsquick setup of the collar. The gauge is just a bkxk of wxxxl that I drilkd out longitudinally, then sawed in half to create a cradle of sorts for the pocket holcdrill hit Referring to my users' manual. I marked the block to gauge the proper bit depth for various thkkncsscsof wood. Now all I haw to do is rest the bit in the cradle, slip the stopcollaragainst the end of the block. lock it in place and I'm ready to go. FW — Mitch Palmer. Nashville. Tennessee L Slidestopcollaragamst ' 20 ■ ItpfcrVfrodffRfctag Mn.W) |


