Popular Woodworking 2009-06 № 176, страница 28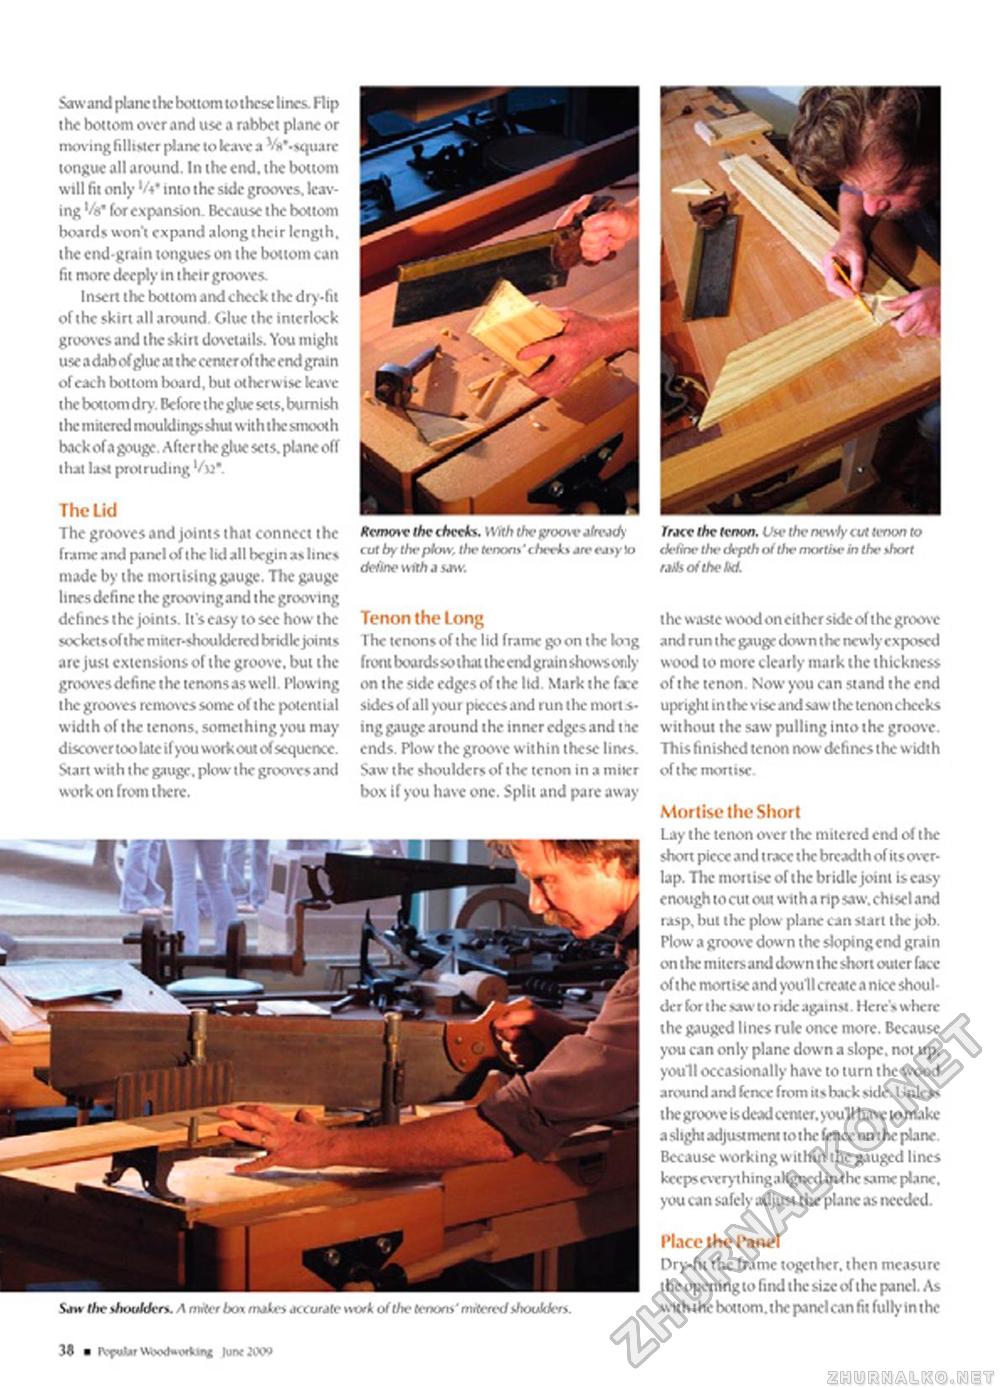
Sow and plane the bottom to these lines. Flip the bottom over and use a rabbet plane or moving fillister plane to leave a V*\*quare tongue all around. In the end. the bottom will fit only '/•»• into the side grooves, leaving '/«' for expansion. Because the bottom boards won't expand alongtheir length, the end-grain tongues on the bottom can fit more deeply in theirgrooves. Insert the bottom and check the dry-fit of the skirt all around. Glue the interlock grooves, and the skirt dovetails. You might use adab of glue at the center ofthe endgrain of each bottom board, but otherwise leave the bottom dry'- Before the glue sets, burnish the mitcrcd mouldings shut with the smooth back of a gouge. After t he glue sets, plane off that last protruding Vm". The Lid The grooves and joints that connect the frame and panel of t he lid all begin as lines made by the mortising gauge. The gauge lines define the grooving and the grooving defines the joints. It'seasy to see how the socketsof the miter-shouldered bridle joints arc just extensions of the groove, but the groovcsdefinethetcnonsaswell. Plowing the grooves removes some of the potential widthof the tenons, something you may discover too late if you workout of sequence. Start with the gauge, plow the groovesand work on from there. Kcmoxv the iheekt. With the groenv a'rcjcA fmv the tenon. Uh' the newly tut tenon to cut by the plow, the tenon>' t heekt jrevjiy to define the depth of the mortite in the >hort define with a uw. raHsoftheM. Tenon the Long The tenonsof the lid frame goon the kng front bcurdssotliai the end gruinshows only on the side edges of the lid Mark the fare sides of all your pieces and run the mon s-ing gauge around the inner edges and tie ends. Plow the groove within these lines. Saw the shoulders of the tenon in a miter box if you have one. Split and pare away Saw the dwutden. \ miter box intLn 30 ■ IVpuUr WbodMNfcM* ■ •k of the tenons' mitered thoulden. the waste wood oncithcr side of the groove and run the gauge down the newly exposed wood to more clearly mark the thickncss of the tenon. Now you can stand the end upright in the vise and saw the tenon checks without the saw pulling into the groove. This finished tenon now defines the width ofthemonise. Mortise the Short Lay the tenon over the mitcrcd end of the short piccc and trace the breadthof itsovcr-lap. The mortise of the bridle joint is easy enough to cut out wit h a rip saw. chisel and rasp, but the plow plane can start the job. Plow a groove down the slopingcnd grain on the mitcrsand down the short outer face of the mortise and youll create a nice shoulder forthc saw to ride against. Here's where the gauged lines rule once more. Because you can only plane down a slope, not up. youll occasionally have to turn the wx>od around and fence from its back side. Unless the groove is dead center, yvxill have to make a slight adjustment toihe fenceonihe plane Because working within the gauged lines keepsevcrythingaligncd in the same plane, you can safely adjust tlic plane as needed. Place the Panel Dry-fit the frame together, then measure the opening to find the size of the panel. As with t he brttom. the panel can fit fully- In the |


