Popular Woodworking 2009-08 № 177, страница 37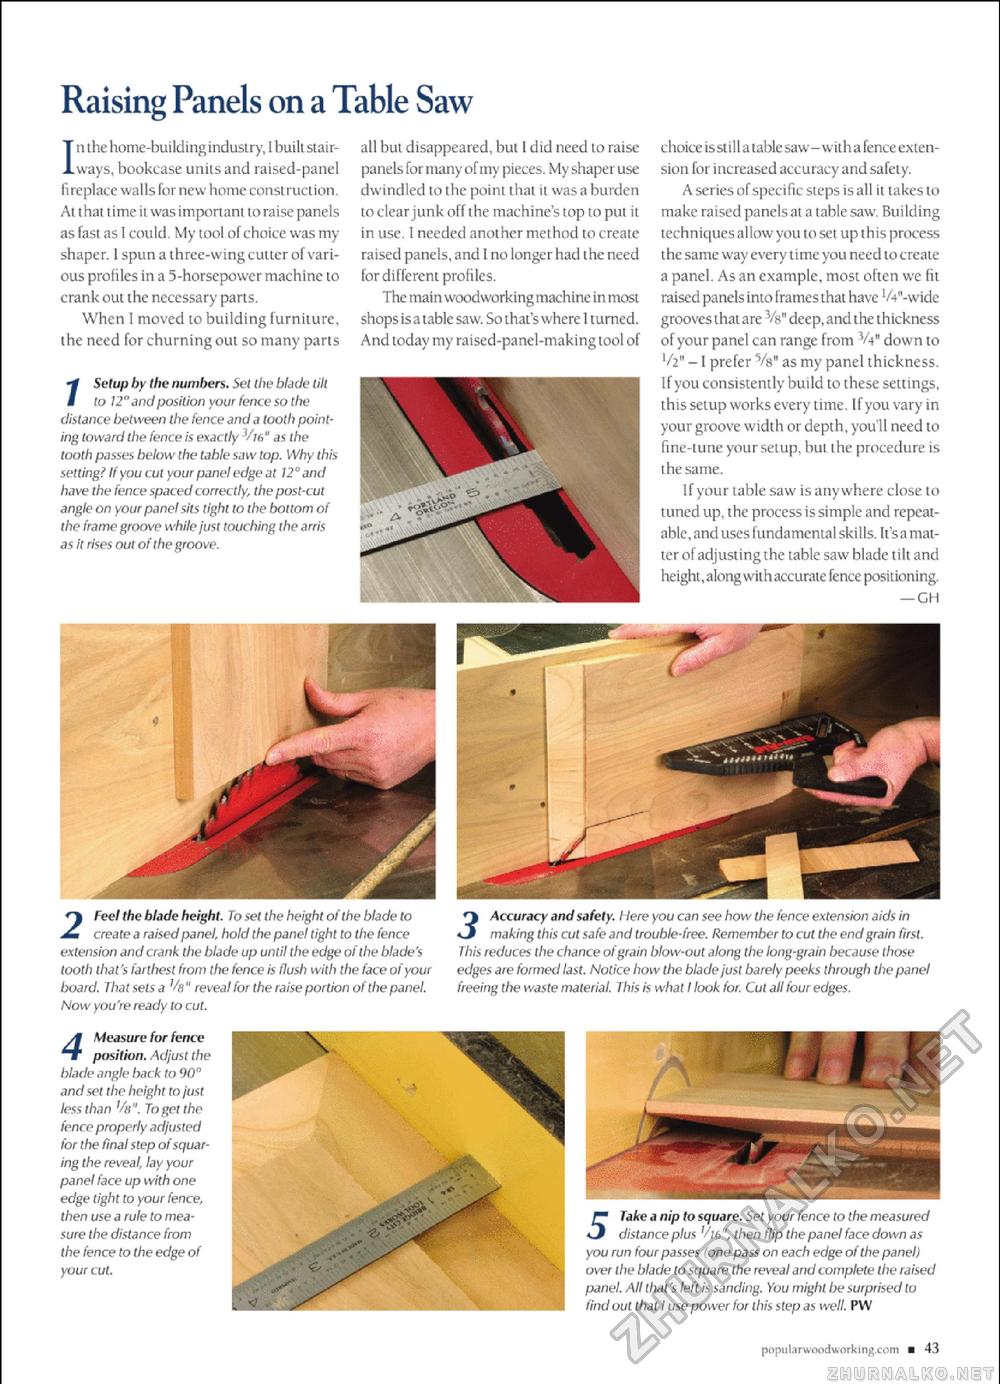
Raising Panels on a Table Saw In the home-buildingindustry, I builtstair-ways, bookcase units and raised-panel fireplace walls for new home construction At that time it was import ant to raise panels as fast as I could. My tool of choice was my shaper. [spun a three-wing cutter of various profiles in a 5-horsepower machine to crank out the necessary parts. When 1 moved to building furniture, the need for churning out so many parts /Setup by the numbers. Set the blade tilt _ to 12° and position your fence so the distance between the fence and a tooth pointing toward the fence is exactly 3A16" as the tooth passes below the table saw lop. Why this setting? If you cut your panel edge at 12° and have the fence spaced correctly, the post-cut angle on your panel sits tight to the bottom of the frame groove while just touching the arris as it rises out of the groove. all but disappeared, but I did need to raise panels for many of my pieces, My shape r use dwindled to the point that it was a burden to clear junk off the machine's top to put it in use. 1 needed another method to create raised panels, and I no longer had the need lor different profiles. The main woodworking machine inmost shops is a table saw. So Lhat's where I turned. And today my raised-panel-making tool of choice is still a table saw-with a fence extension for increased accuracy and safety. A series of specific steps is all it takes to make raised panels at a table saw, BuiLding techniques allow you to set up this process the same way every time you need tocreate a panel. As an example, most often we fit raised panels into frames that have '/V-wide grooves that are Vs" deep.and the thickness of your panel can range from %* down to V2" -1 prefer Vg" as my panel thickness. If you consistently build to these settings, this setup works every time. If you vary in your groove width or depth, you'll need to fine-tune your setup, but the procedure is the same. If your table saw is anywhere close to tuned up, the process is simple and repeat-able, and uses fundamental skills. It'sa matter of adjusting the table saw blade tilt and height,alongwiihaccurate fence positioning. —GH 2 Feel the blade height. To set the height of the blade to _ _ create a raised panel, hold the panel tight to the fence extension and crank the blade up until the edge of the blade's tooth that's farthest from the fence is flush with the face of your board. That sets a reveal for the raise portion of the panel. Now you're ready to cut. 4 Measure for fence position. Adjust the blade angle back to 90° and set the height to just less than Vs". To get the fence properly adjusted for the final step of squaring the reveal, lay your panel face up with one edge tight to your fence, then use a rule to measure the distance from the fence to the edge of your cut. 5 Take a nip to square. Set your fence to the measured distance plus r.!6'\ then flip the panel face down as you run four passes 'one pass on each edge of the panel) over the blade to square the reveal and complete the raised panel. All that's left is sanding. You might be surprised to find out that 1 use power for this step as well. P W popul a rwoodwork ing.com ■ 43 |


