Popular Woodworking 2009-08 № 177, страница 35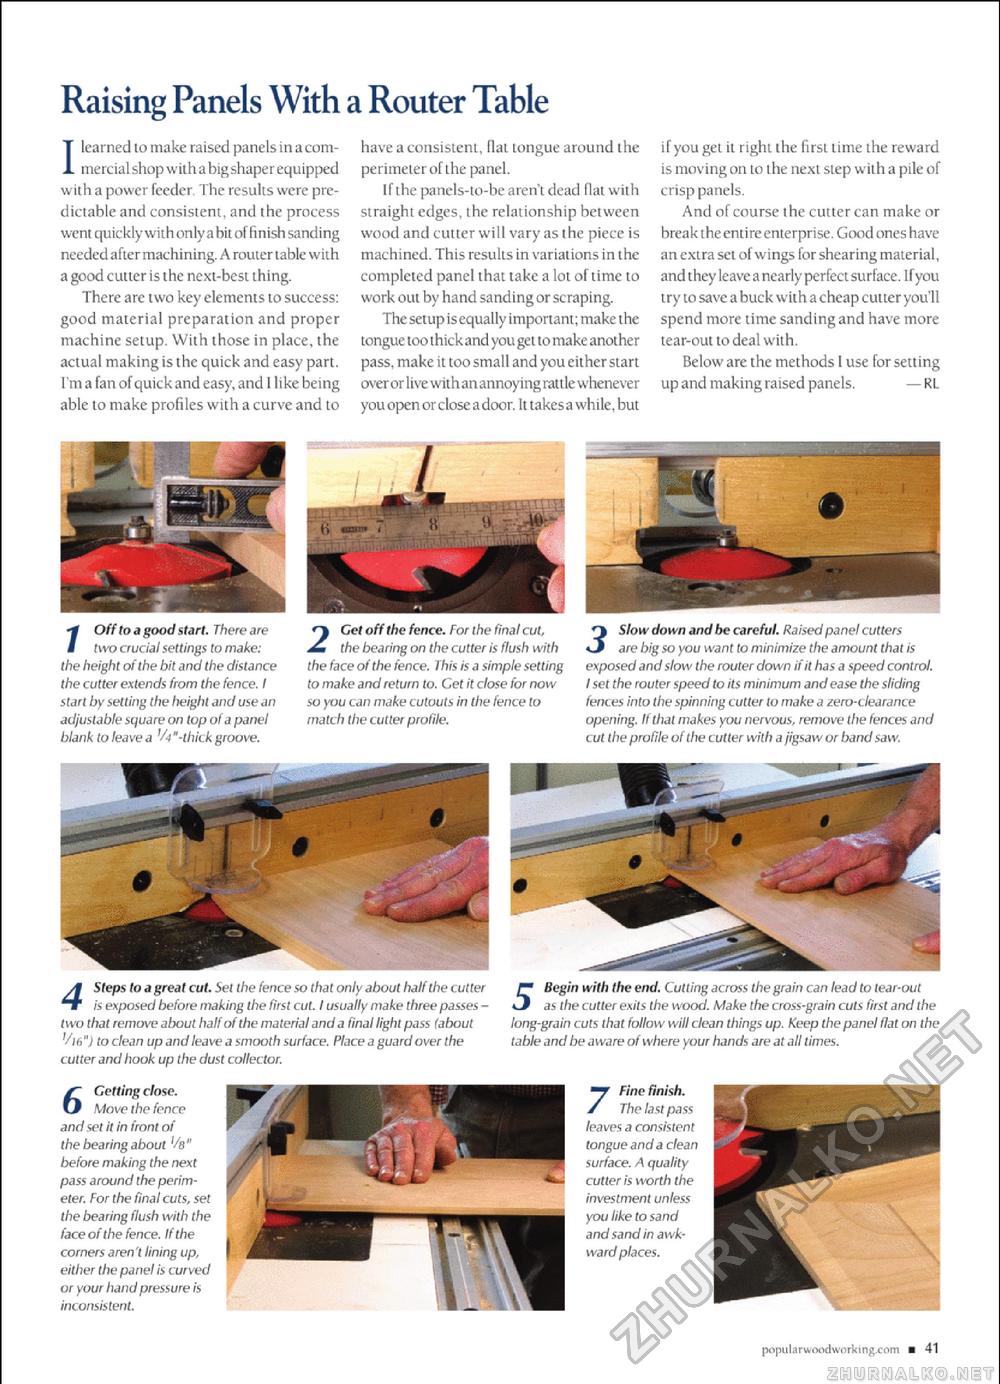
Raising Panels With a Router Table 1 learned to make raised panels in a commercial shop with a big shaper equipped with a power feeder The results were predictable and consistent, and the process went quickly with only a bit of finish sanding needed afler machining. A router table with a good cutter is the next-best thing. There are two key elements to success: good material preparation and proper machine setup. With those in place, the actual making is the quick and easy part. I'm a fan of quick and easy, and I like being able to make profiles with a curve and to have a consistent, flat tongue around the perimeter of the panel. If the panels-to-be aren't dead flat with straight edges, the relationship between wood and cutter will vary as the piece is machined. This results in variations in the completed panel that take a lot of time to work out by hand sanding or scraping. The setup is equally important; make the tongue too thickand you get to make another pass, make it too small and you either start over or live wit h an annoying rattle whenever you open or close a door. It ta kes a while, but if you get it right the first time the reward is moving on to the next step with a pile of crisp panels. And of course the cutter can make or break the entire enterprise. Good ones have an extra set of wings for shearing material, and they leave a nearly perfect surface. If you try to save a buck with a cheap cutLer you'll spend more time sanding and have more tear-out to deal with. Below are the methods I use for setting up and making raised panels. — RL 7 Off to a good start. There are two crucial settings to make: the height of the bit and the distance the cutter extends from the fence. I start by setting the height and use an adjustable square on top of a panel blank to leave a V4 "-thick groove. 2 Gel off the fence. For the final cut, the bearing on the cutter is flush with the face of the fence. This is a simple setting to make and return to. Cet it close for now so you can make cutouts in the fence to match the cutter profile. 3 Slow down and be careful. Raised panel cutters are big so you want to minimize the amount that is exposed and slow the router down if it has a speed control. I set the router speed to its minimum and ease the sliding fences into the spinning cutter to make a zero-clearance opening. If that makes you nervous, remove the fences and cut the profile of the cutter with a jigsaw or band saw. 4 Steps to a great cut Set the fence so that only about half the cutter is exposed before making the first cut. I usually make three passes -f wo that remove about half of the material and a final light pass (about Via") to clean up and leave a smooth surface. Place a guard over the cutter and hook up the dust collector. 5 Begin with the end. Cutting across the grain can lead to tear-out as the cutter exits the wood. Make the cross-grain cuts first and the long-grain cuts that follow will clean things up. Keep the panel flat on the table and be aware of where your hands are at all times. 6 Getting close. Move the fence and set it in front of the bearing about Vb" before making the next pass around the perimeter. For the final cuts, set the bearing flush with the face of the fence. If the corners aren't lining up, either the panel is curved or your hand pressure is inconsistent. 7 Fine finish. The last pass leaves a consistent tongue and a clean surface. A quality cutter is worth the investment unless you like to sand and sand in awkward places. popul a rwoodwork ing.com ■ 41 |


