Popular Woodworking 2009-08 № 177, страница 33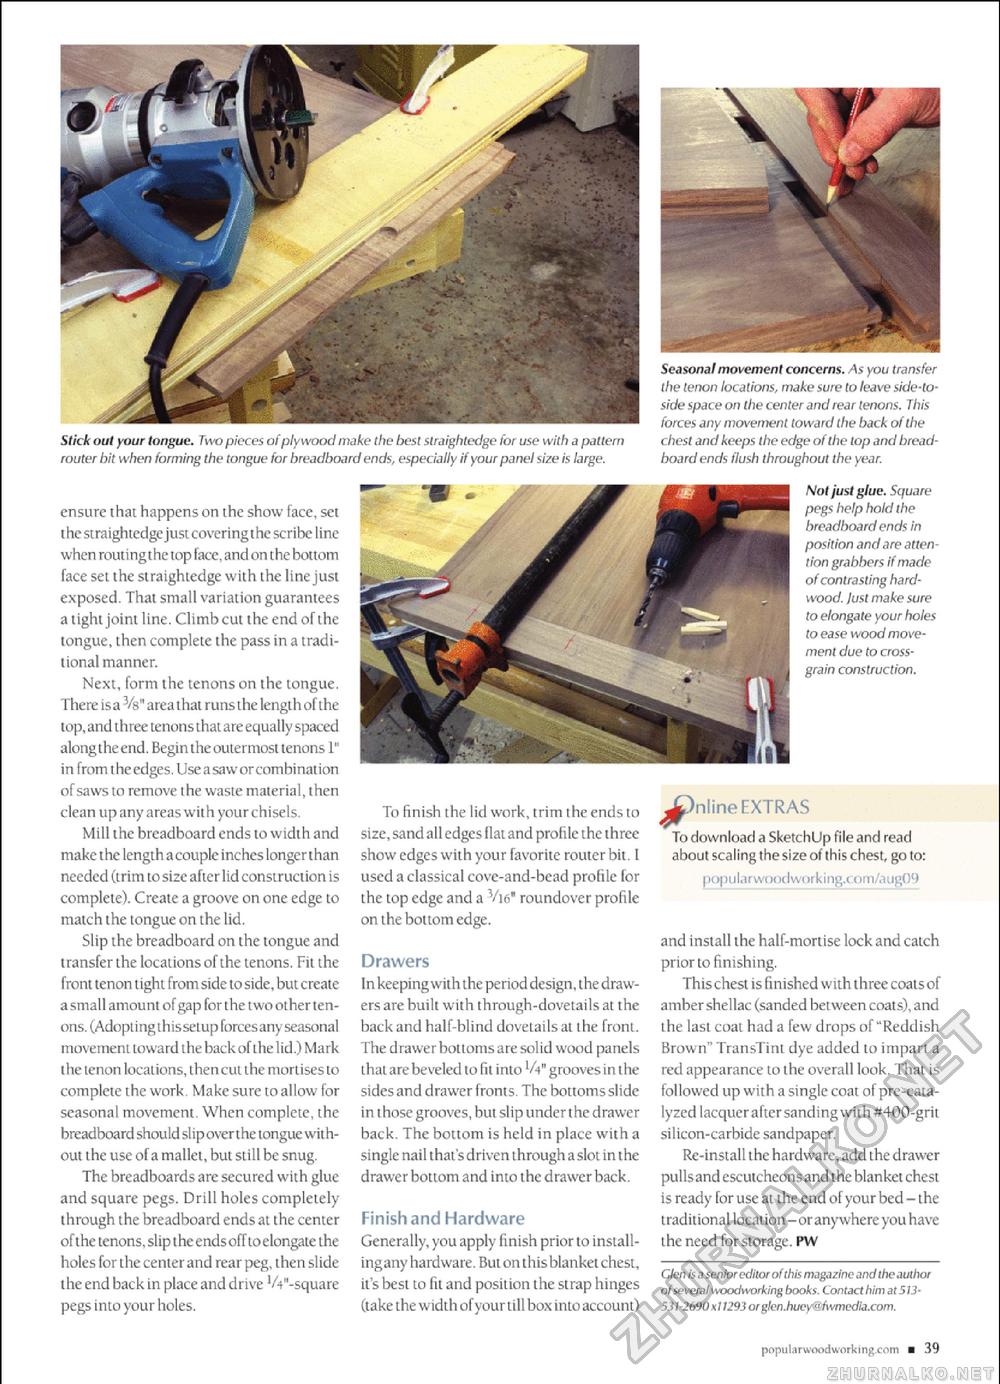
ensure I hat happens on the show face, set (he straightedge just coveringthe scribe line when routingthe top face, and on the bottom face set the straightedge with the line just exposed. That small variation guarantees a tight joint line. Climb cut the end of the tongue, then complete the pass in a traditional manner. Next, form the tenons on the tongue. There isa Vs" areathat runs ihelengthof the lop, and three tenons that are equally spaced alonglheend. Begin lhe outermost tenons 1" in Trom the edges. Use a saw or combination of saws to remove lhe waste material, then clean up any areas with your chisels. Mill the breadboard ends to widih and make the length a couple inches longer than needed (trim tosize after lid construction is complete). Create a groove on one edge to match the tongue on the Lid. Slip the breadboard on the tongue and transfer the locations of the tenons. Fit the front tenontight fromside to side,but create a small amount of gap for the two other tenons. (Adopti ng thissetup forces any seasonal movement towardthebackof the lid.) Mark the tenon locations, then cut the mortises to complete the work. Make sure to allow for seasonal movement. When complete, the breadboard should slip overthe tongue without the use of a mallet, but still be snug. The breadboards are secured with glue and square pegs. Drill holes completely through the breadboard ends at the center of the tenons, sliptheendsofftoelongate the holes for the center and rear peg, then slide the end back in place and drive '/-("-square pegs into your holes. To finish the lid work, trim lhe ends to size, sandall edgesflatand profile the three show edges with your favorite router bit. I used a classical cove-and-bead profile for the top edge and a Vis" roundover profile on the bottom edge. Drawers In keeping with the period design, the drawers are built with through-dovetails at the back and half blind dovetails at lhe from. The drawer bottoms are solid wood panels that are beveled to fitinto 'A" groovesin the sides and drawer fronts The bottoms slide in those grooves, but slip underthedrawer back, The bottom is held in place with a single nail that's driven through aslot in the drawer bottom and into the drawer back. Finish and Hardware Generally, you apply finish prior to install-ingany hardware. But on this blankelchest, it's best to fit and position the strap hinges (take the width of yourtill box into account) Seasonal movement concerns. As you transfer the tenon loca Hons, make sure to leave side-to-side space on the center and rear tenons. This forces any movement toward the back of the chest and keeps the edge of the top and breadboard ends flush throughout the year. Not just glue. Square pegs help hold the breadboard ends in position and are attention grabbers if made of contrasting hardwood. [ust make sure to elongate your holes to ease wood movement due to cross-grain construction. Jpnline EXTRAS To download a SketchUp file and read about scaling the site of this chest, go to: pop u laf woodwork i ng-com/a* igt)9 and install the half-mortise lock and catch prior to finishing. Thischest is finished with three coatsof ambershellac (sanded between coats), and the last coat had a few drops of "Reddish Brown™ TransTint dye added to impart a red appearance to the overall look. That is followed up with a single coat of pre-cata-lyzed lacquer aftersanding with #400-grit silicon-carbide sandpaper. Re-install the hardware, add the drawer pull sand escutcheonsand the blanket chest is ready for use at the end of your bed - the traditional location-oranywhere you have the need for storage. PW Cicr, is a senior editor of this magazine and the author of sewral woodworking books. Contact him at513-531-2690 x 11293 or gtenJiueyQfwmediaxnm. popularwo£itlworking.com ■ 39 |


