Popular Woodworking 2009-08 № 177, страница 31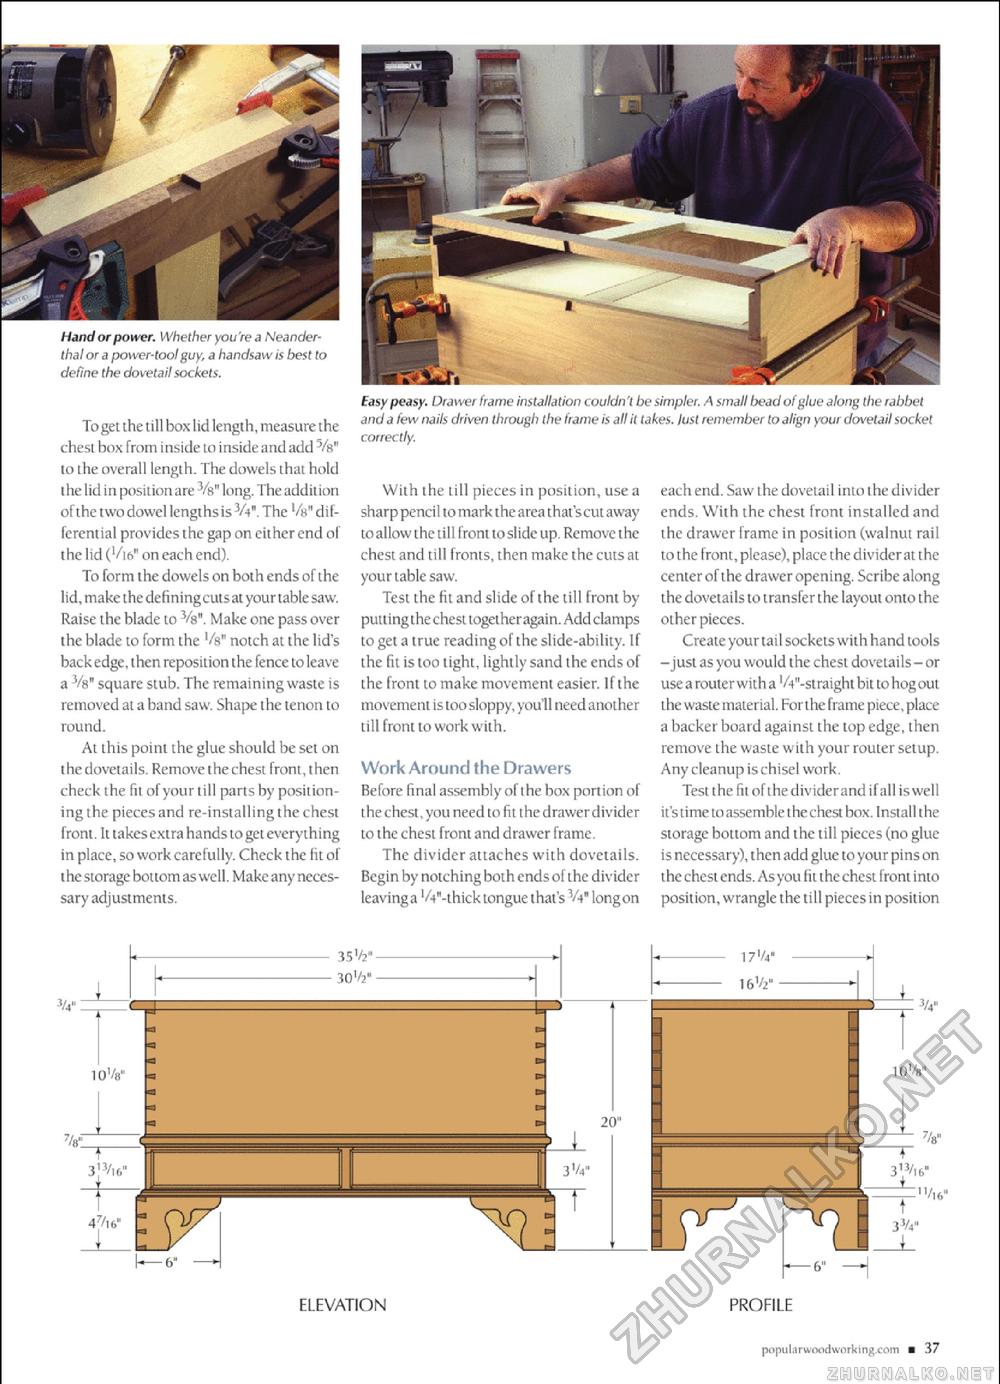
Hand or power. Whether you're a Neanderthal or a power-tool guy, a handsaw Is best to define the dovetail sockets. To get the till box lid length, measure the chest box From inside to insideandadd Vs" to the overall length. The dowels that hold the lid in position are Vs" long. The addition of the two dowel lengthsis V4". The Vs* differential provides the gap on either end of the lid (Vie" on each end). To form the dowels on both ends of the lid, make the defining cuts at yourtablesaw. Raise the blade to Vs", Make one pass over the blade to form the Vs" notch at the lid's back edge, then reposition the fence to leave a Vs" square stub. The remaining waste is removed ai a band saw. Shape the tenon to round. Al this point the glue should be set on the dovetails. Remove the chest front, then check the fit of your till parts by positioning the pieces and re-installing the chest front. It takesextra handstoget everything in place, so work carefully. Check the fit of the storage bottom as well. Make any necessary adjustments Easy peasy. Drawer frame installation couldn't be simpler. A small bead of glue along the rabbet and a few nails driven through the frame is all it takes, lust remember to align your dovetail socket correctly. With the till pieces in position, use a sharp pencil tomark 1 he a t ea th at's cut away toallowthetill front toslide up. Remove the chest and till fronts, then make the cuts at you n able saw. Test the fit and slide of the till front by putlingthe chest together again. Add clamps to get a true reading of the slide-ability. If the fit is too tight, lightly sand the ends of the front to make movement easier. If the movement is Loo sloppy, you'll needanother till front to work with. Work Around the Drawers Before final assembly of the box portion of thechest.you need to fit the drawerdivider to the chest front and drawer frame. The divider attaches with dovetails. Begin by notching both ends of the divider leavinga '/♦"-thick tongue that's longon each end. Saw the dovetail into the divider ends. With the chest front installed and the drawer frame in position (walnut rail to the front, please), place the divider at the center ofthe drawer opening. Scribe along the dovetails to transfer the layout onto the other pieces. Create your tail sockets with band tools -just as you would the chest dovetails - or use a router with a 'A"-straight bit to hog out the waste material. For the frame piece, place a backer board against the lop edge, then remove the waste with your router setup. Any cleanup is chisel work. Test the fil ofthedivider and if all is well it's time 10 assemble the chesl box. Install lhe storage bouom and the till pieces (no glue is necessary), then add glue to your pins on t he chest end s. As you fit t he chest front into posit ion, w rangle l he ti 11 pieces in p osil ion popul a rwoodwork ing.com ■ 37 |


