Popular Woodworking 2009-08 № 177, страница 29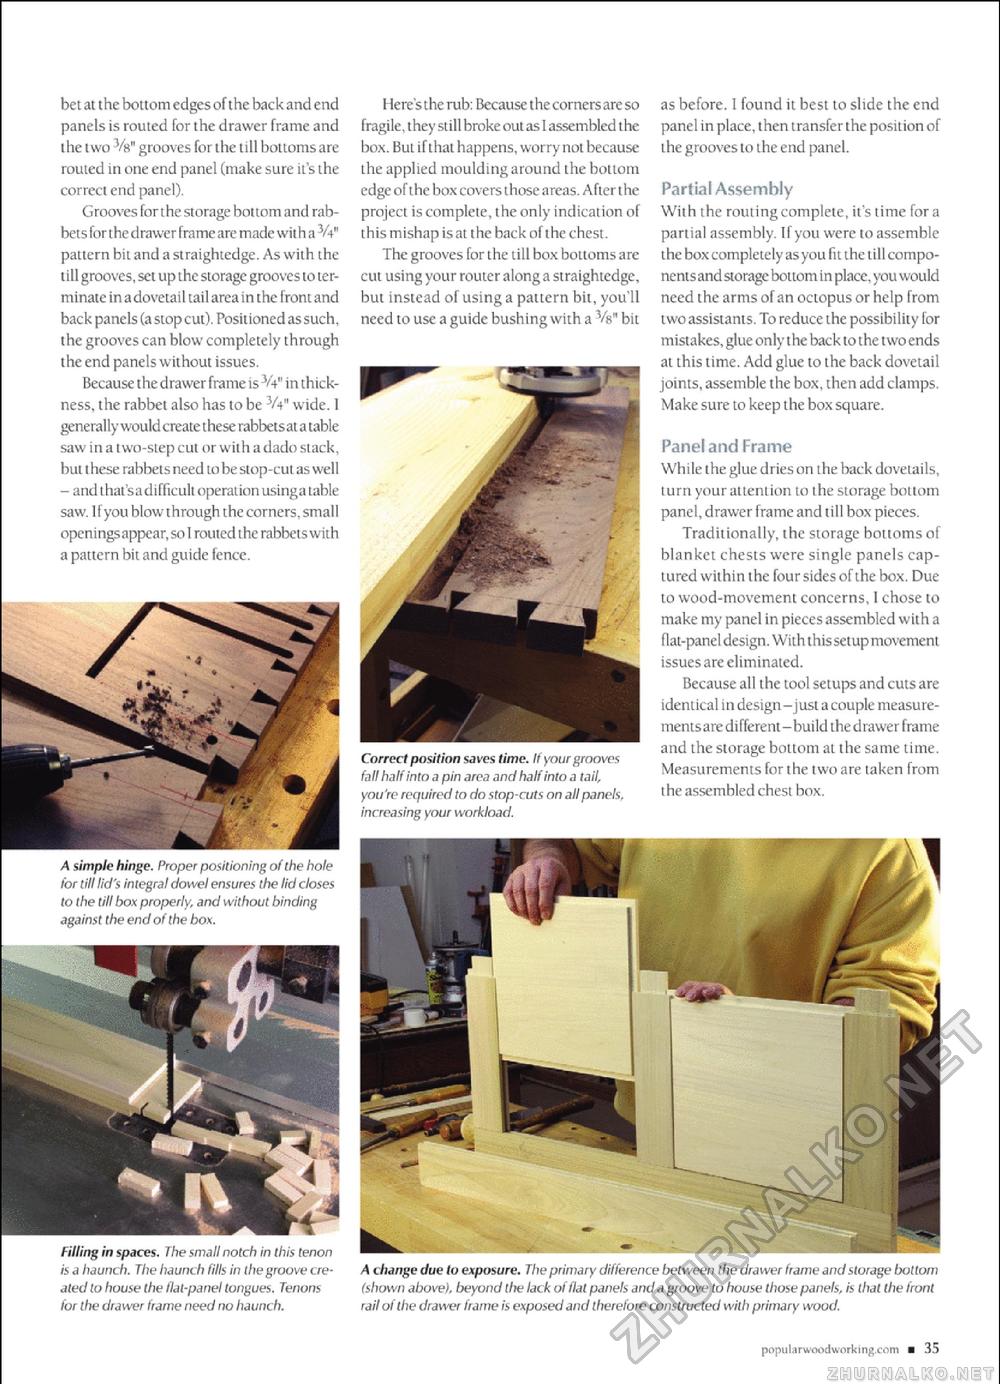
bet at t he bottom edges oft he back and end panels is routed for the drawer frame and the two Vs" grooves for the till bottoms are routed in one end panel (make sure it's the correct end panel) Grooves for the storage bottom and rabbets for the drawer frame are made with a -W1 pattern bit and a straightedge. As with the t ill grooves, set u p Lhe storage grooves to te r-minate inadovetail tail areainthe front and bac k pa nels (a stop cut). Posit ioned as such, the grooves can blow completely through the end panels without issues. Because thedrawerframe is V4" in thickness, the rabbet also has to be V4" wide. 1 generally would create these rabbets at atable saw in a two-slep cul or wit h a dado stack, but l hese rabbet s need to be stop-cut as well - and t hal s a di ffic ull operation usinga table saw. Ifyou blowthrough the corners, small openings appear, sol routed the rabbets with a pattern bit and guide fence. A simple hinge. Proper positioning of the hole for till lid's integral dowel ensures the lid doses to the till box properly, and without binding against the end of the box. Here's the rub; Because the comers are so fragile, they still broke out as I assembled t he box. But if that happens, worry not because the applied moulding around the bottom edge of the box covers those areas. After the project is complete, the only indication of this m ishap is at t he bac k of t he chcsi The grooves for the till box boLtoms are cut using your rouLer alonga straighLedge, but instead of using a pattern bit, you'll need to use a guide bushing with a Vs" bit Correct position UK's time. It your grooves fall half into a pin area and half into a tail, you're required to do stop-cuts on all panels, increasing your workload. as before. 1 found it best to slide the end panel in place, then transfer the position of the grooves to the end panel. Partial Assembly With the routing complete, it's time for a partial assembly. If you were to assemble Lhe box complelely as you fit the till compo-nentsand storage bouom in place, you would need the arms of an octopus or help from two assistants. To reduce the possibility For mistakes,glue only the backlo the two ends at this time. Add glue to the back dovetail joints, assemble the box, then add clamps. Make sure to keep the box square. Panel and Frame While the glue dries on the back dovetails, lurn yourallenlion to the storage bottom panel, drawer frame and till box pieces. Traditionally, the storage bottoms of blanket chests were single panels captured within the four sides of the box. Due to wood-movement concerns, 1 chose to make my panel in pieces assembled with a flat-panel design. With this setup movement issues are eliminated. Because all the tool setups and cuts are identical in design-jusi a couple measure-mentsaredifferent-build ihedrawer frame and lhe storage bottom at the same Lime. Measurements for the two are taken from lhe assembled chesl box. Filling in spaces, fhe small notch in this tenon is a haunch. The haunch fills in the groove created to houseI.'.'!' flat-panel tongues. Tenons for the drawer frame need no haunch. A change due to exposure. The prima ry difference between thedra wer frame and storage bottom (shown above), beyond the lack of flat panels and a groove to house those panels, is that the front rail of the drawer frame is exposed and therefore constructed with primary wood. popul a rwoodwork ing.com ■ 35 |


