Popular Woodworking 2009-08 № 177, страница 27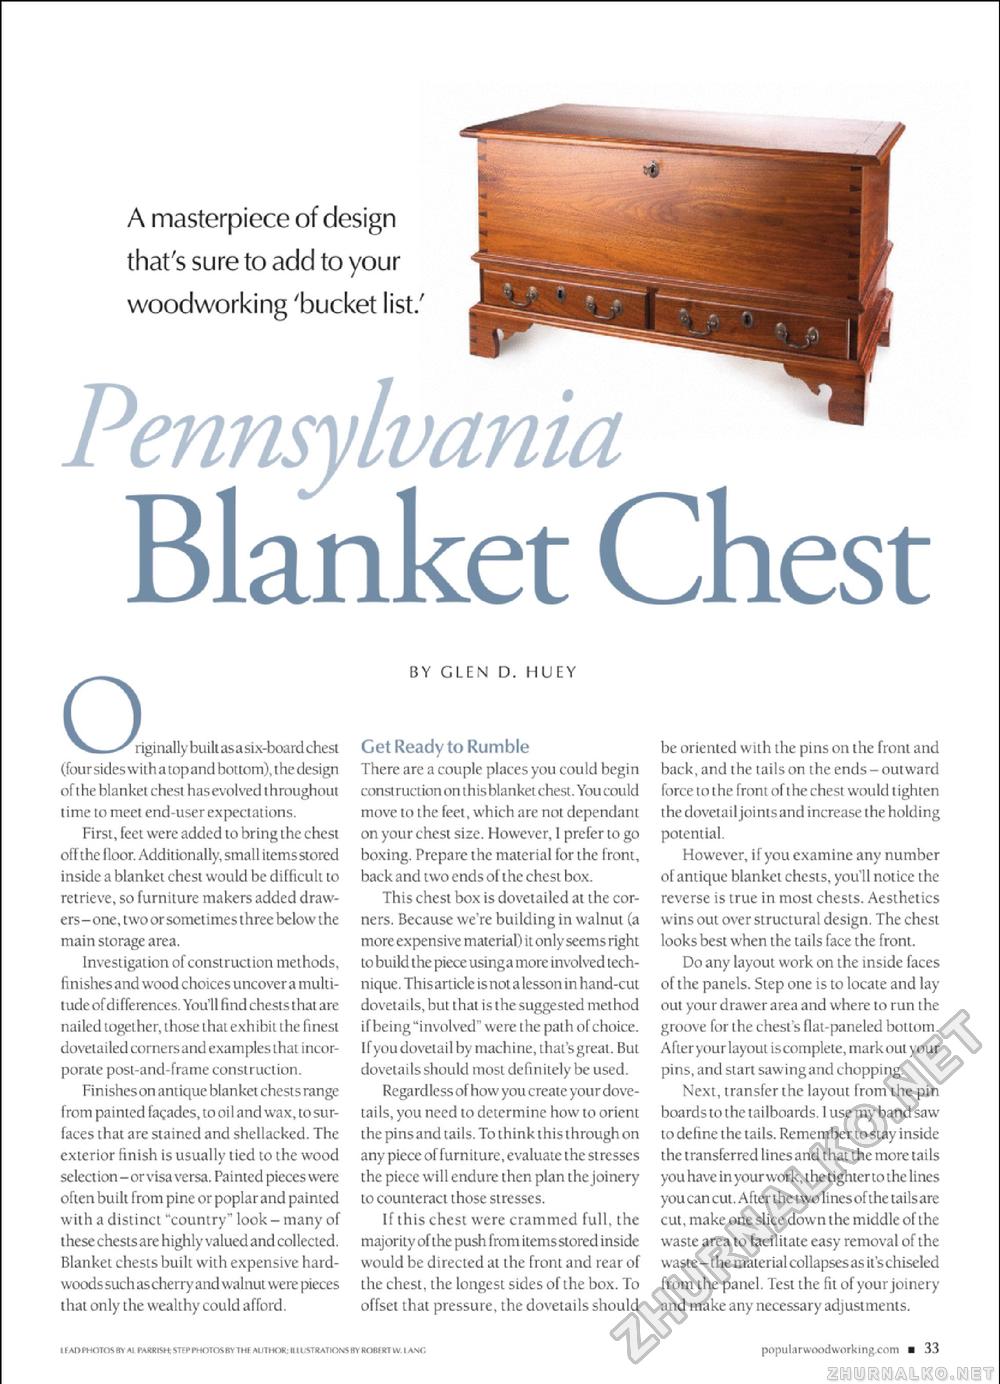
A masterpiece of design that's sure to add to your woodworking 'bucket list/ PennsylvaniaBlanket Chest^^■^^^iginally built asa six-board chest (four sides w ith a top and bottom), the design of the blanket chest hasevolved throughout lime to meet end-user expectations. First, feet were added to bring the chest off the door. Additionally, small itemsstored inside a blanket chest would be difficult to retrieve, so furniture makers added drawers-one, two or sometimes three below, he main storage area. Investigation ofconstruction methods, finishes and woodchoicesuncovera multitude of differences. You'll find chests that are nailed together, thosethat exhibit the finest dovetailed comers and examplesthat incorporate post-and-frame construction. Finishes on antique blanket chests range from painted facades, to oil and wax, tosur-faces that are stained and shellacked. The exterior finish is usually tied to the wood selection -or visa versa. Painted pieces were oftenbuilt from pine or poplarand painted with a distinct "country" look - many of these chests are highly valued and collected. Blanket chests built with expensive hardwoods such as cherry and walnut were pieces that only the wealthy could afford. BY GLEN D. HUEY Get Ready to Rumble There are a couple places you could begin constructionon thisblanket chest. You could move to the feel, which are nol dependant on your chest size. However, I prefer to go boxing. Prepare the material lor Lhe front, backand twoends of the chest box. This chest box is dovetailed at the corners. Because we're building in walnut (a more expensive material) it only seems right to build the piece usinga more involved technique. Thisarticle isnot a lesson in hand-cut dovetails, but that is the suggested method if being "involved" were the path ofchoice. Ifyou dovetail by machine, that's great. But dovetails should most definitely be used. Regardless of how you create your dovetails, you need to determine how to orient thepinsand tails. To think this through on any pieceoffurniture, evaluate the stresses the piece will endure then plan the joinery to counteract those stresses. If this chest were crammed full, the maj ority of t he push from items stored inside would be directed at the front and rear of the chest, the longest sides of the box. To offset that pressure, the dovetails should be oriented with the pins on the front and back, and the tails on the ends - outward force to the front of the chest would lighten Lhe dovetailjoinls and increase the holding potential. However, if you examine any number of antique blanket chests, you'll notice the reverse is true in most chests. Aesthetics wins out over structural design. The chest looks best when the tails face the front. Do any layout work on the inside faces of the panels. Step one is to locate and lay out your drawer area and where to run the groove for the chest's flat-paneled bottom Afteryourlayout iscomplete, mark out your pins, and start sawingand chopping. Next, transfer the layout from the pin boards to the tailboards. 1 use my band saw to define the tails. Remember to stay inside the transferred lines and that the more tails you have in your work, the tighter to the lines you can cut. After the two lines of the tailsare cut, make one slice down the middle of the waste area to facilitate easy removal of the waste - the material collapses as it's chiseled from the panel. Test the fit of your joinery and make any necessary adjustments. popularwoodworkiTig.com ■ 33 LEAOPHCTTBS av ALPARRISH; STEP PHOTGSBTTHE MJTHOR; ILLUSTRATIONS BY ROBERT W.LANG |


