Popular Woodworking 2009-11 № 179, страница 24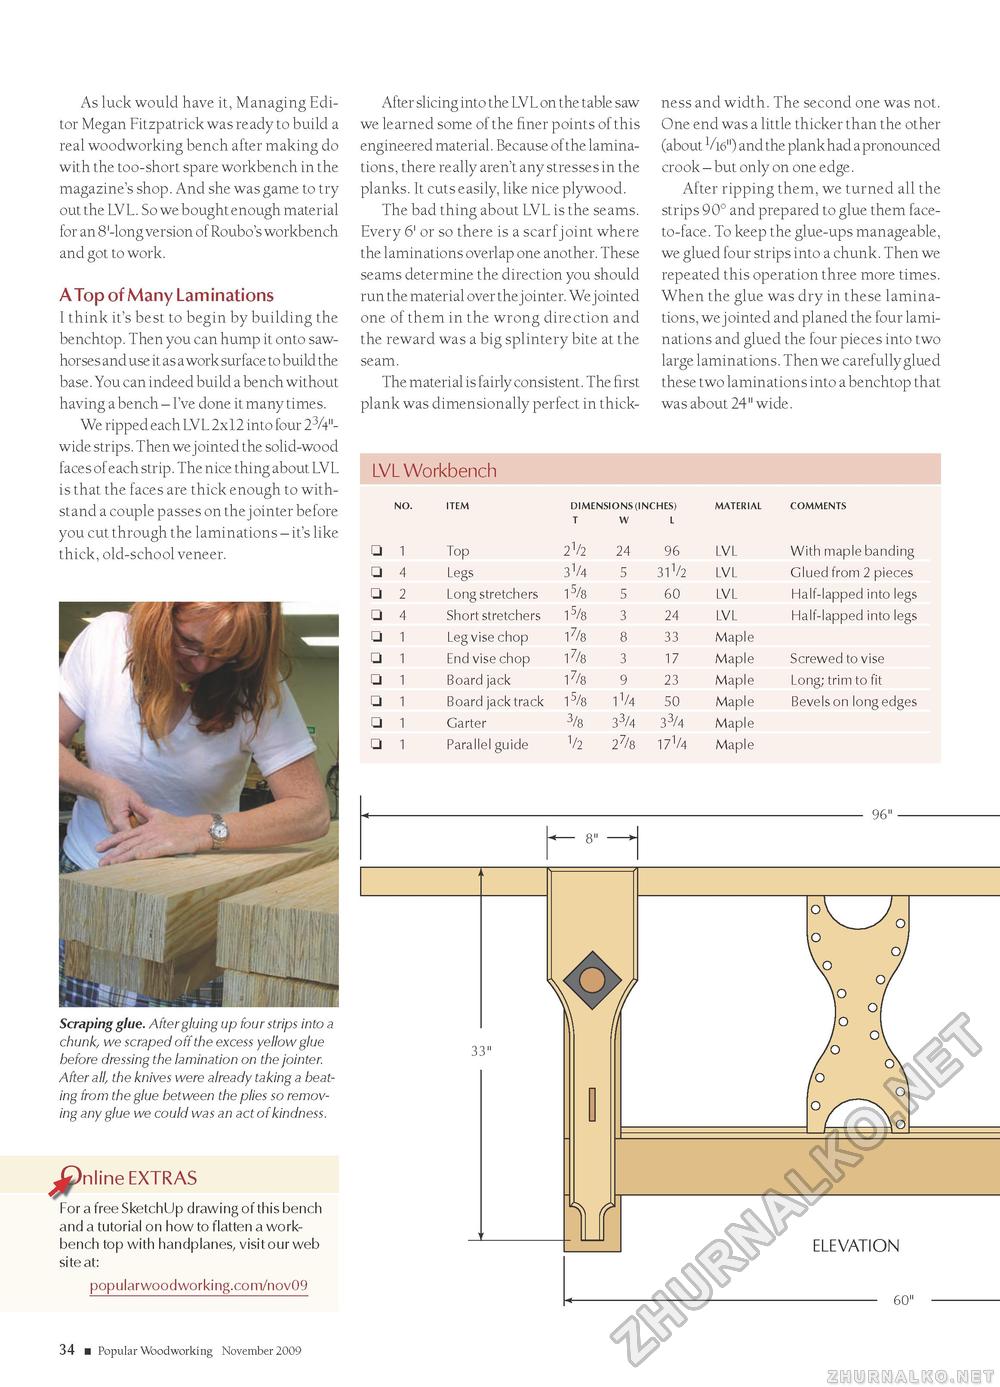
As luck would have it, Managing Editor Megan Fitzpatrick was ready to build a real woodworking bench after making do with the too-short spare workbench in the magazine's shop. And she was game to try out the LVL. So we bought enough material for an 8 '-long version of Roubo's workbench and got to work. A Top of Many Laminations I think it's best to begin by building the benchtop. Then you can hump it onto saw-horses and use it as a work surface to build the base. You can indeed build a bench without having a bench - I've done it many times. We ripped each LVL 2x12 into four 23/4"-wide strips. Then we jointed the solid-wood faces of each strip. The nice thing about LVL is that the faces are thick enough to withstand a couple passes on the jointer before you cut through the laminations - it's like thick, old-school veneer. Scraping glue. After gluing up four strips into a chunk, we scraped off the excess yellow glue before dressing the lamination on the jointer. After all, the knives were already taking a beating from the glue between the plies so removing any glue we could was an act of kindness. For a free SketchUp drawing of this bench and a tutorial on how to flatten a workbench top with handplanes, visit our web site at: popularwoodworking.com/nov09 34 ■ Popular Woodworking November 2009 After slicing into the LVL on the table saw we learned some of the finer points of this engineered material. Because of the laminations, there really aren't any stresses in the planks. It cuts easily, like nice plywood. The bad thing about LVL is the seams. Every 6' or so there is a scarf joint where the laminations overlap one another. These seams determine the direction you should run the material over the jointer. We jointed one of them in the wrong direction and the reward was a big splintery bite at the seam. The material is fairly consistent. The first plank was dimensionally perfect in thick ness and width. The second one was not. One end was a little thicker than the other (about V16") and the plank had a pronounced crook - but only on one edge. After ripping them, we turned all the strips 90° and prepared to glue them face-to-face. To keep the glue-ups manageable, we glued four strips into a chunk. Then we repeated this operation three more times. When the glue was dry in these laminations, we jointed and planed the four laminations and glued the four pieces into two large laminations. Then we carefully glued these two laminations into a benchtop that was about 24" wide. LvL Workbench
COMMENTS With maple banding Glued from 2 pieces Half-lapped into legs Half-lapped into legs screwed to vise long; trim to fit Bevels on long edges COMMENTS With maple banding Glued from 2 pieces Half-lapped into legs Half-lapped into legs screwed to vise long; trim to fit Bevels on long edges - 96" |
||||||||||||||||||||||||||||||||||||||||||||||||||||||||||||||||||||||||||||||||||||


