Popular Woodworking 2009-12 № 180, страница 39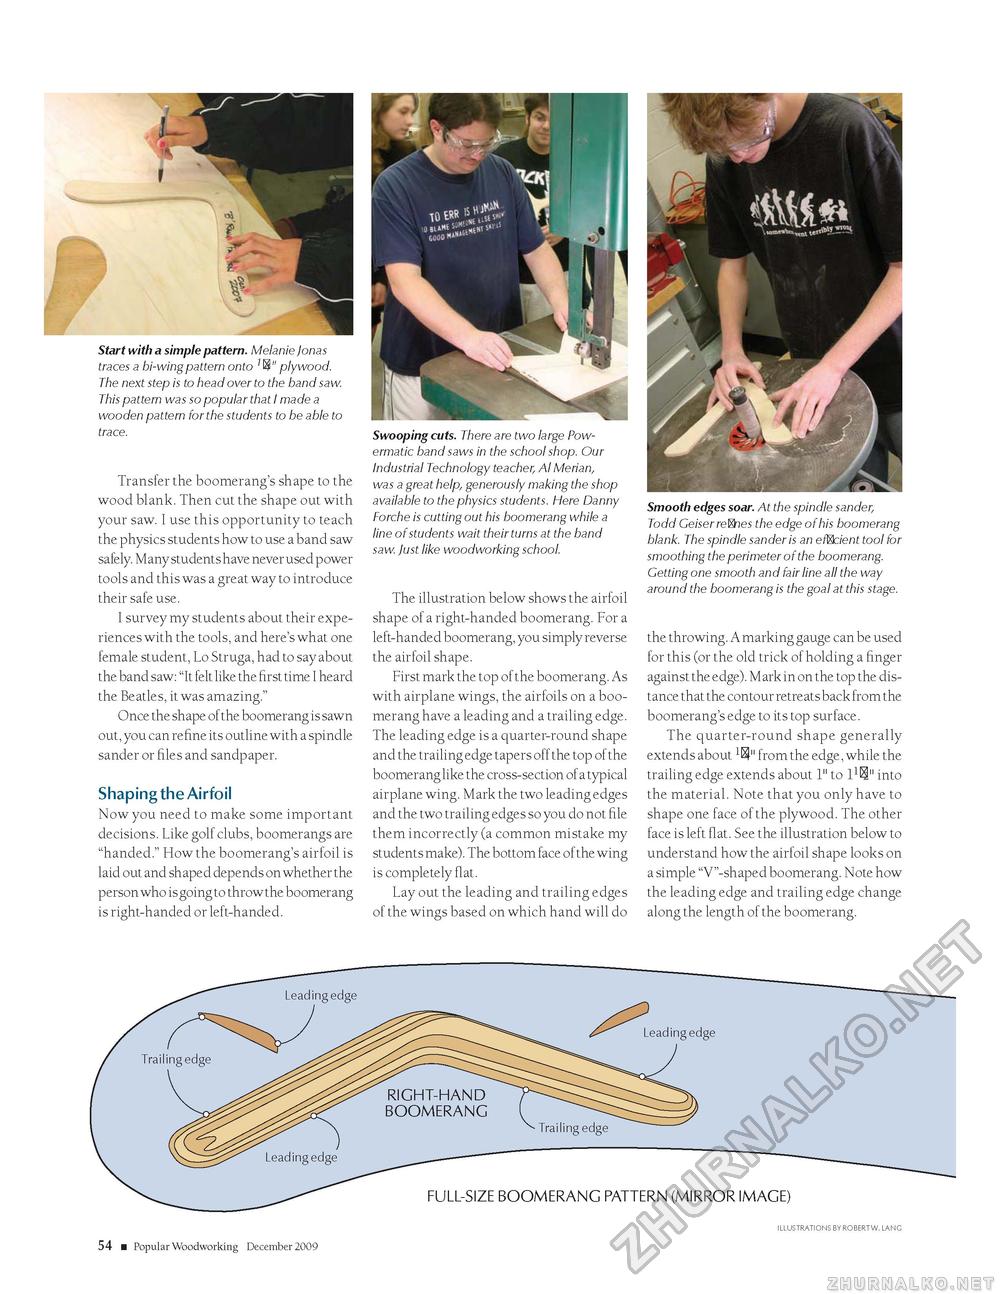
Start with a simple pattern. Melanie Jonas traces a bi-wingpattern onto plywood. The next step is to head over to the band saw. This pattern was so popular that I made a wooden pattern for the students to be able to trace. Transfer the boomerang's shape to the wood blank. Then cut the shape out with your saw. I use this opportunity to teach the physics students how to use a band saw safely. Many students have never used power tools and this was a great way to introduce their safe use. I survey my students about their experiences with the tools, and here's what one female student, Lo Struga, had to say about the band saw: "It felt like the first time I heard the Beatles, it was amazing." Once the shape of the boomerang is sawn out, you can refine its outline with a spindle sander or files and sandpaper. Shaping the AirfoilNow you need to make some important decisions. Like golf clubs, boomerangs are "handed." How the boomerang's airfoil is laid out and shaped depends on whether the person who is going to throw the boomerang is right-handed or left-handed. Swooping cuts. There are two large Pow-ermatic band saws in the school shop. Our Industrial Technology teacher, Al Merian, was a great help, generously making the shop available to the physics students. Here Danny Forche is cutting out his boomerang while a line of students wait their turns at the band saw. Just like woodworking school. The illustration below shows the airfoil shape of a right-handed boomerang. For a left-handed boomerang, you simply reverse the airfoil shape. First mark the top of the boomerang. As with airplane wings, the airfoils on a boomerang have a leading and a trailing edge. The leading edge is a quarter-round shape and the trailing edge tapers off the top of the boomerang like the cross-section of a typical airplane wing. Mark the two leading edges and the two trailing edges so you do not file them incorrectly (a common mistake my students make). The bottom face of the wing is completely flat. Lay out the leading and trailing edges of the wings based on which hand will do Smooth edges soar. At the spindle sander, Todd Geiser reBnes the edge of his boomerang blank. The spindle sander is an efBcient tool for smoothing the perimeter of the boomerang. Getting one smooth and fair line all the way around the boomerang is the goal at this stage. the throwing. A marking gauge can be used for this (or the old trick of holding a finger against the edge). Mark in on the top the distance that the contour retreats back from the boomerang's edge to its top surface. The quarter-round shape generally extends about 1H-" from the edge, while the trailing edge extends about 1" to into the material. Note that you only have to shape one face of the plywood. The other face is left flat. See the illustration below to understand how the airfoil shape looks on a simple "V"-shaped boomerang. Note how the leading edge and trailing edge change along the length of the boomerang. Leading edg> Trailing edge FULL-SIZE BOOMERANG PATTERN (MIRROR IMAGE) ILLUSTRATIONS BY ROBERT W. LANG 14 ■ Popular Woodworking December 2009 |


