Popular Woodworking 2009-12 № 180, страница 40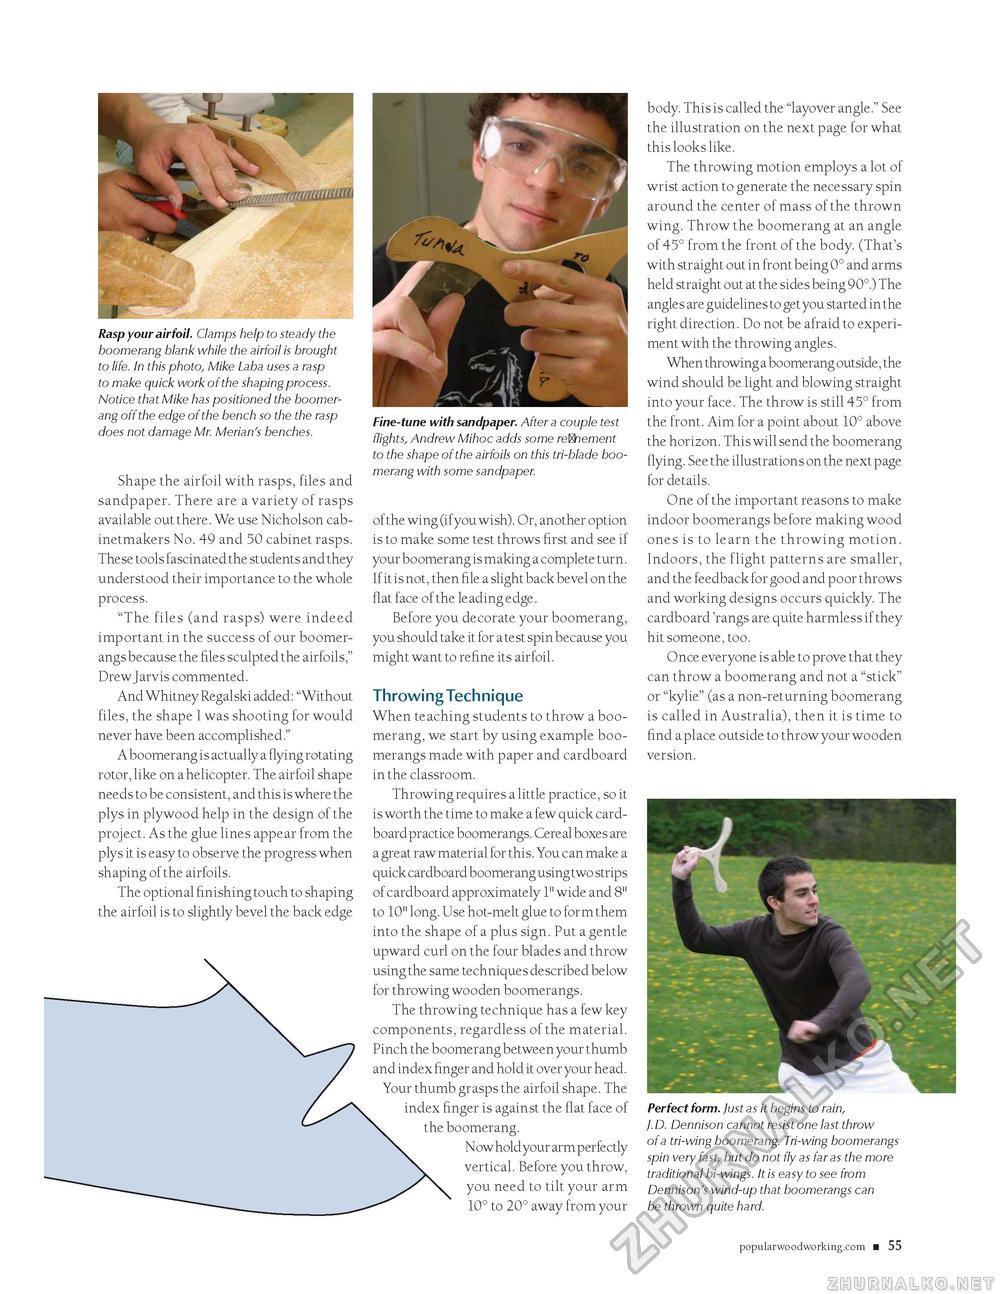
Rasp your airfoil. Clamps help to steady the boomerang blank while the airfoil is brought to life. In this photo, Mike Laba uses a rasp to make quick work of the shaping process. Notice that Mike has positioned the boomerang off the edge of the bench so the the rasp does not damage Mr. Merian's benches. Shape the airfoil with rasps, files and sandpaper. There are a variety of rasps available out there. We use Nicholson cabinetmakers No. 49 and 50 cabinet rasps. These tools fascinated the students and they understood their importance to the whole process. "The files (and rasps) were indeed important in the success of our boomerangs because the files sculpted the airfoils," Drew Jarvis commented. And Whitney Regalski added: "Without files, the shape I was shooting for would never have been accomplished." A boomerang is actually a flying rotating rotor, like on a helicopter. The airfoil shape needs to be consistent, and this is where the plys in plywood help in the design of the project. As the glue lines appear from the plys it is easy to observe the progress when shaping of the airfoils. The optional finishing touch to shaping the airfoil is to slightly bevel the back edge Fine-tune with sandpaper. After a couple test flights, Andrew Mihoc adds some refinement to the shape of the airfoils on this tri-blade boomerang with some sandpaper. of the wing (ifyou wish). Or, another option is to make some test throws first and see if your boomerang is making a complete turn. If it is not, then file a slight back bevel on the flat face of the leading edge. Before you decorate your boomerang, you should take it for a test spin because you might want to refine its airfoil. Throwing TechniqueWhen teaching students to throw a boomerang, we start by using example boomerangs made with paper and cardboard in the classroom. Throwing requires a little practice, so it is worth the time to make a few quick cardboard practice boomerangs. Cereal boxes are a great raw material for this. You can make a quick cardboard boomerang using two strips of cardboard approximately 1" wide and 8" to 10" long. Use hot-melt glue to form them into the shape of a plus sign. Put a gentle upward curl on the four blades and throw using the same techniques described below for throwing wooden boomerangs. The throwing technique has a few key components, regardless of the material. Pinch the boomerang between your thumb and index finger and hold it over your head. Your thumb grasps the airfoil shape. The index finger is against the flat face of the boomerang. Now hold your arm perfectly vertical. Before you throw, you need to tilt your arm 10° to 20° away from your body. This is called the "layover angle." See the illustration on the next page for what this looks like. The throwing motion employs a lot of wrist action to generate the necessary spin around the center of mass of the thrown wing. Throw the boomerang at an angle of 45° from the front of the body. (That's with straight out in front being 0° and arms held straight out at the sides being 90°.) The angles are guidelines to get you started in the right direction. Do not be afraid to experiment with the throwing angles. When throwing a boomerang outside, the wind should be light and blowing straight into your face. The throw is still 45° from the front. Aim for a point about 10° above the horizon. This will send the boomerang flying. See the illustrations on the next page for details. One of the important reasons to make indoor boomerangs before making wood ones is to learn the throwing motion. Indoors, the flight patterns are smaller, and the feedback for good and poor throws and working designs occurs quickly. The cardboard 'rangs are quite harmless if they hit someone, too. Once everyone is able to prove that they can throw a boomerang and not a "stick" or "kylie" (as a non-returning boomerang is called in Australia), then it is time to find a place outside to throw your wooden Perfect form. Just as it begins to rain, J.D. Dennison cannot resist one last throw of a tri-wing boomerang. Tri-wing boomerangs spin very fast, but do not fly as far as the more traditional bi-wings. It is easy to see from Dennison's wind-up that boomerangs can be thrown quite hard. version. popularwoodworking.com ■ 21 |


