57 - A Shop-Built Pin Router, страница 29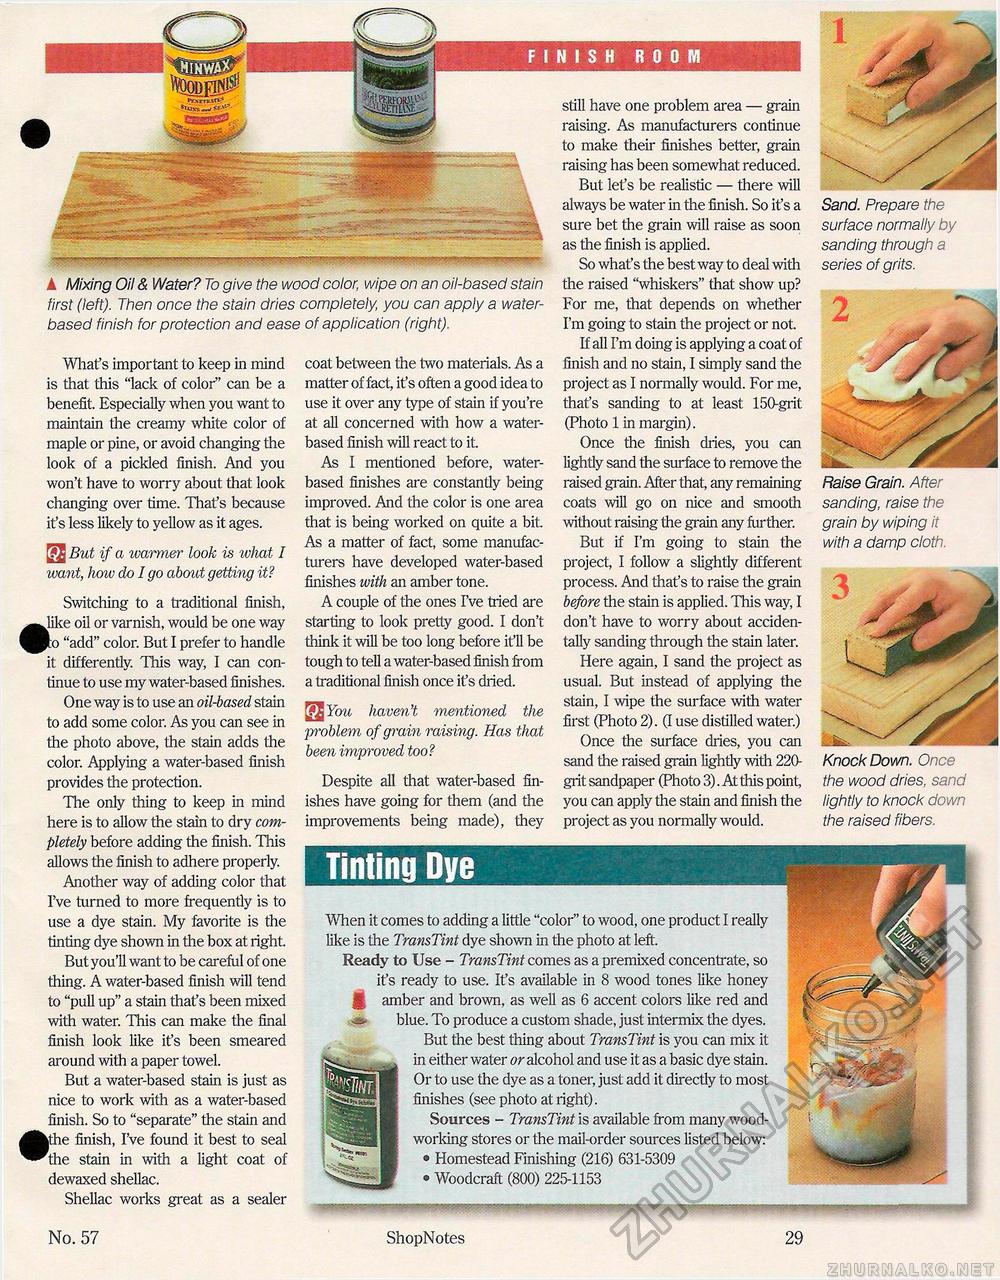
N I S H BOOM A Mixing Oil & Water? To give the wood color, wipe on an oil-based stain first (left). Then once the stain dries completely, you can apply a water-based finish for protection and ease of application (right). What's important to keep in mind is that this "lack of color" can be a benefit. Especially when you want to maintain the creamy white color of maple or pine, or avoid changing the look of a pickled finish. And you won't have to worry about that look changing over time. That's because it's less likely to yellow as it ages. [jjjJ But if a warmer look is what I ivant, how do I go about getting it? Switching to a traditional finish, •like oil or varnish, would be one way co "add" color. But I prefer to handle it differently. This way, I can continue to use my water-based finishes. One way is to use an oil-based stain to add some color. As you can see in the photo above, the stain adds the color. Applying a water-based finish provides the protection. The only thing to keep in mind here is to allow the stain to dry completely before adding the finish. This allows the finish to adhere properly. Another way of adding color that I've turned to more frequently is to use a dye stain. My favorite is the tinting dye shown in the box at right. But you'll want to be careful of one thing. A water-based finish will tend to "pull up" a stain that's been mixed with water. This can make the final finish look like it's been smeared around with a paper towel. But a water-based stain is just as nice to work with as a water-based finish. So to "separate" the stain and •the finish, I've found it best to seal the stain in with a light coat of dewaxed shellac. Shellac works great as a sealer coat between the two materials. As a matter of fact, it's often a good idea to use it over any type of stain if you're at all concerned with how a water-based finish will react to it. As I mentioned before, water-basecl finishes are constantly being improved. And the color is one area that is being worked on quite a bit. As a matter of fact, some manufacturers have developed water-based finishes with an amber tone. A couple of the ones I've tried are starting to look pretty good. I don't think it will be too long before it'll be tough to tell a water-based finish from a traditional finish once it's dried. You haven't mentioned the ■problem of grain raising. Has that been improved too ? Despite all that water-based finishes have going for them (and the improvements being made), they still have one problem area — grain raising. As manufacturers continue to make their finishes better, grain raising has been somewhat reduced. But let's be realistic — there will always be water in the finish. So it's a sure bet the grain will raise as soon as the finish is applied. So what's the best way to deal with the raised "whiskers" that show up? For me, that depends on whether I'm going to stain the project or not. If all I'm doing is applying a coat of finish and no stain, I simply sand the project as I normally would. For me, that's sanding to at least 150-grit (Photo 1 in margin). Once the finish dries, you can lightly sand the surface to remove the raised grain. After that, any remaining coats will go on nice and smooth without raising the grain any further. But if I'm going to stain the project, I follow a slightly different process. And that's to raise the grain before the stain is applied. This way, I don't have to worry about accidentally sanding through the stain later. Here again, I sand the project as usual. But instead of applying the stain, I wipe the surface with water first (Photo 2). (I use distilled water.) Once the surface dries, you can sand the raised grain lightly with 220-grit sandpaper (Photo 3). At this point, you can apply the stain and finish the project as you normally would. Raise Grain. After Sand. Prepare the surface normally by sanding through a series of grits. sanding, raise the grain by wiping it with a damp cloth. Knock Down. Once the wood dries, sand lightly to knock down the raised fibers. "When it comes to adding a little "color" to wood, one product I really like is the TransTint dye shown in the photo at left. Ready to Use - TransTint comes as a premixed concentrate, so it's ready to use. It's available in 8 wood tones like honey H amber and brown, as well as 6 accent colors like red and blue. To produce a custom shade, just intermix the dyes. But the best thing about TransTint is you can mix it in either water or alcohol and use it as a basic dye stain. Or to use the dye as a toner, just add it directly to most finishes (see photo at right). Sources - TransTint is available from many woodworking stores or the mail-order sources listed below: • Homestead Finishing (216) 631-5309 ® Woodcraft (800) 225-1153 No. 57 ShopNotes 29 |


