57 - A Shop-Built Pin Router, страница 4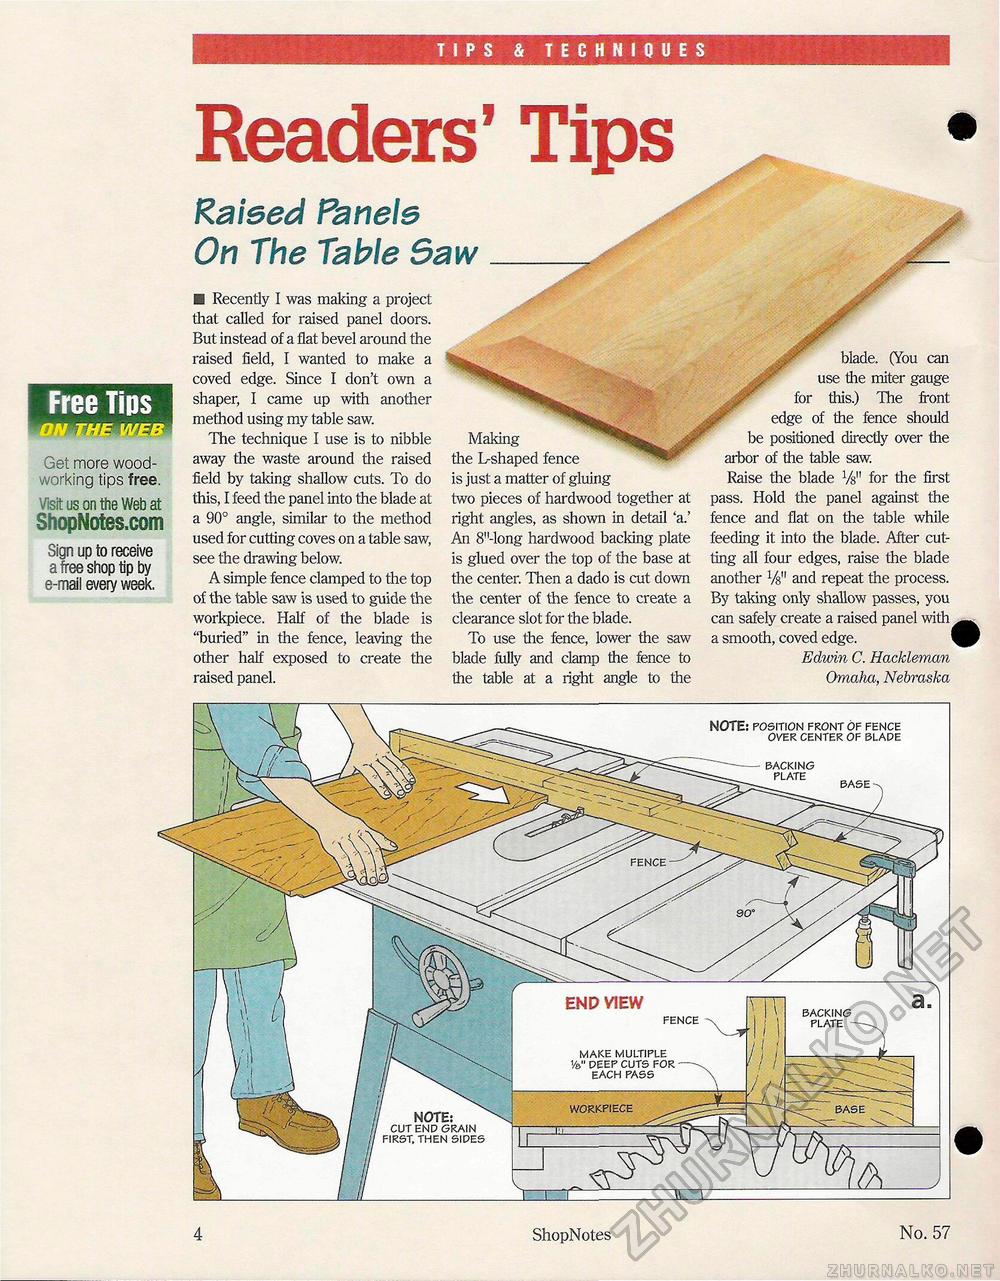
TIPS & TECHNIQUES Free Tips WfTi Get more woodworking tips free. Visit us on the Web atSiiopNotes.comSign up to receive a free shop tip by e-mail every week. Readers' TipsRaised Panels ^ On The Table Saw_ ■ Recently I was making a project that called for raised panel doors. But instead of a flat bevel around the raised field, I wanted to make a coved edge. Since I don't own a shaper, I came up with another method using my table saw. The technique I use is to nibble away the waste around the raised field by taking shallow cuts. To do this, I feed the panel into the blade at a 90° angle, similar to the method used for cutting coves on a table saw, see the drawing below. A simple fence clamped to the top of the table saw is used to guide the workpiece. Half of the blade is "buried" in the fence, leaving the other half exposed to create the raised panel. Making the L-shaped fence is just a matter of gluing two pieces of hardwood together at right angles, as shown in detail 'a.' An 8"-long hardwood backing plate is glued over the top of the base at the center. Then a dado is cut down the center of the fence to create a clearance slot for the blade. To use the fence, lower the saw blade My and clamp the fence to the table at a right angle to the JW' blade. (You can use the miter gauge for this.) The front edge of the fence should be positioned directly over the arbor of the table saw. Raise the blade Vs" for the first pass. Hold the panel against the fence and flat on the table while feeding it into the blade. After cutting all four edges, raise the blade another W and repeat the process. By taking only shallow passes, you can safely create a raised panel with a smooth, coved edge. 1 Edwin C. Hackleman Omaha, Nebraska NOTE: position front of fence over center of blade backing plate backing plate - make multiple ve" peep cuts for each pass WORKPIECE NOTE: cut enp grain first, then si pes 4 ShopNotes No. 57 |


