80 - Heirloom Tool Cabinet, страница 49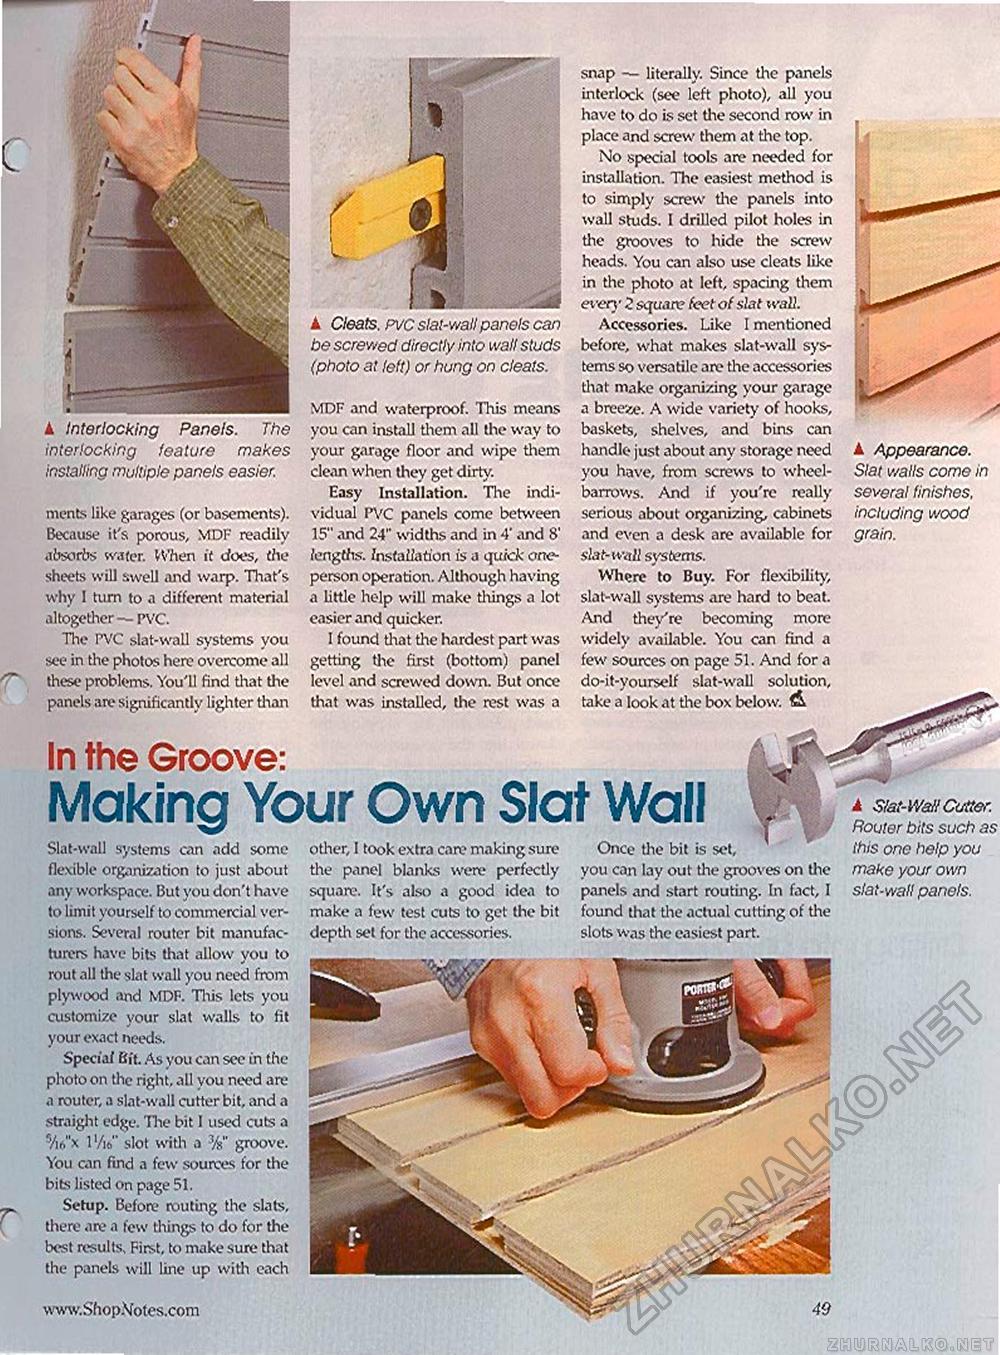
snap — literally. Since the panels interlock (see left photo), all you have to do is set the second row in place and screw them at the top. No special tools are needed for installation. The easiest method is to simply screw the panels into wall studs. I drilled pilot holes in the grooves to hide the screw heads. You can also use cleats like in the photo at left, spacing them even* 2 square feet of slat wall. Accessories. Like I mentioned before, what makes slat-wall systems so versatile are the accessories that make organizing your garage a breeze. A wide variety of hooks, baskets, shelves, and bins can handle just about any storage need you have, from screws to wheelbarrows. And if you're really serious about organizing, cabinets and even a desk are available for siaf-wvifl systems. Where to Buy. For flexibility, slat-wall systems are hard to beat. And they're becoming more widely available. You can find a few sources on page 51. And for a do-it-yourself slat-wall solution, take a look at the box below. A In the Groove: Making Your Own Slat Wall Slat-wall systems can add some flexible organization to just about any workspace. But you don't have to limit yourself to commercial versions. Several router bit manufacturers have bits that allow you to rout all the slat wall you need from plywood iind MDF. This lets you customize your slat walls to fit your exact needs. Speciaf Bit. As you can see in the photo 011 the right, all you need arc a router, a slat-wall cutter bit, and a straight edge. The bit 1 used cuts a 7ir."x 1 '/it," slot with a groove. You can find a few sources for the bits listed on page 51. Setup. Before routing the slats, there are a few things to do for the best results. First, to make sure that the panels will line up with each other, I took extra can1 making sure the panel blanks were perfectly square. It's also a good idea to make a few test cuts to get the bit depth set for the accessories. Once the bit is set, you can lay out the grooves on the panels and start routing. In fact, I found that the actual cutting of tine slots was the easiest part. A Slat-Wall Cutter. Router bits such as this one help you make your own sfat-wall panels. ▲ Interlocking Panels. The interlocking feature makes installing multiple panels easier. ments like garages (or basements). Because it's porous, MDF readily absorbs water. When it does, the sheets will swell and warp. That's why 1 turn to a different material altogether — PVC. The PVC slat-wall systems you see in the photos here overcome all these problems. You'll find that the panels are significantly lighter than ▲ Cleats. PVC slat-wall panels can be screwed directly into wall studs (photo at left) or hung on cleats. MDF and waterproof. This means you can install them all the way to your garage floor and wipe them clean when they get dirty. Easy Installation. The individual PVC panels come between 15" and 24" widths and in 4' and 8' lengths. installation is a qurck one-person operation. Although having a little help will make things a lot easier and quicker. I found that the hardest part was getting the first (bottom) panel level and screwed down. But once that was installed, the rest was a A Appearance. Slat walls come in several finishes, including wood grain. |


