84, страница 45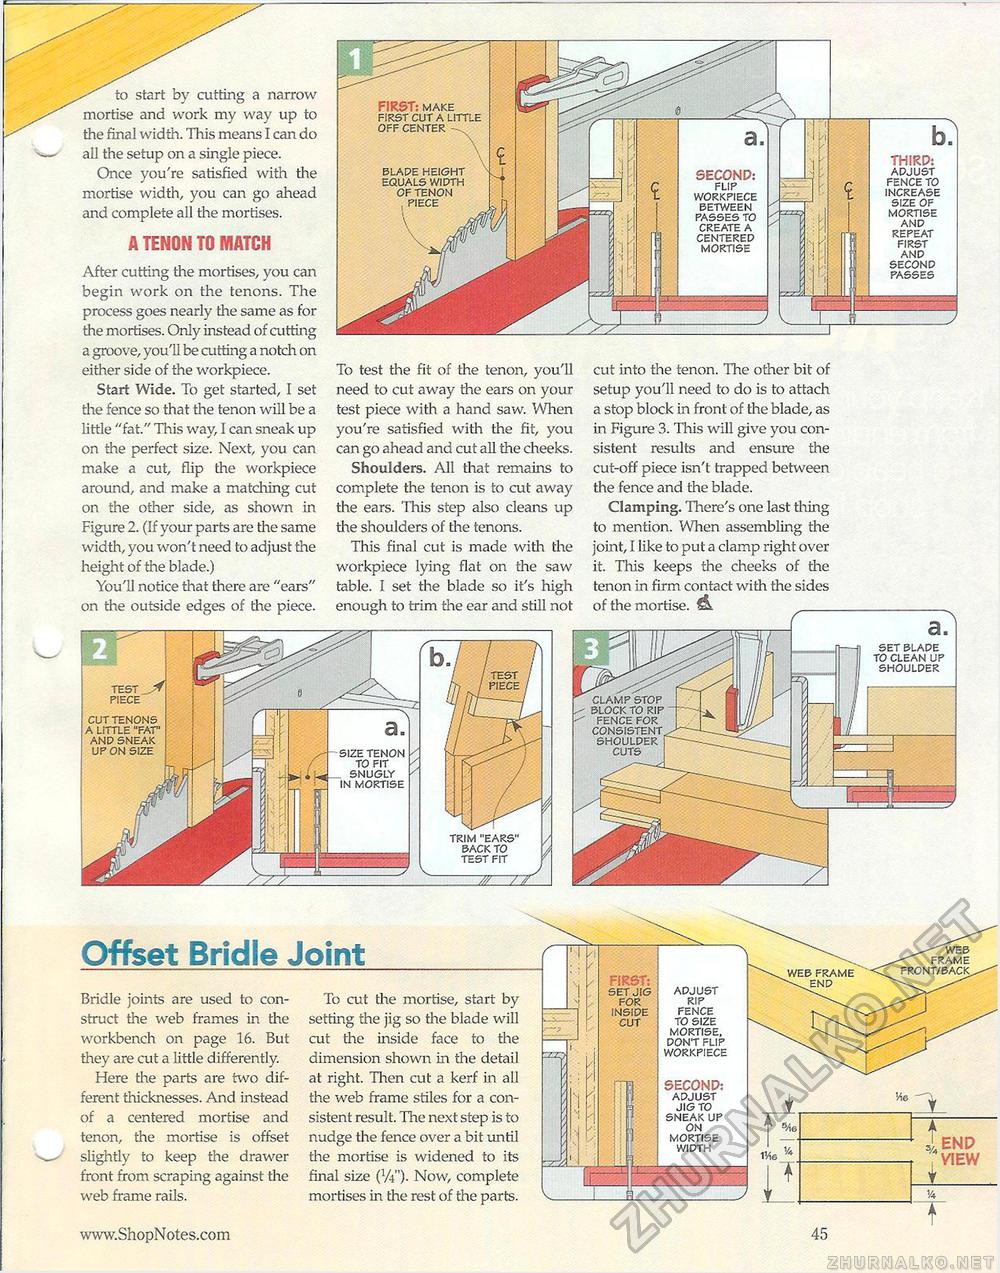
to start by cutting a narrow mortise and work my way up to the final width. This means I can do all the setup on a single piece. Once you're satisfied with the mortise width, you can go ahead and complete all the mortises. A TENON TO MATCH After cutting the mortises, you can begin work on the tenons. The process goes nearly the same as for the mortises. Only instead of cutting a groove, you'll be cutting a notch on either side of the workpiece. Start Wide. To get started, I set the fence so that the tenon will be a little "fat." This way, I can sneak up on the perfect size. Next, you can make a cut, flip the workpiece around, and make a matching cut on the other side, as shown in Figure 2. (If your parts are the same width, you won't need to adjust the height of the blade.) You'll notice that there are "ears" on the outside edges of the piece. To test the fit of the tenon, you'll need to cut away the ears on your test piece with a hand saw. When you're satisfied with the fit, you can go ahead and cut all the cheeks. Shoulders. All that remains to complete the tenon is to cut away the ears. This step also cleans up the shoulders of the tenons. This final cut is made with the workpiece lying flat on the saw table. I set the blade so it's high enough to trim the ear and still not cut into the tenon. The other bit of setup you'll need to do is to attach a stop block in front of the blade, as in Figure 3. This will give you consistent results and ensure the cut-off piece isn't trapped between the fence and the blade. Clamping. There's one last thing to mention. When assembling the joint, I like to put a clamp right over it. This keeps the cheeks of the tenon in firm contact with the sides of the mortise. A _ Offset Bridle Joint Bridle joints are used to construct the web frames in the workbench on page 16. But they are cut a little differently. Here the parts are two different thicknesses. And instead of a centered mortise and tenon, the mortise is offset slightly to keep the drawer front from scraping against the web frame rails. To cut the mortise, start by setting the jig so the blade will cut the inside face to the dimension shown in the detail at right. Then cut a kerf in all the web frame stiles for a consistent result. The next step is to nudge the fence over a bit until the mortise is widened to its final size (V-i")- Now, complete mortises in the rest of the parts. |


