85 - Router Table, страница 26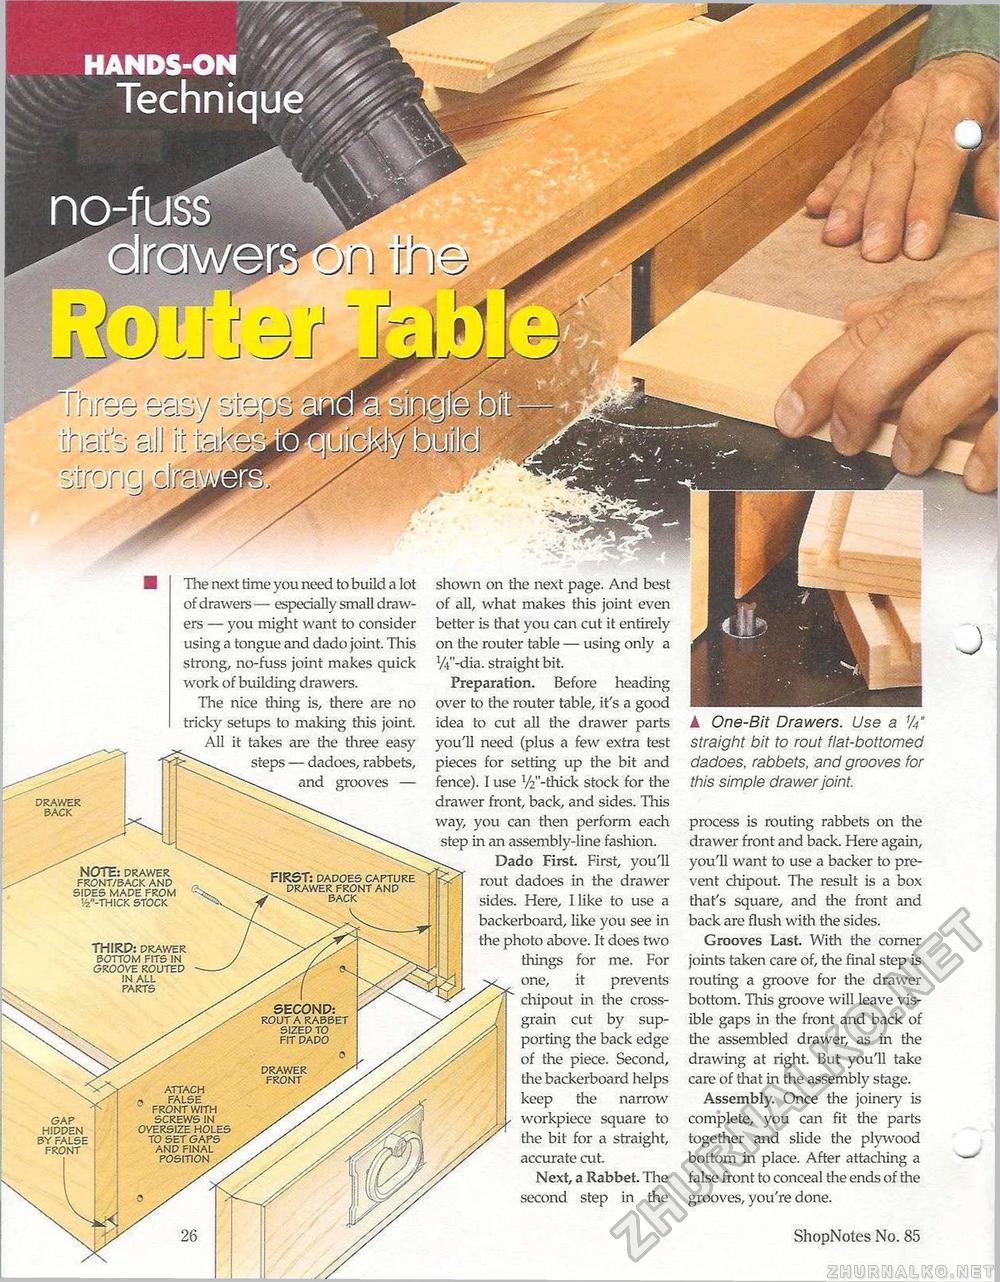
SECONP: rout a rabbet sized to fit dado drawer front ▲ One-Bit Drawers. Use a 'A" straight bit to rout fiat-bottomed dadoes, rabbets, and grooves for this simple drawer joint. process is routing rabbets on the drawer front and back. Here again, you'll want to use a backer to prevent chipout. The result is a box that's square, and tire front and back are flush with the sides. Grooves Last. With the corner joints taken care of, the final step is routing a groove for the drawer bottom. This groove will leave visible gaps in the front and back of die assembled drawer, as in the drawing at right. But you'll take care of that in the assembly stage. Assembly. Once the joinery is complete, you can fit the parts together and slide the plywood bottom in place. After attaching a false front to conceal the ends of the grooves, you're done. 26 ShopNotes No. 85 | W fnree easy thSfe all it The next time you need to build a lot of drawers — especially small drawers — you might want to consider using a tongue and dado joint. This strong, no-fuss joint makes quick work of building drawers. The nice tiling is, there are no tricky setups to making this joint. All it takes are the three easy steps — dadoes, rabbets, and grooves — drawer back NOTE: drawer front/back and sides made from '/2"-thick stock FIRST: dadoes capture drawer front and back THIRD: drawer bottom fits in groove routed in all parts attach f false front with screws in oversize holes to set gaps and final position / sap hidden by false front shown on the next page. And best of all, what makes this joint even better is that you can cut it entirely on the router table — using only a W'-dia. straight bit. Preparation. Before heading over to the router table, it's a good idea to cut all the drawer parts you'll need (plus a few extra test pieces for setting up the bit and fence). I use V^'-thick stock for the drawer front, back, and sides. This way, you can then perform each step in an assembly-line fashion. Dado First. First, you'll rout dadoes in the drawer sides. Here, Hike to use a backerboard, like you see in the photo above. It does two things for me. For one, it prevents chipout in the cross-grain cut by supporting the back edge of the piece. Second, die backerboard helps keep the narrow workpiece square to the bit for a straight, accurate cut. Next, a Rabbet. The second step in the |


