85 - Router Table, страница 24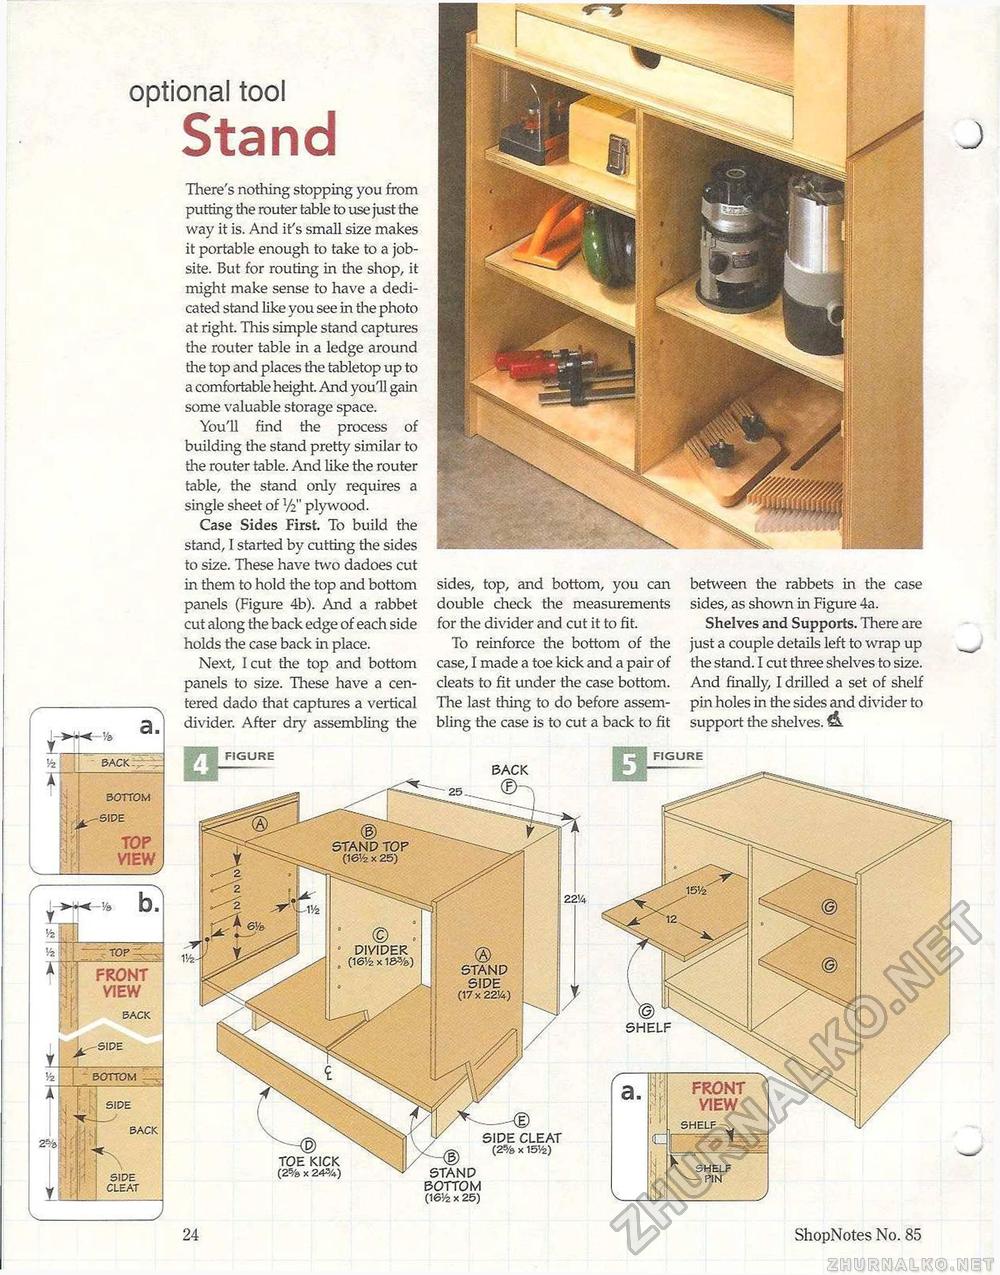
optional tool StandHie re's nothing stopping you from putting the router table to use just the way it is. And it's small size makes it portable enough to take to a job-site. But for routing in the shop, it might make sense to have a dedicated stand like you see in the photo at right. This simple stand captures the router table in a ledge around the top and places the tabletop up to a comfortable height. And you'll gain some valuable storage space. You'll find the process of building the stand pretty similar to the router table. And like the router table, the stand only requires a single sheet of V2" plywood. Case Sides First. To build the stand, I started by cutting the sides to size. These have two dadoes cut in them to hold the top and bottom panels (Figure 4b). And a rabbet cut along the back edge of each side holds the case back in place. Next, I cut the top and bottom panels to size. These have a centered dado that captures a vertical divider. After dry assembling the w% figure TOE KICK (2% x 24%) sides, top, and bottom, you can double check the measurements for the divider and cut it to fit. To reinforce the bottom of the case, I made a toe kick and a pair of cleats to fit under tire case bottom. The last thing to do before assembling the case is to cut a back to fit between the rabbets in the case sides, as shown in Figure 4a. Shelves and Supports. There are just a couple details left to wrap up the stand. I cut three shelves to size. And finally, I drilled a set of shelf pin holes in tire sides and divider to support the shelves. BACK STAND BOTTOM (16'/2 x 25) SIDE CLEAT (2% x 15%) ® STAND SIDE (17 x 2214) b. Vz 1 *1 TOP ' FRONT VIEW BACK SIDE BOTTOM 2% 1J |rp m £T3 SIDE BACK SIDE CLEAT 24 ShopNotes No. 85 |


