85 - Router Table, страница 21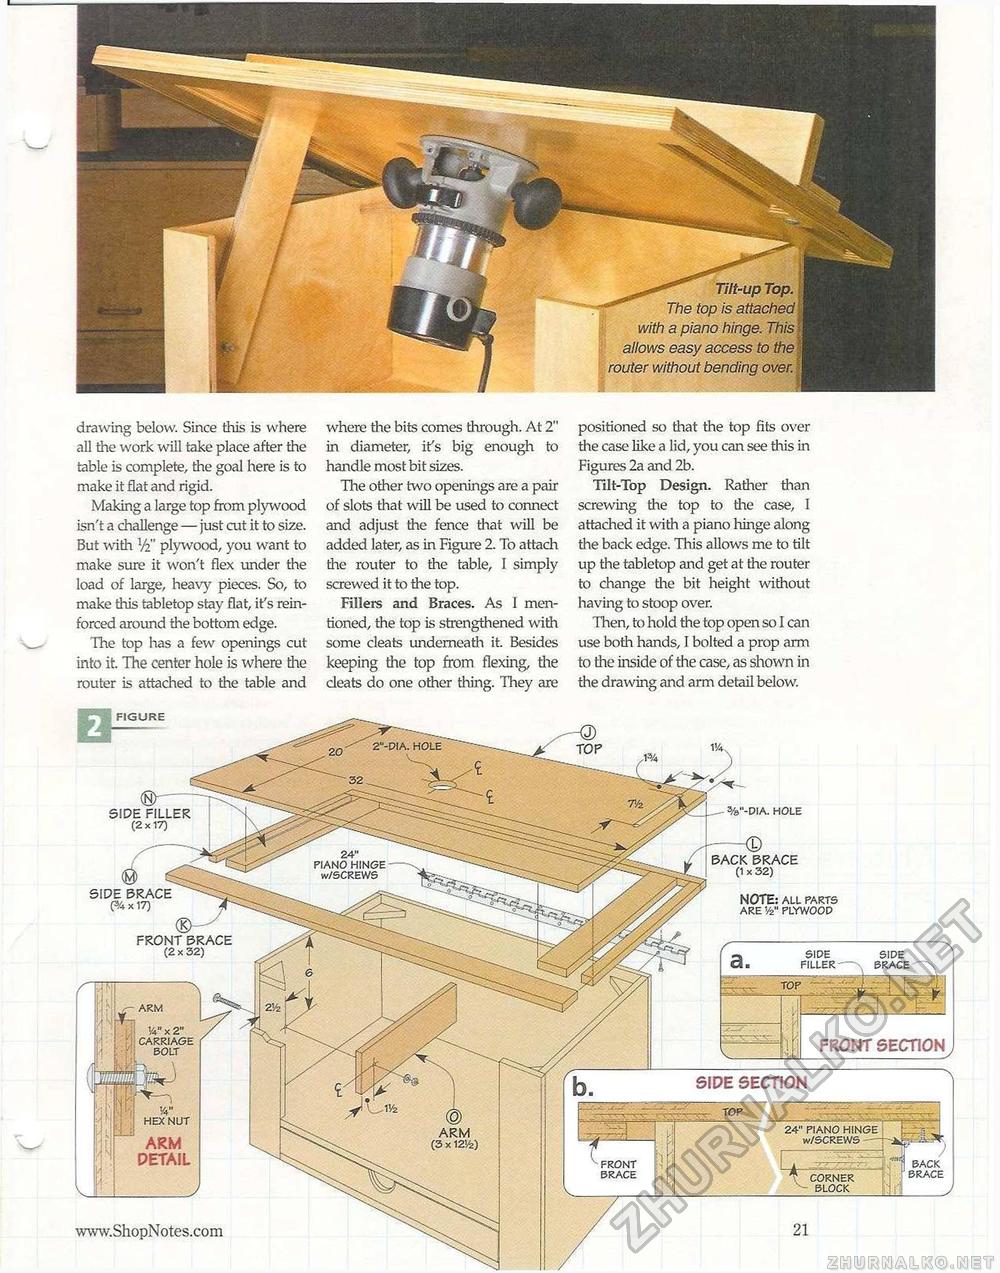
Tilt-up Top. The top is attached ij with a piano hinge. This allows easy access to the router without bending over. drawing below. Since this is where all the work will take place after the table is complete, the goal here is to make it flat and rigid. Making a large top from plywood isn't a challenge — just cut it to size. But with V2" plywood, you want to make sure it won't flex under the load of large, heavy pieces. So, to make this tabletop stay flat, it's reinforced around the bottom edge. The top has a few openings cut into it. The center hole is where the router is attached to the table and where the bits comes through. At 2" in diameter, ifs big enough to handle most bit sizes. Hie other two openings are a pair of slots that will be used to connect and adjust the fence that will be added later, as in Figure 2. To attach the router to the table, I simply screwed it to the top. Fillers and Braces. As I mentioned, the top is strengthened with some cleats underneath it. Besides keeping the top from flexing, die cleats do one other thing. They axe positioned so that the top fits over the case like a lid, you can see this in Figures 2a and 2b. Tilt-Top Design. Rather than screwing the top to the case, I attached it with a piano hinge along the back edge. This allows me to tilt up the tabletop and get at the router to change the bit height without having to stoop over. Then, to hold the top open so I can use both hands, I bolted a prop arm to the inside of the case, as shown in the drawing and arm detail below. FIGURE SIDE SECTION SIDE (2x SIDE BRACE (%x17) D1A. HOLE BRACE <32) NOTE: ALL PARTS ARE V2" PLYWOOD SIPE FILLER SIDE BRACE FRONT SECTION ARM BACK BRACE J V4" HEX NUT ARM DETAIL |


