85 - Router Table, страница 30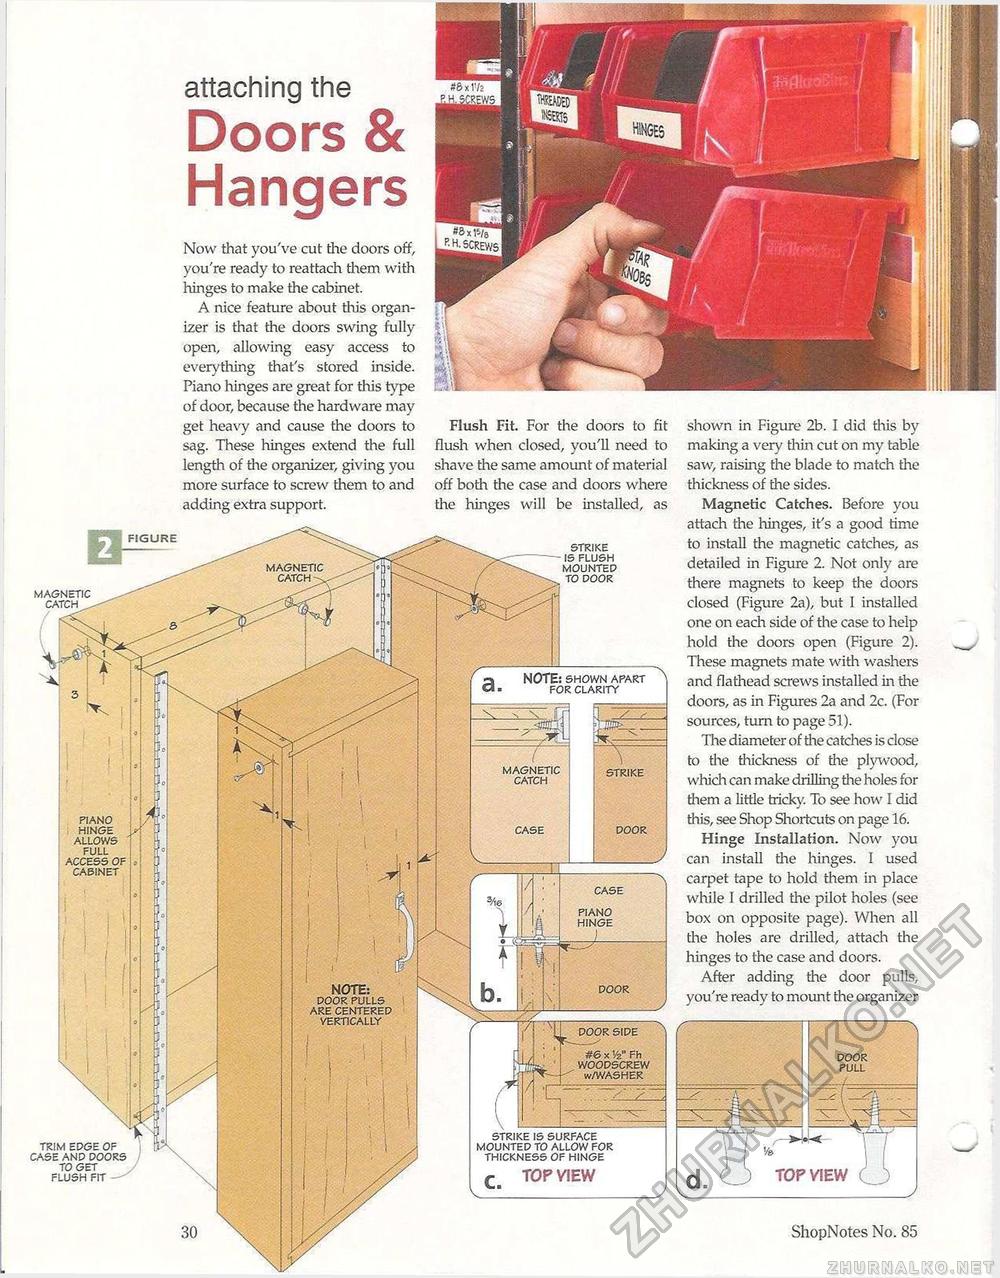
attaching the Doors & Hangers Now that you've cut the doors off, you're ready to reattach them with hinges to make the cabinet. A nice feature about this organizer is that the doors swing fully open, allowing easy access to everything that's stored inside. Piano hinges are great for this type of door, because the hardware may get heavy and cause the doors to sag. These hinges extend the full length of the organizer, giving you more surface to screw them to and adding extra support. Flush Fit. For the doors to fit flush when closed, you'll need to shave the same amount of material off both the case and doors where the hinges will be installed, as shown in Figure 2b. I did this by making a very thin cut on my table saw, raising the blade to match the thickness of the sides. Magnetic Catches. Before you attach the hinges, it's a good time to install the magnetic catches, as detailed in Figure 2. Not only are there magnets to keep the doors closed (Figure 2a), but I installed one on each side of the case to help hold the doors open (Figure 2). These magnets mate with washers and flathead screws installed in the doors, as in Figures 2a and 2c. (For sources, turn to page 51). The diameter of tire catches is close to the thickness of the plywood, which can make drilling the holes for them a little tricky. To see how I did this, see Shop Shortcuts on page 16. Hinge Installation. Now you can install the hinges. I used carpet tape to hold them in place while 1 drilled the pilot holes (see box on opposite page). When all the holes are drilled, attach the hinges to the case and doors. After adding the door pulls, you're ready to mount the organizer TRIM EDGE OF CASE AND DOORS TO GET FLUSH FIT —^ 30 ShopNotes No. 85 |


