86, страница 6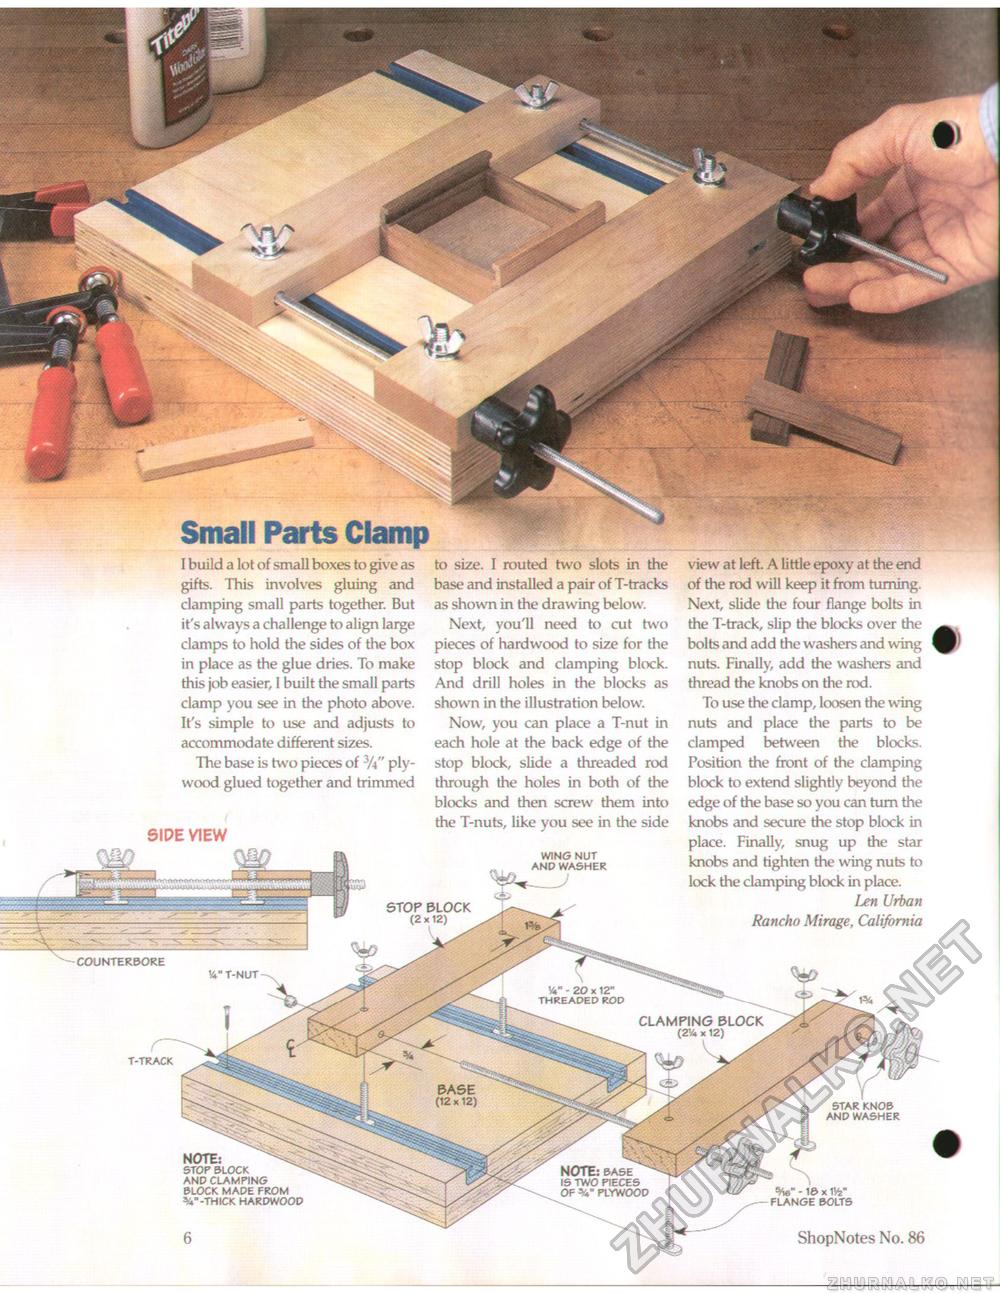
WFh vJj ' W "STVN Small Parts ClampI build a lot of small boxes to give as gifts. This involves gluing and clamping small parts together. But it's always a challenge to align large clamps to hold the sides of the box in place as the glue dries. To make this job easier, I built the small parts clamp you see in the photo above. It's simple to use and adjusts to accommodate different sizes. The base is two pieces of ply-wood glued together and trimmed SIDE VIEW to size. I routed two slots in the base and installed a pair of T-tracks as shown in the drawing below. Next, you'll need to cut two pieces of hardwood to size for the stop block and clamping block. And drill holes in the blocks as shown in the illustration below. Now, you can place a T-nut in each hole at the back edge of the stop block, slide a threaded rod through the holes in both of the blocks and then screw them into the T-nuts, like you see in the side WING NUT AND WASHER W?- •->• view at left. A little epoxy at the end of the rod will keep it from turning. Next, slide the four flange bolts in the T-track, slip the blocks over the bolts and add the washers and wing nuts. Finally, add the washers and thread the knobs on the rod. To use the clamp, loosen the wing nuts and place the parts to be clamped between the blocks. Position the front of the clamping block to extend slightly beyond the edge of the base so you can turn the knobs and secure the stop block in place. Finally, snug up the star knobs and tighten the wing nuts to lock the clamping block in place. Len Urban Rancho Mirage, California NOTE: STOP BLOCK AND CLAMPING BLOCK MADE FROM V -THICK HARDWOOD - IB x FLANGE BOLTS 6 ShopNotes No. 86 |


