87, страница 34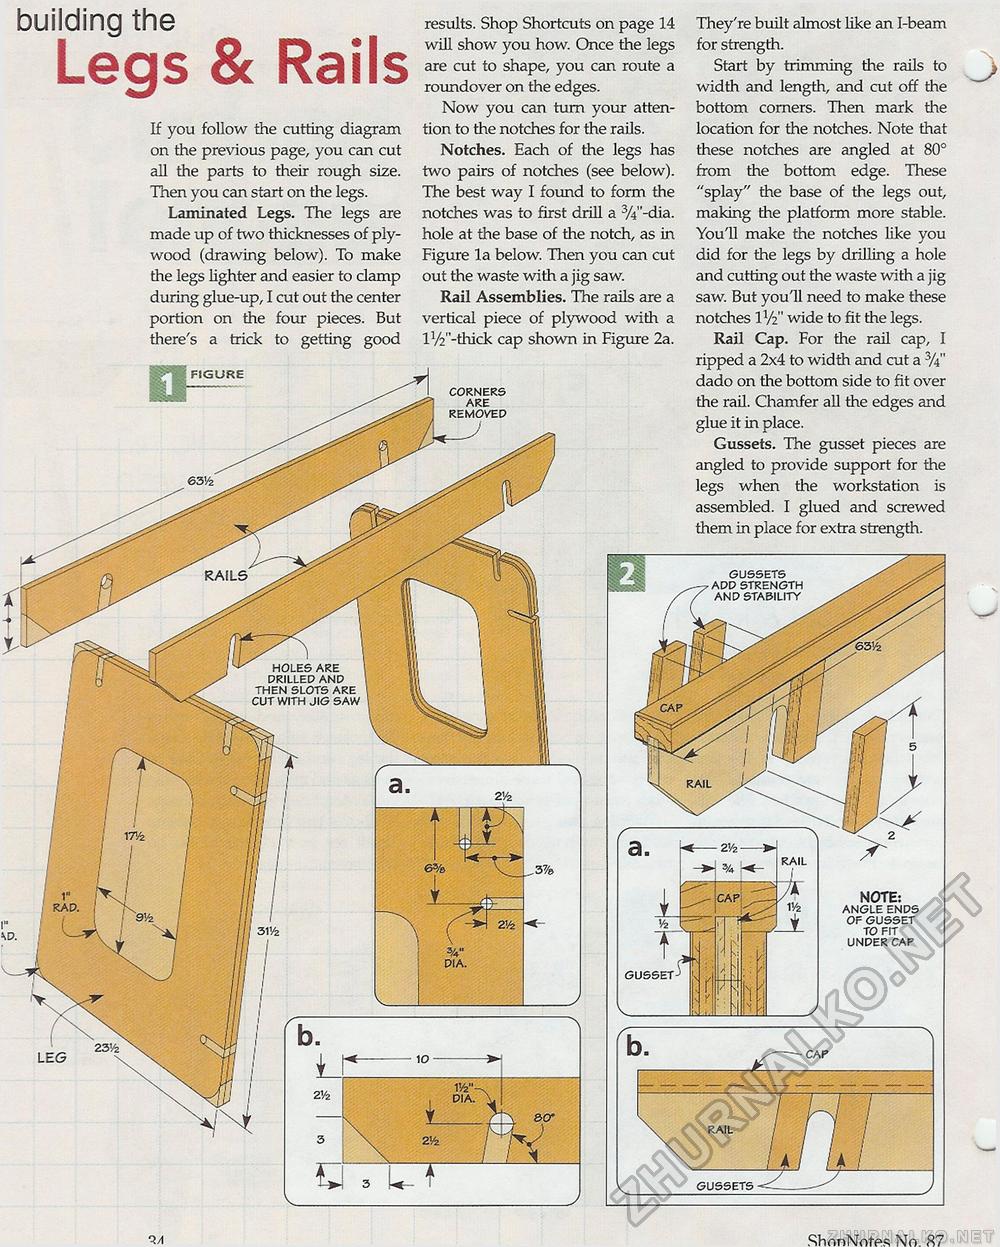
RAIL G USSETS RAIL building the Legs & Rails If you follow the cutting diagram on the previous page, you can cut all the parts to their rough size. Then you can start on the legs. Laminated Legs. The legs are made up of two thicknesses of plywood (drawing below). To make the legs lighter and easier to clamp during glue-up, I cut out the center portion on the four pieces. But there's a trick to getting good results. Shop Shortcuts on page 14 will show you how. Once the legs are cut to shape, you can route a roundover on the edges. Now you can turn your attention to the notches for the rails. Notches. Each of the legs has two pairs of notches (see below). The best way I found to form the notches was to first drill a 3/4"-dia. hole at the base of the notch, as in Figure la below. Then you can cut out the waste with a jig saw. Rail Assemblies. The rails are a vertical piece of plywood with a iy2"-thick cap shown in Figure 2a. They're built almost like an I-beam for strength. Start by trimming the rails to width and length, and cut off the bottom corners. Then mark the location for the notches. Note that these notches are angled at 80° from the bottom edge. These "splay" the base of the legs out, making the platform more stable. You'll make the notches like you did for the legs by drilling a hole and cutting out the waste with a jig saw. But you'll need to make these notches IV2" wide to fit the legs. Rail Cap. For the rail cap, I ripped a 2x4 to width and cut a %" dado on the bottom side to fit over the rail. Chamfer all the edges and glue it in place. Gussets. The gusset pieces are angled to provide support for the legs when the workstation is assembled. I glued and screwed them in place for extra strength. NOTE: ANGLE ENDS OF GUSSET TO FIT UNDER CAP ShnnNotes No. 87 |


