88, страница 46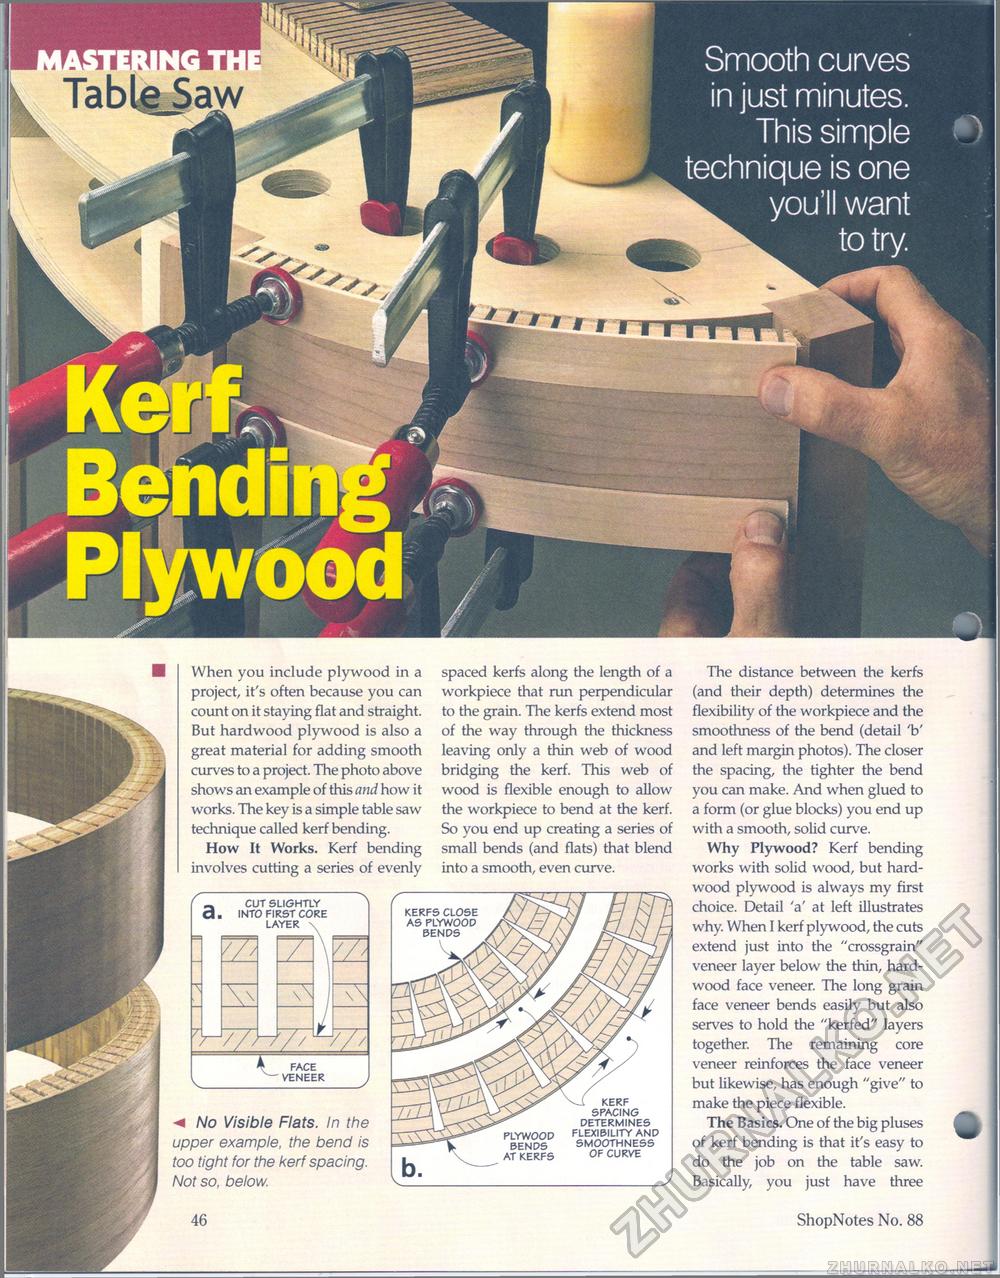
FACE VENEER KERFS CLOSE AS PLYWOOD SENDS Smooth curves in just minutes. This simple technique is one you'll want to try. /— a. CUT SLIGHTLY INTO FIRST CORE LAYER - PLYWOOD BENDS AT KERFS m No Visible Flats. In the upper example, the bend is too tight for the kerf spacing. Not so, below. 46 spaced kerfs along the length of a workpiece that run perpendicular to the grain. The kerfs extend most of the way through the thickness leaving only a thin web of wood bridging the kerf. This web of wood is flexible enough to allow the workpiece to bend at the kerf. So you end up creating a series of small bends (and flats) that blend into a smooth, even curve. The distance between the kerfs (and their depth) determines the flexibility of the workpiece and the smoothness of the bend (detail V and left margin photos). The closer the spacing, the tighter the bend you can make. And when glued to a form (or glue blocks) you end up with a smooth, solid curve. Why Plywood? Kerf bending works with solid wood, but hardwood plywood is always my first choice. Detail 'a' at left illustrates why. When I kerf plywood, the cuts extend just into the "crossgrain" veneer layer below the thin, hardwood face veneer. The long grain face veneer bends easily but also serves to hold the "kerfed" layers together. The remaining core veneer reinforces the face veneer but likewise, has enough "give" to make the piece flexible. The Basics. One of the big pluses of kerf bending is that it's easy to do the job on the table saw. Basically, you just have three ShopNotes No. 88 KERF SPACING DETERMINES FLEXIBILITY AND SMOOTHNESS OF CURVE When you include plywood in a project, it's often because you can count on it staying flat and straight. But hardwood plywood is also a great material for adding smooth curves to a project. The photo above shows an example of this and how it works. The key is a simple table saw technique called kerf bending. How It Works. Kerf bending involves cutting a series of evenly |


