91 - Planer Stand, страница 4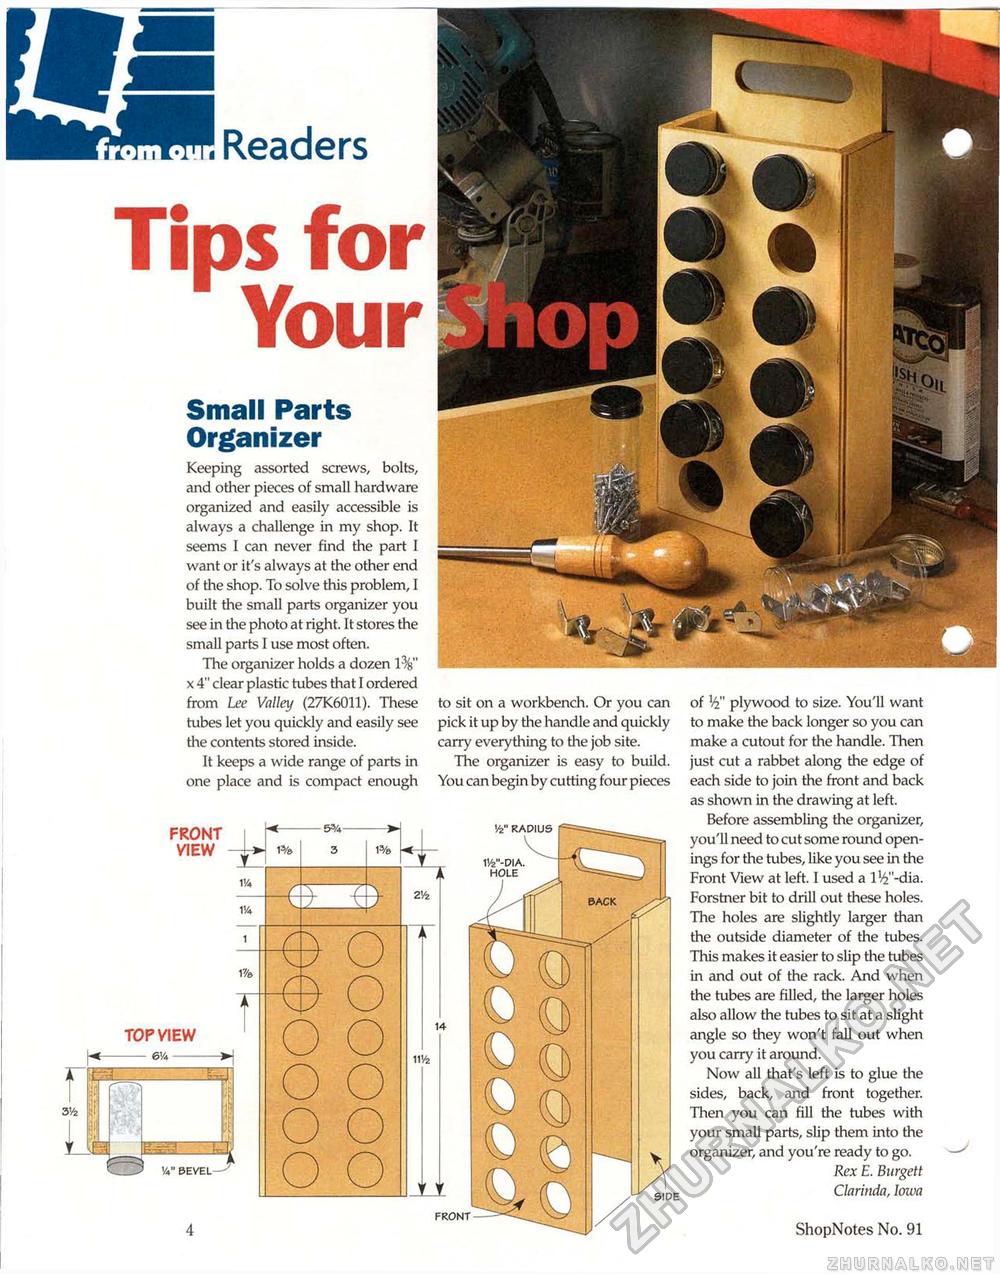
n^M Readers Tips for Your Small Parts Organizer Keeping assorted screws, bolts, and other pieces of small hardware organized and easily accessible is always a challenge in my shop. It seems I can never find the part I want or it's always at the other end of the shop. To solve this problem, I built the small parts organizer you see in the photo at right. It stores the small parts I use most often. The organizer holds a dozen x 4" clear plastic tubes that I ordered from Lee Valley (27K6011). These tubes let you quickly and easily see the contents stored inside. It keeps a wide range of parts in one place and is compact enough FRONT I f* VIEW --■-»► ' 1% iy« 1'/4 1% TOP VIEW
5%-3 1% e o -e o o o o o o o o o to sit on a workbench. Or you can pick it up by the handle and quickly carry everything to the job site. The organizer is easy to build. You can begin by cutting four pieces vz" radius 2</2 14 11Vi V V front side of V plywood to size. You'll want to make the back longer so you can make a cutout for the handle. Then just cut a rabbet along the edge of each side to join the front and back as shown in the drawing at left. Before assembling the organizer, you'll need to cut some round openings for the tubes, like you see in the Front View at left. I used a ll£"-dia. Forstner bit to drill out these holes. The holes are slightly larger than the outside diameter of the tubes. This makes it easier to slip the tubes in and out of the rack. And when the tubes are filled, the larger holes also allow the tubes to sit at a slight angle so they won't fall out when you carry it around. Now all that's left is to glue the sides, back, and front together. Then you can fill the tubes with your small parts, slip them into the organizer, and you're ready to go. Rex E. Burgett Clarinda, Iowa 4 ShopNotes No. 91 |
|||||||||||||||


