93, страница 7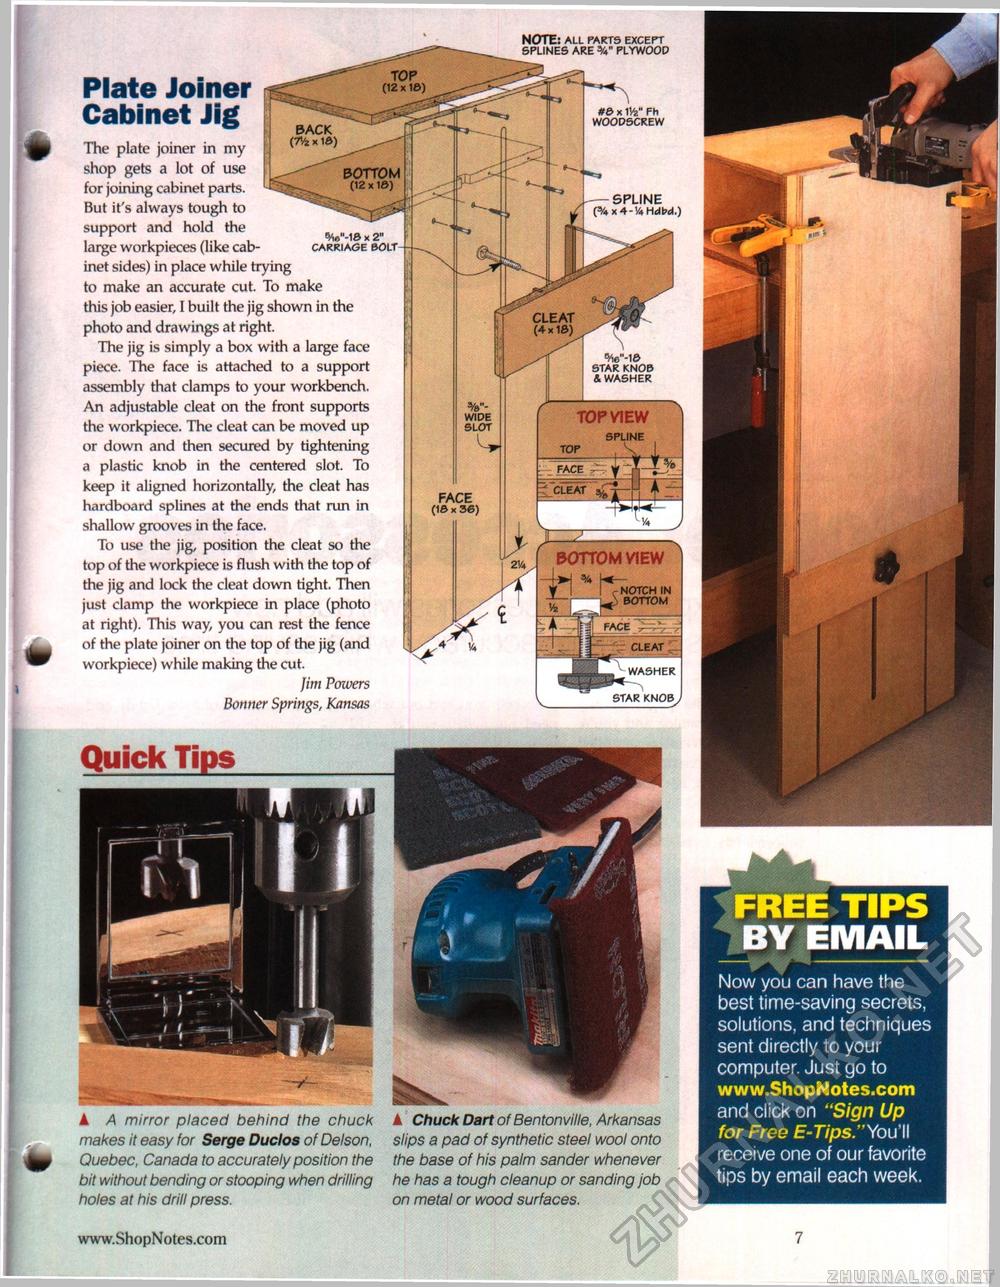
NOTE: ALL PARTS EXCEPT SPLINES ARE 3/V PLYWOOD Plate Joiner Cabinet Jig The plate joiner in my shop gets a lot of use for joining cabinet parts. But it's always tough to support and hold the large workpieces (like cabinet sides) in place while trying to make an accurate cut. To make this job easier, I built the jig shown in the photo and drawings at right. The jig is simply a box with a large face piece. The face is attached to a support assembly that clamps to your workbench. An adjustable cleat on the front supports the workpiece. The cleat can be moved up or down and then secured by tightening a plastic knob in the centered slot. To keep it aligned horizontally, the cleat has hardboard splines at the ends that run in shallow grooves in the face. To use the jig, position the cleat so the top of the workpiece is flush with the top of the jig and lock the cleat down tight. Then just clamp the workpiece in place (photo at right). This way, you can rest the fence of the plate joiner on the top of the jig (and workpiece) while making the cut. Jim Powers Bonner Springs, Kansas NOTCH IN NOTCH IN
STAR KNOB, Quick Tips ▲ A mirror placed behind the chuck makes it easy for Serge Duclos of Delson, Quebec, Canada to accurately position the bit without bending or stooping when drilling holes at his drill press. A Chuck Dart of Bentonville, Arkansas slips a pad of synthetic steel wool onto the base of his palm sander whenever he has a tough cleanup or sanding job on metal or wood surfaces. FREE TIPS jBY EMAIL W^ w Now you can have the best time-saving secrets, solutions, and techniques sent directly to your computer. Just go to www.ShopNotes.com and click on "Sign Up for Free E-Tips." You'll receive one of our favorite tips by email each week. 7 |


