94, страница 47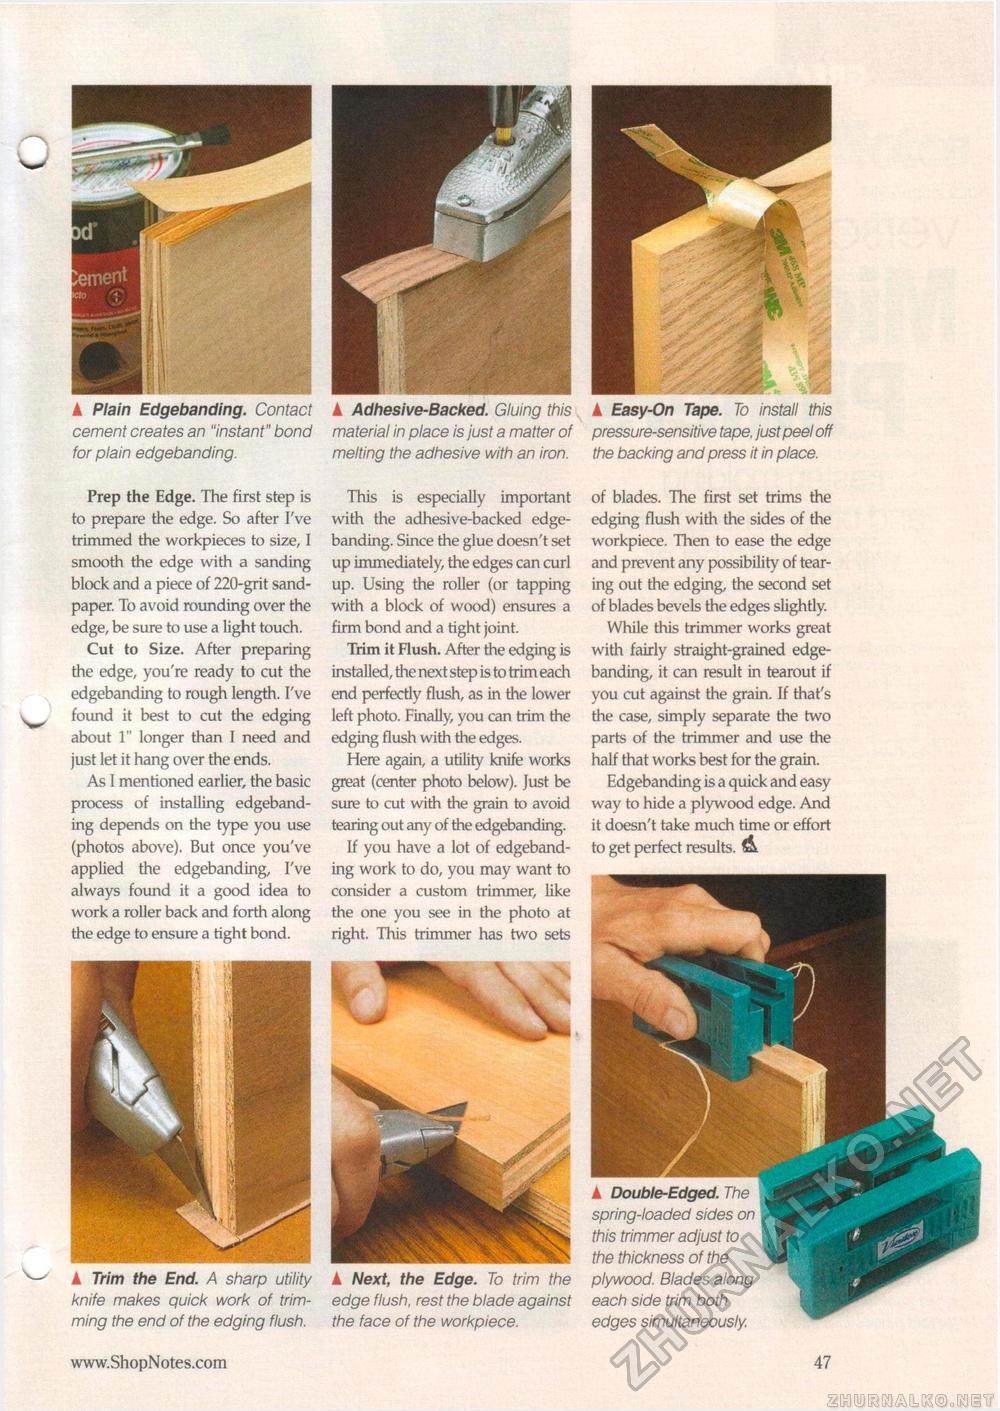
A Plain Edgebanding. Contact cement creates an "instant" bond for plain edgebanding. Prep the Edge. The first step is to prepare the edge. So after I've trimmed the workpieces to size, I smooth the edge with a sanding block and a piece of 220-grit sandpaper. To avoid rounding over the edge, be sure to use a light touch. Cut to Size. After preparing the edge, you're ready to cut the edgebanding to rough length. I've ^ found it best to cut the edging about 1" longer than I need and just let it hang over the ends. As I mentioned earlier, the basic process of installing edgebanding depends on the type you use (photos above). But once you've applied the edgebanding, I've always found it a good idea to work a roller back and forth along the edge to ensure a tight bond. ^ A Trim the End. A sharp utility knife makes quick work of trimming the end of the edging flush. A Adhesive-Backed. Gluing this material in place is just a matter of melting the adhesive with an iron. This is especially important with the adhesive-backed edgebanding. Since the glue doesn't set up immediately, the edges can curl up. Using the roller (or tapping with a block of wood) ensures a firm bond and a tight joint. Trim it Flush. After the edging is installed, the next step is to trim each end perfectly flush, as in the lower left photo. Finally, you can trim the edging flush with the edges. Here again, a utility knife works great (center photo below). Just be sure to cut with the grain to avoid tearing out any of the edgebanding. If you have a lot of edgebanding work to do, you may want to consider a custom trimmer, like the one you see in the photo at right. This trimmer has two sets A Next, the Edge. To trim the edge flush, rest the blade against the face of the workpiece. A Easy-On Tape. To install this pressure-sensitive tape, just peel off the backing and press it in place. of blades. The first set trims the edging flush with the sides of the workpiece. Then to ease the edge and prevent any possibility of tearing out the edging, the second set of blades bevels the edges slightly. While this trimmer works great with fairly straight-grained edgebanding, it can result in tearout if you cut against the grain. If that's the case, simply separate the two parts of the trimmer and use the half that works best for the grain. Edgebanding is a quick and easy way to hide a plywood edge. And it doesn't take much time or effort to get perfect results. & edges simultaneously. • 47 |


