94, страница 49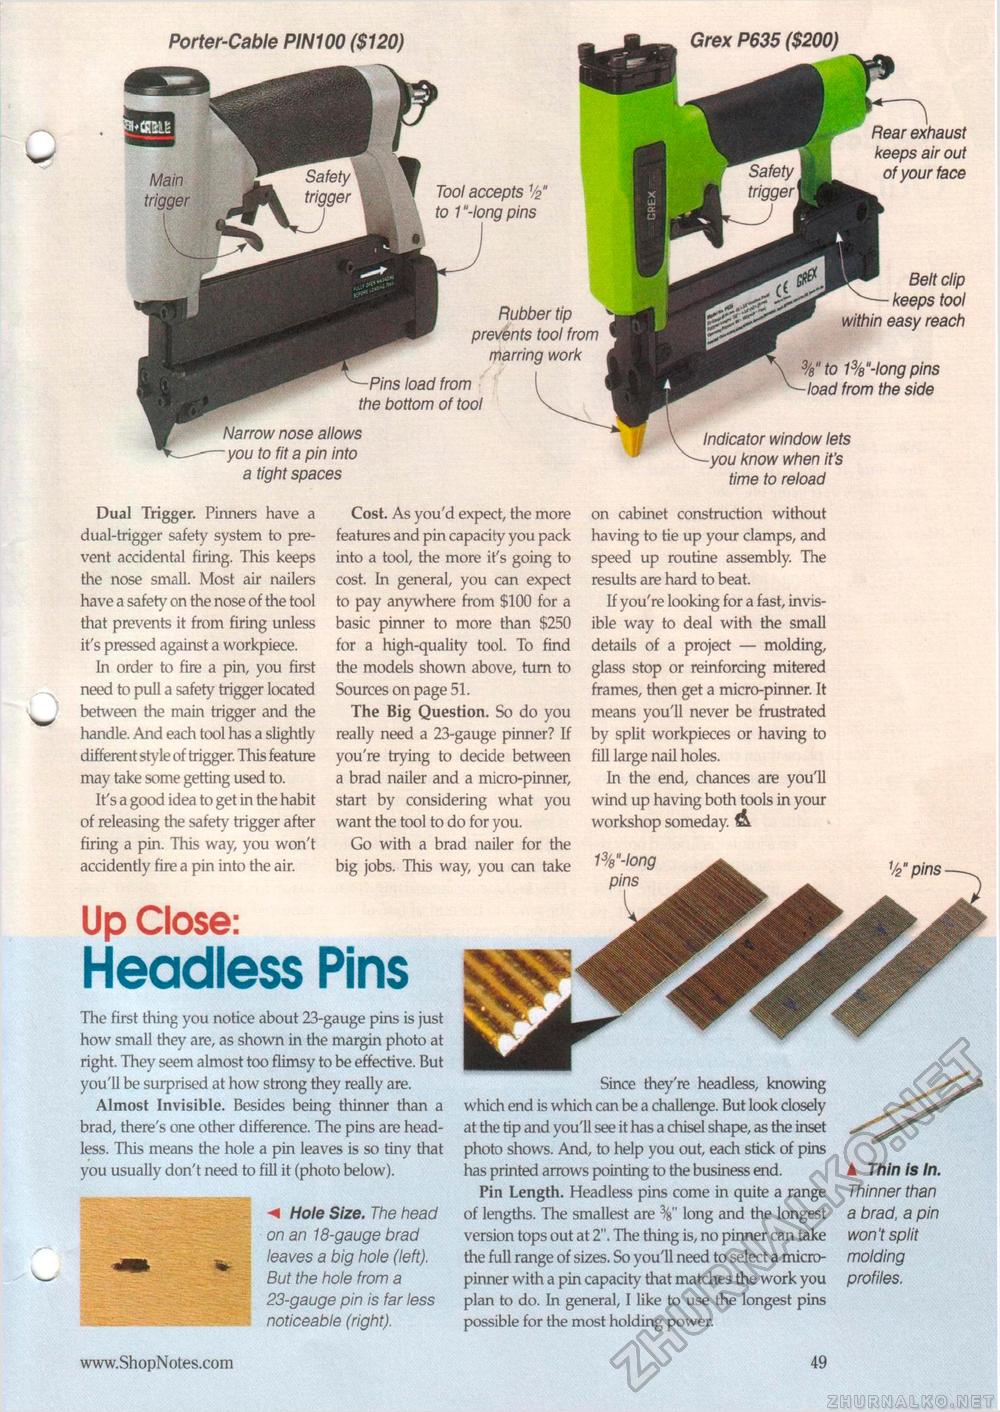
Tool accepts V2" pins keeps air out of your face Rubber tip prevents tool from marring work , ., ,3 load from the bottom of tool Narrow nose allows you to fit a pin into a tight spaces Belt clip keeps tool within easy reach 3/e"to 13/8u-long pins load from the side Dual Trigger. Pinners have a dual-trigger safety system to prevent accidental firing. This keeps the nose small. Most air nailers have a safety on the nose of the tool that prevents it from firing unless it's pressed against a workpiece. In order to fire a pin, you first need to pull a safety trigger located between the main trigger and the handle. And each tool has a slightly different style of trigger. This feature may take some getting used to. It's a good idea to get in the habit of releasing the safety trigger after firing a pin. This way, you won't accidently fire a pin into the air. Cost. As you'd expect, the more features and pin capacity you pack into a tool, the more it's going to cost. In general, you can expect to pay anywhere from $100 for a basic pinner to more than $250 for a high-quality tool. To find the models shown above, turn to Sources on page 51. The Big Question. So do you really need a 23-gauge pinner? If you're trying to decide between a brad nailer and a micro-pinner, start by considering what you want the tool to do for you. Go with a brad nailer for the big jobs. This way, you can take Indicator window lets know when it's time to reload on cabinet construction without having to tie up your clamps, and speed up routine assembly. The results are hard to beat. If you're looking for a fast, invisible way to deal with the small details of a project — molding, glass stop or reinforcing mitered frames, then get a micro-pinner. It means you'll never be frustrated by split workpieces or having to fill large nail holes. In the end, chances are you'll wind up having both tools in your workshop someday. & 1%"-long Up Close: Headless Pins The first thing you notice about 23-gauge pins is just how small they are, as shown in the margin photo at right. They seem almost too flimsy to be effective. But you'll be surprised at how strong they really are. Almost Invisible. Besides being thinner than a brad, there's one other difference. The pins are headless. This means the hole a pin leaves is so tiny that you usually don't need to fill it (photo below). Hole Size. The head on an 18-gauge brad leaves a big hole (left). But the hole from a 23-gauge pin is far less noticeable (right). Porter-Cable PIN100 ($120) Grex P635 ($200) Since they're headless, knowing which end is which can be a challenge. But look closely at the tip and you'll see it has a chisel shape, as the inset photo shows. And, to help you out, each stick of pins has printed arrows pointing to the business end. Pin Length. Headless pins come in quite a range of lengths. The smallest are long and the longest version tops out at 2". The thing is, no pinner can take the full range of sizes. So you'll need to select a micro-pinner with a pin capacity that matches the work you plan to do. In general, I like to use the longest pins possible for the most holding power. A Thin is In. Thinner than a brad, a pin won't split molding profiles. • 49 |


