Woodworker's Journal 101-Projects-for-Woodworkers, страница 138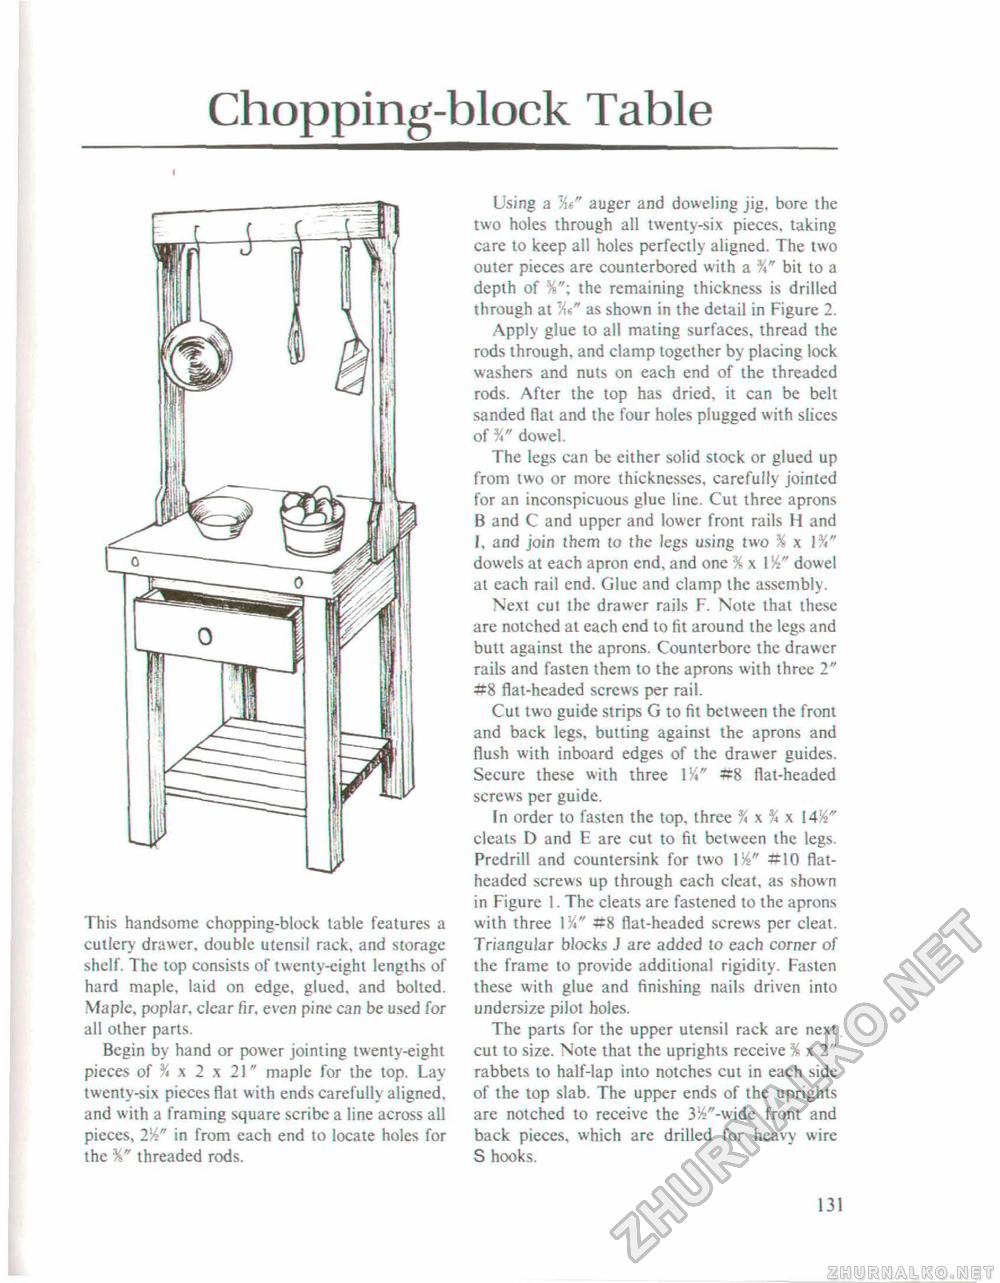
Chopping-block TableThis handsome chopping-block table features a cutlery' drawer, double utensil rack, and storage shelf. The top consists of twenty-eight lengths of hard maple, laid on edge, glued, and bolted. Maple, poplar, clear fir. even pine can be used for all other parts. Begin by hand or power jointing twenty-eight pieces of % x 2 x 21" maple for the top. Lay twenty-six pieces flat with ends carefully aligned, and with a framing square scribe a line across all pieces, 2W in from each end to locate holes for the %" threaded rods. Using a 'At" auger and doweling jig. bore the two holes through all twenty-six pieces, taking care to keep all holes perfectly aligned. The two outer pieces are counterbored with a %" bit to a depth of %"• the remaining thickness is drilled through at 1Ae" as shown in the detail in Figure 2. Apply glue to all mating surfaces, thread the rods through, and clamp together by placing lock washers and nuts on each end of the threaded rods. After the top has dried, it can be belt sanded fiat and the four holes plugged with slices of V dowel. The legs can be cither solid stock or glued up from two or more thicknesses, carefully jointed for an inconspicuous glue line. Cut three aprons B and C and upper and lower front rails H and J, and join them to the legs using two % x dowels at each apron end, and one % x VA" dowel at each rail end. Glue and clamp the assembly. Next cut the drawer rails F. Note that these are notched at each end to fit around the legs and butt against the aprons. Counterborc the drawer rails and fasten them to the aprons with three 1" ^=8 fiat-headed screws per rail- Cut two guide strips G to fit between the front and back legs, butting against the aprons and flush with inboard edges of the drawer guides. Secure these with three VA" flat-headed screws per guide. In order to fasten the top, three % cleats D and E are cut to fit between the legs. Predrill and countersink for two 114" #10 flat-headed screws up through each cleat, as shown in Figure 1. The cleats are fastened to the aprons with three VA" #8 flat-headed screws per cleat. Triangular blocks J are added to each corner of the frame to provide additional rigidity. Fasten these with glue and finishing nails driven into undersize pilot holes. The parts for the upper utensil rack are next cut to size. Note that the uprights receive % x 2" rabbets to half-lap into notches cut in each side of the top slab. The upper ends of the uprights are notched to receive the 3H"-wide front and back pieces, which are drilled for heavy wire S hooks. 131 |


