Woodworker's Journal 101-Projects-for-Woodworkers, страница 169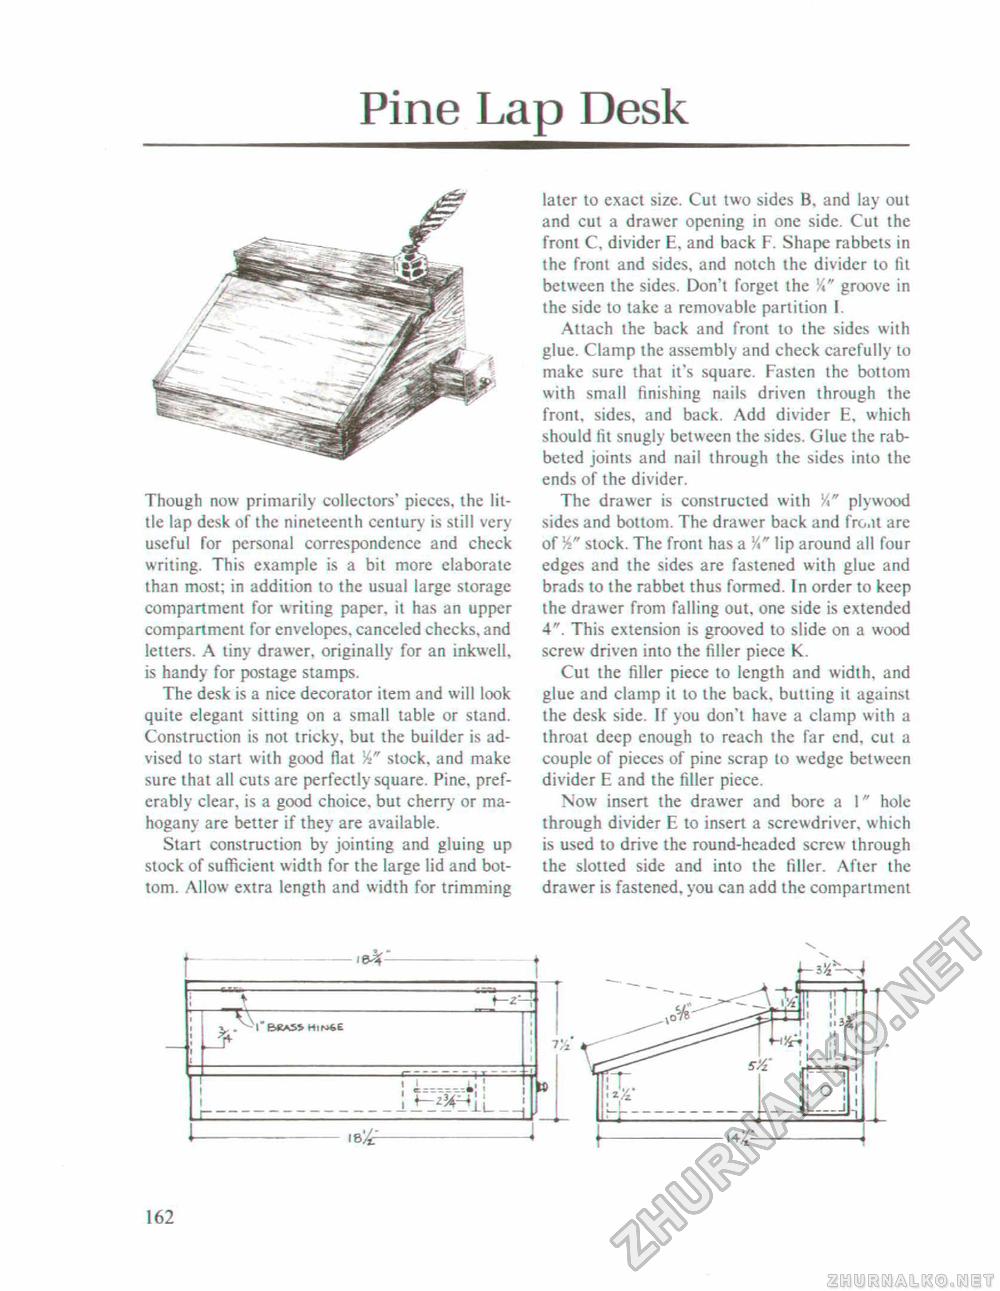
Pine Lap DeskJ? Though now primarily collectors' pieces, the little lap desk of the nineteenth century is still very useful for persona! correspondence and check writing. This example is a bit more elaborate than most; in addition to the usual large storage compartment for writing paper, it has an upper compartment for envelopes, canceled checks, and letters. A tiny drawer, originally for an inkwell, is handy for postage stamps. The desk is a nice decorator item and will look quite elegant sitting on a small table or stand. Construction is not tricky, but the builder is advised to start with good flat W stock, and make sure that all cuts are perfectly square. Pine, preferably clear, is a good choice, but cherry or mahogany are better if they are available. Start construction by jointing and gluing up stock of sufficient width for the large lid and bottom. Allow extra length and width for trimming later to exact size. Cut two sides B. and lay out and cut a drawer opening in one side. Cut the front C, divider E, and back F. Shape rabbets in the front and sides, and notch the divider to fit between the sides. Don't forget the X" groove in the side to take a removable partition I, Attach the back and front to the sides with glue. Clamp the assembly and check carefully to make sure that it's square. Fasten the bottom with small finishing nails driven through the front, sides, and back. Add divider E, which should fit snugly between the sides. Glue the rabbeted joints and nail through the sides into the ends of the divider. The drawer is constructed with xh" plywood sides and bottom. The drawer back and fro.it are of stock. The front has a V*" lip around all four edges and the sides are fastened with glue and brads to the rabbet thus formed. In order to keep the drawer from falling out. one side is extended 4". This extension is grooved to slide on a wood screw driven into the filler piece K. Cut the filler piece to length and width, and glue and clamp it to the back, butting it against the desk side. If you don't have a clamp with a throat deep enough to reach the far end. cut a couple of pieces of pine scrap to wedge between divider E and the filler piece. Now insert the drawer and bore a 1" hole through divider E to insert a screwdriver, which is used to drive the round-headed scrcw through the slotted side and into the filler. After the drawer is fastened, you can add the compartment \ 162 |


